I've finalized the legs to waist connection this week. I've also added the upper arms and begun to splash some paint about!
The Titans waist is made up of three pieces from top to bottom, Lower Torso, Waist, and Pelvis. The pelvis is, of course, already in place holding the legs together. The waist proper allows the Titan to rotate in the middle. The lower torso is a ball and socket that allows some tilt to go into the mid section. One thing I found was that a lot more of this work could have been done before priming than what I did. The lower torso could be added to the torso without hiding any detail that would later need to be painted. The waist could then be attached to this, still without causing any painting problems later. This would also allow the Reavers upper half and lower half to be dry fit. Here is a picture of the lower torso attached to the bottom of the, already primered, torso... live and learn.

This finishing of the waist allowed me to position the upper arms into the shoulder sockets. This is another of those awesome spots where you can glue first and pin second due to later parts hiding the pins. The upper arms each got two pins to the shoulder, I don't trust a ball and socket joint to just one. I'm sorry there aren't pictures of this process, they came out absolutely terrible so I scrapped them. You can see the arms connected to the shoulders in a picture later in the blog.
As for the color. I picked up an airbrush recently and still have my compressor from about a million years ago. For an easy entry into airbrush land I sprayed the legs from the knee joint down with Boltgun Metal. This went on really nicely, so I got a little more brave. I've been playing with the Piston Guards and experimenting with painting them. After a coat of black primer, I sprayed them with Mordian Blue foundation paint. I then went back around the edges of the armor with Necron Abyss foundation paint. This was a decent effect and would have been better if I had more practice with an airbrush. The blue looked nice, but I couldn't leave well enough alone. I kept thinking about how the old Legio Astorum epic minis had flames painted on them. I wasn't sure how I felt about this, but I decided to do a couple test pieces. By the way, the piston armor pieces became my test bed as they are all going to be stripped and redone anyway. I find that with every different thing I try, I get much better with the airbrush. Anyway, I know I don't want flames all over this beast, but I thought around the lower legs would be a nice nod the old days of the Legio. Thus I came up with the following ideas...
Traditional flames...

And what I like to call, Ghost flames...

Not trusting anything to chance I thought I better lay down some bronze on the trim to make sure I have an accurate comparison of the two effects.


There is some, "yuck" that is noticeable around the blue flames. This is due to the method I used to draw the flames on and will not be there in any end result. Also, I found a genius tool for airbrushing those flames on and I'd expect to see a tutorial with plenty of pics in the next week or so.
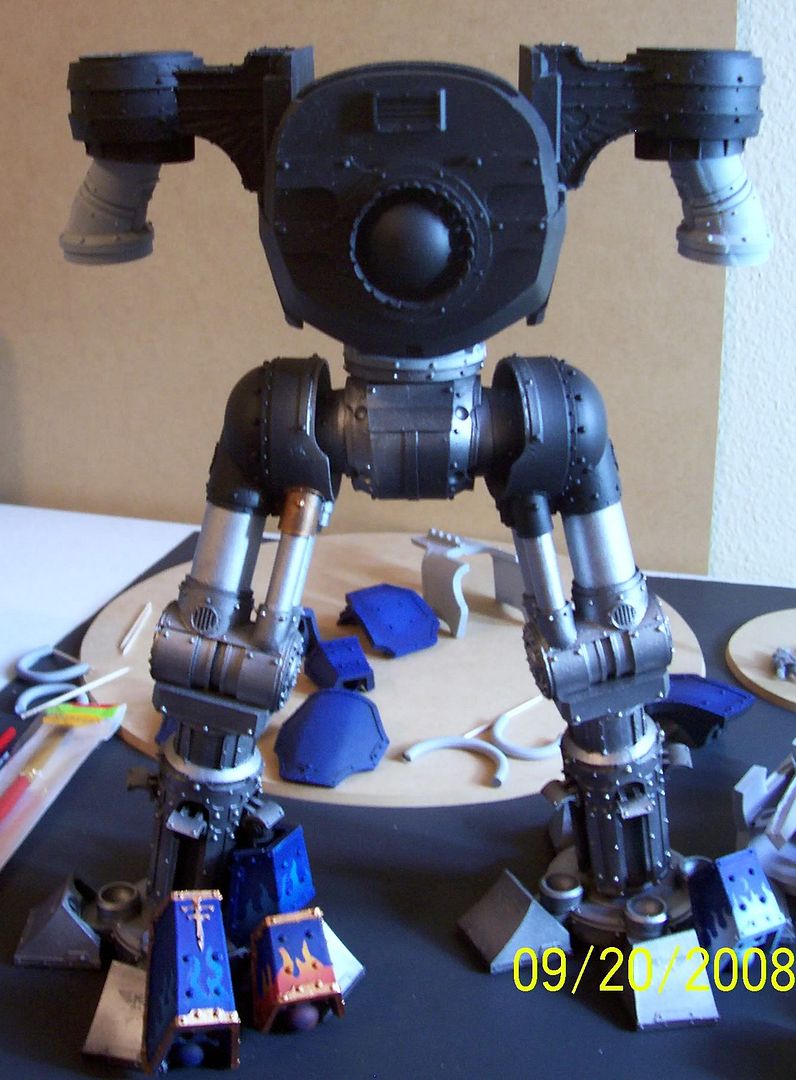
I'll also toss in a picture of the Reaver as it stands (pun intended). The upper and lower halves are not attached, merely pinned and dry fit. Here you can see the upper leg pistons have been given a coat of Mithril Silver since they seem to be hydraulics to me and should be shiny. Also, the upper arms are attached. As I mentioned above about the lower torso, this too could have been done pre-primer.
Aside from a bit of work on the smaller pieces and hand painting a million pistons, that's it for this week. Like I said, a lot of work, but not a lot to show for it! I would like to solicit opinions on the leg flames idea. Love it, hate it, take it, leave it, if you have an opinion please put it in a comment. I considered a poll, but that doesn't encourage people to explain why they think what they do, and I want to know! Personally I will tell you, I'm leaning towards the blue flames heavily.
Thanks for stopping by. Look for that flames tutorial in the near future, you can probably come up with other ways to use it besides flames. If you have any thoughts whatsoever, take a second and drop me a comment.