Monday, December 7, 2009

A worthy site (shame-less plug)

I recently found an awesome blog where a guy is doing a Chaos Reaver Titan! I recommend it to anyone interested in anything whatsoever. Go check him out at Acolite Reaver Art. Do it now! Those of you of the "Dakka Dakka" persuasion can also see his work on his Dakka Dakka post.

So far he looks to be doing a detailed build, so anyone thinking about doing either a Loyalist or especially a Chaos Reaver should check him out. I even learned something already. And drop him a comment and let him know what a horrible heretic he is too!

Wednesday, November 25, 2009

Way Back Wednesday #2

This installment we have another Inqusitor circa 1989. Close friends and one time blister-mates with the subject of the first Way Back Wednesday, this guy also lost his original backpack in a high stakes poker game. A custom pack was made and some new paint hastily applied.


(Yes, that's an antique Plasma Gun!)

Nothing brings out flaws in a paint job like a close up picture. Ignore those and enjoy the musty, aged, goodness. As you see, this fellows haircut is more reminiscent of a the sort a Monk might sport. He could easily be used as some sort of Ecclesiarchy zealot. Though, the Inquisition might come after you if you did so!

Monday, November 16, 2009

BRIEGEL Pt 1 "Unboxing"

A month or two back I acquired a resin model kit from Kallamity.com. The site, and the models/art found therein, are the work of Luca Zampriolo from Italy. I would encourage anyone interested in mecha or any kind of mechanical art to check out his website. In particular there are picture galleries of some of his work being designed as well as painted. If you pay attention to the painting in progress galleries, there are non verbal hints and tips to be ferreted out. He has quite an interesting style that I've become quite keen on.

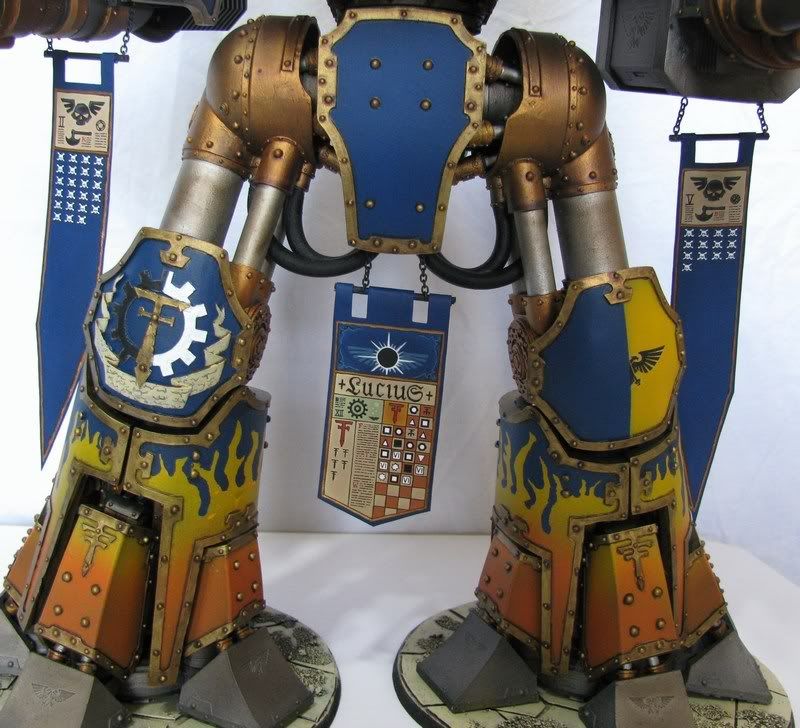
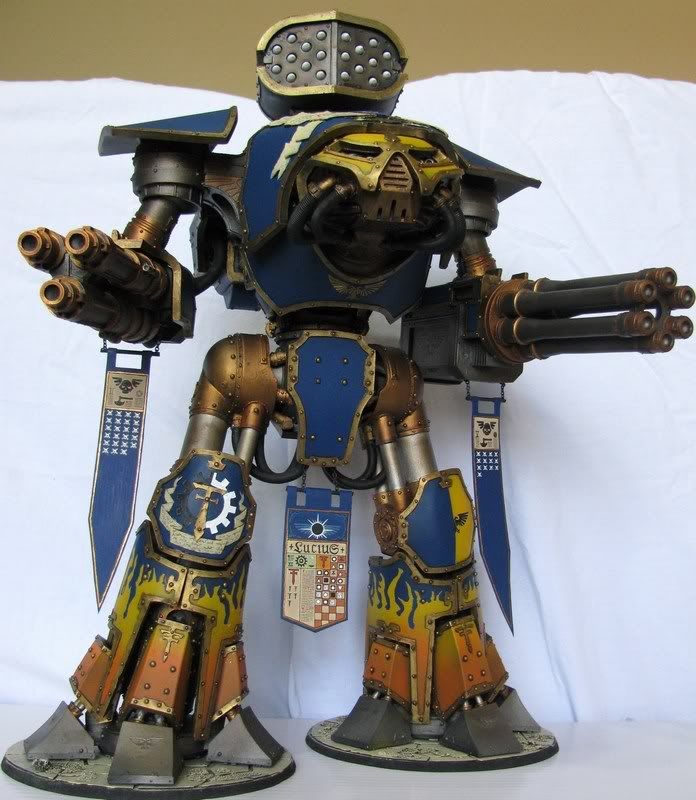
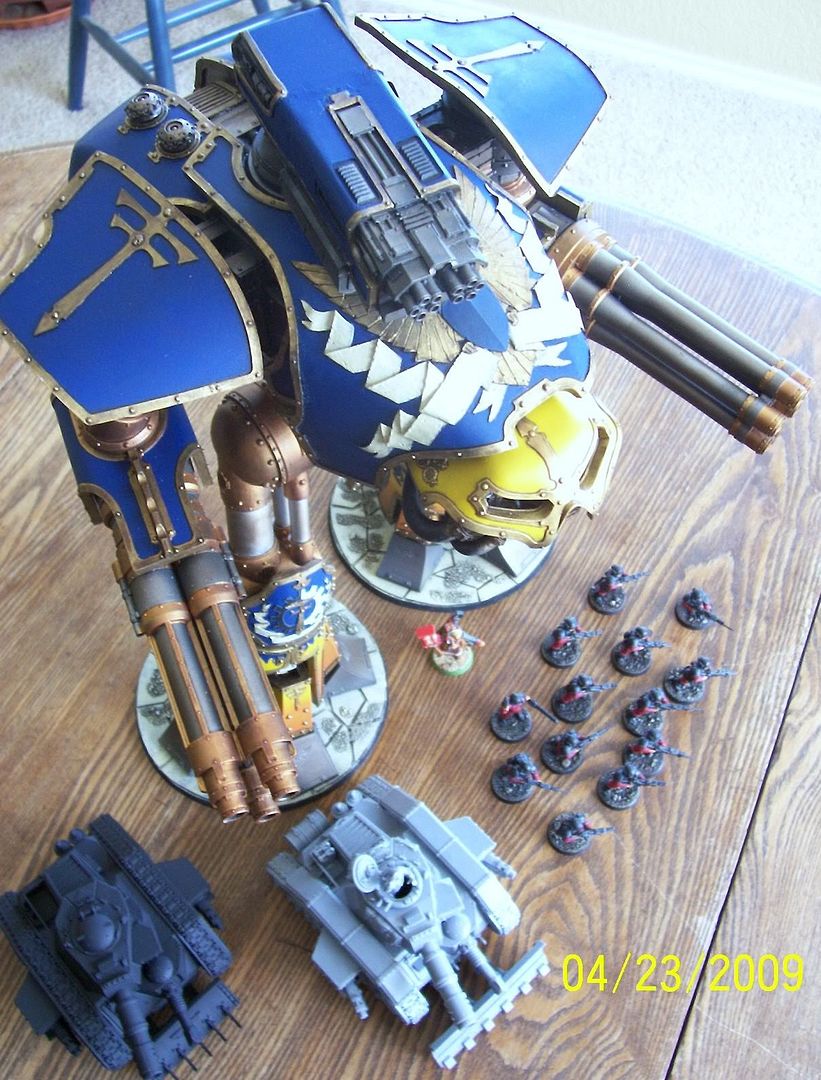
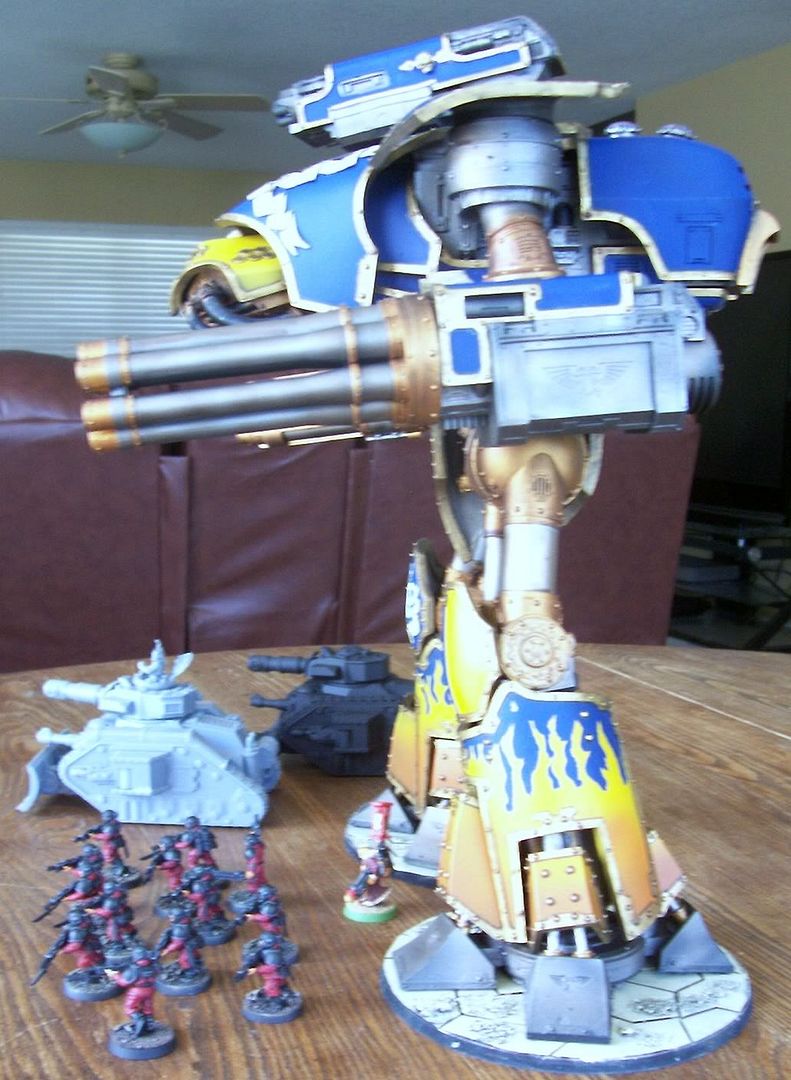
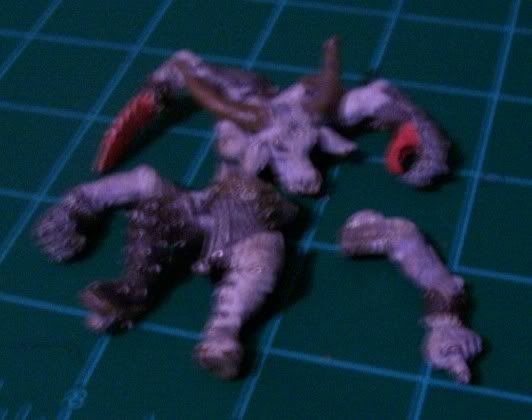
The kit I purchased was the BRIEGEL with optional 'Walrus Units'. The Walrus Units are simply big guns that can be used to replace the arms, though I have other ideas I might try using them for! This kit is billed as a 1/35 scale model and features a cockpit that can be modeled to open and close upon completion. This scale lines up reasonably well with my Warhammer 40k addiction so the completed model may at least make for interesting scenery or a mysterious objective when finished. On to the unboxing...

The kit arrived reasonably quickly from Italy, less than a week in shipping, and in great condition. The box was packed tight, but it was an efficient kind of tight, not overcrowded. Little things like the picture on the box and the stamp on the end proclaiming the print number of this particular kit add to the professionalism Luca shows with this kit.


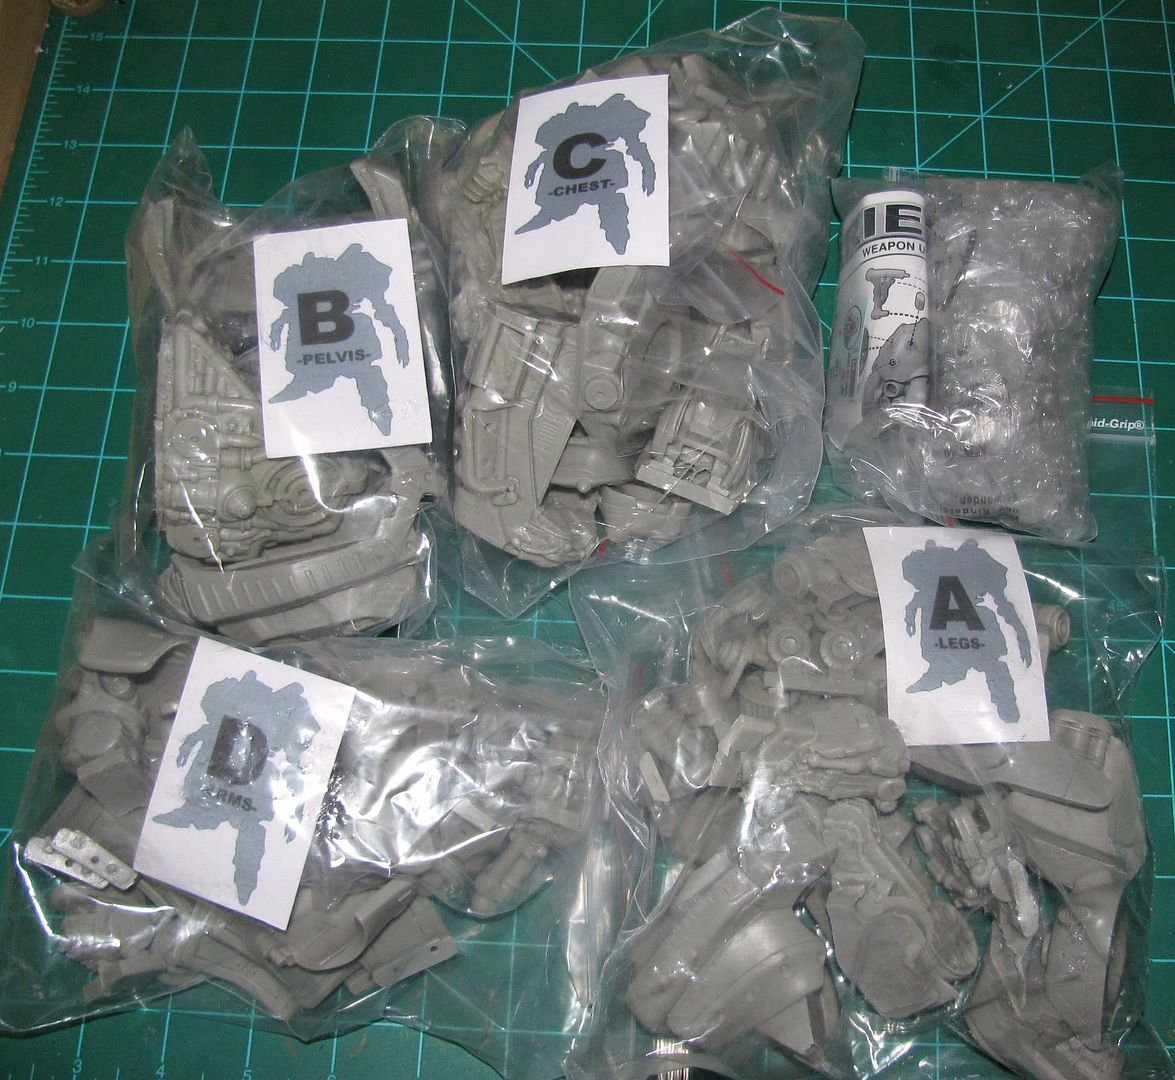
Inside the box the parts are laid out in individual bags with labels as to what the parts in that bag will be used to build. Some of these bags also contain smaller bags within to hold smaller parts or parts of a particular sub assembly. This is similar to the way ForgeWorld lays out some of their larger kits but with the addition of a small piece of paper as a label, it comes off as more organized and feels more put together.


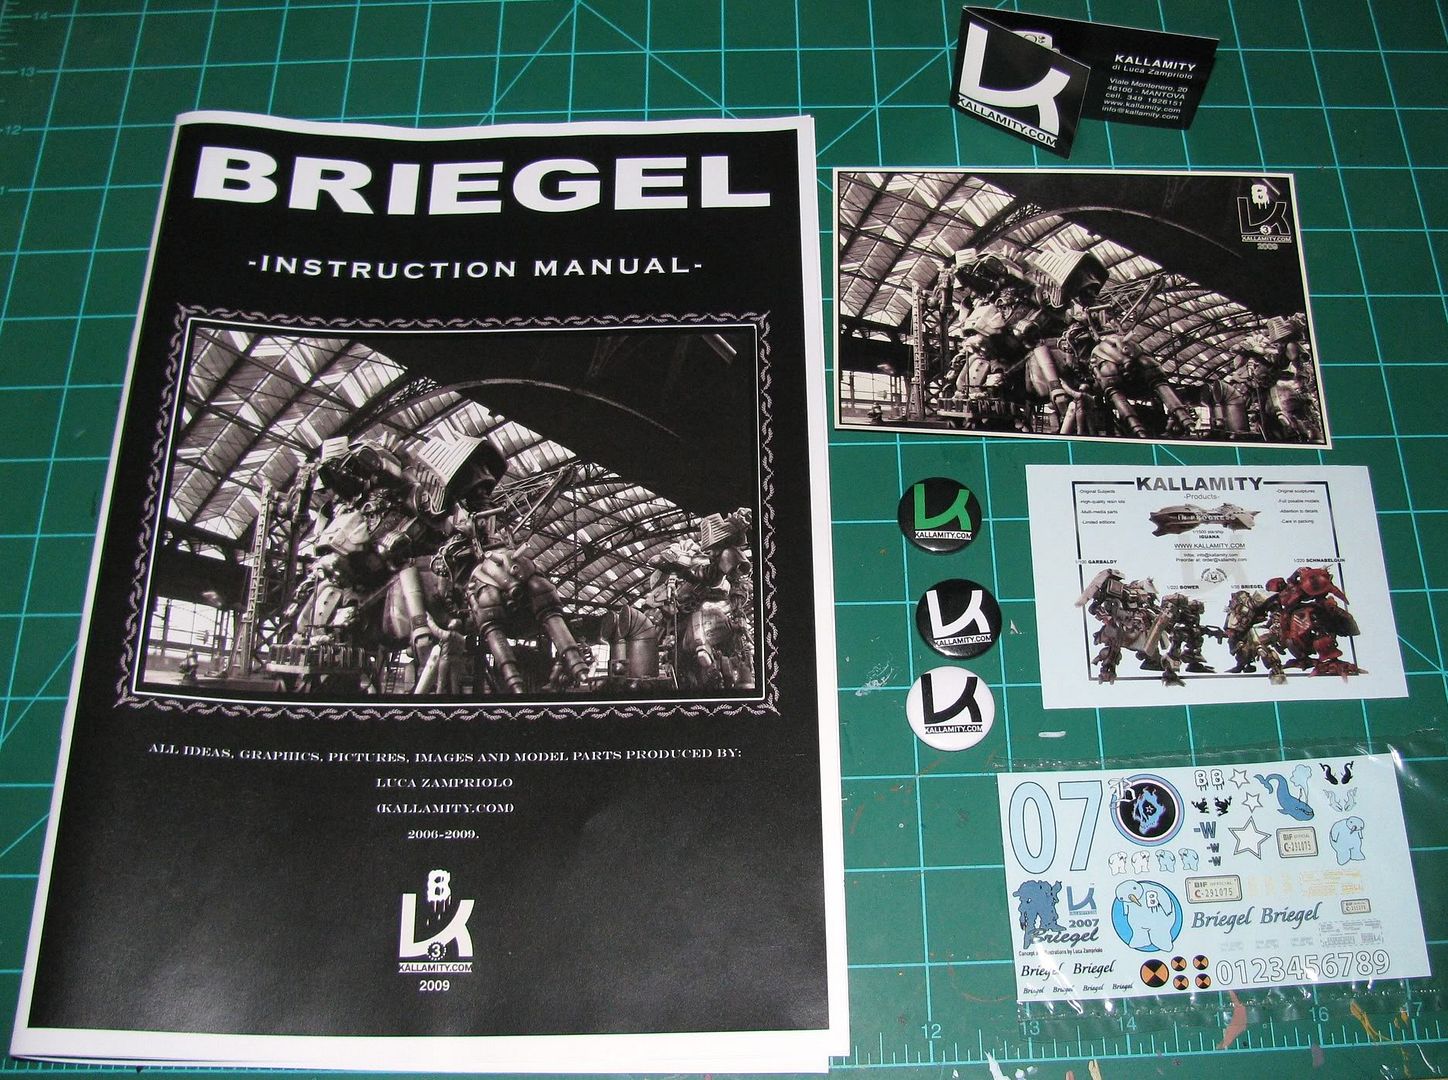
Besides the parts there is a packet of instructions and other goodies. There is the manual proper, a small sheet of decals, a snazzy and unique business card, a custom postcard with the numbered and signed edition info on it, a small card of information and products, and three pins of the sort you can pin to a shirt or hat. I know it's silly, but it's the little things that really make me smile, maybe because they're so unexpected. The pins, the business card... will I ever need them? No, but he went through the trouble to put them in there anyway. The decals are of a high quality including whites, not just something that was done on someones HP printer. I don't recall getting decals with other companies resin kits in the past...


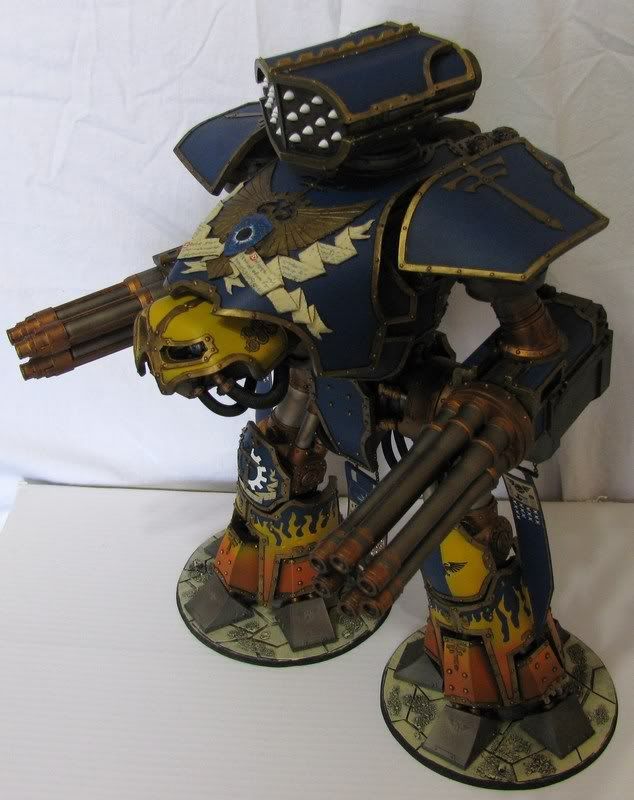
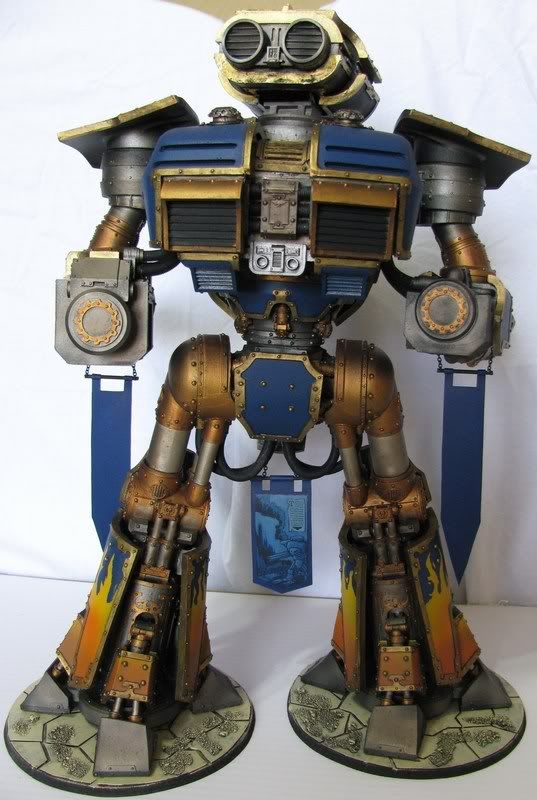
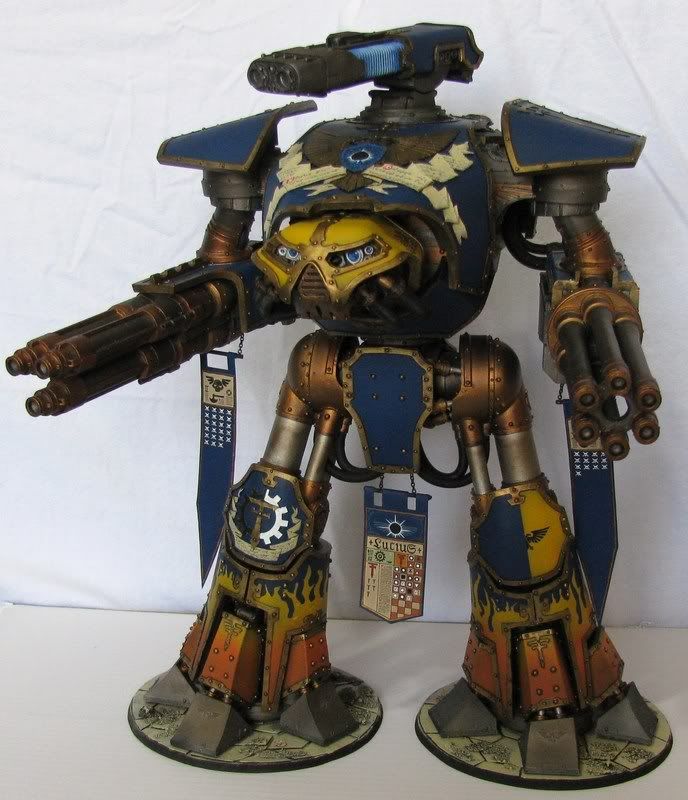
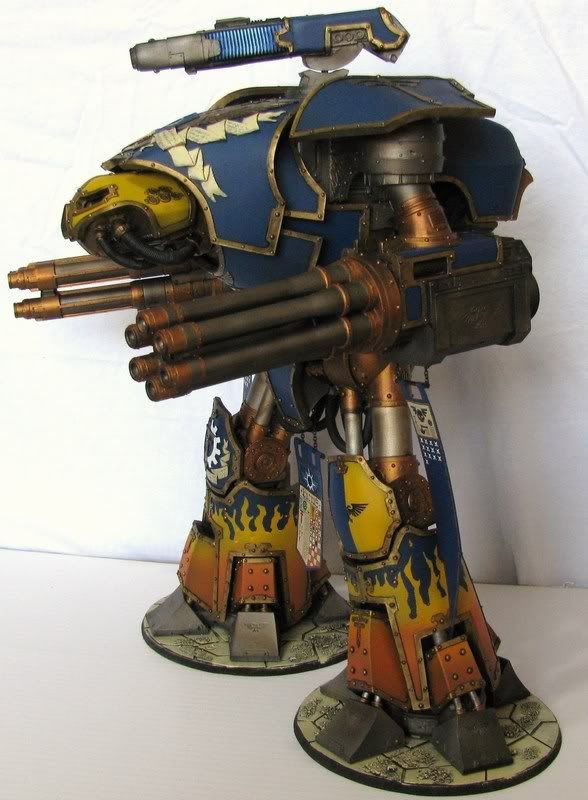
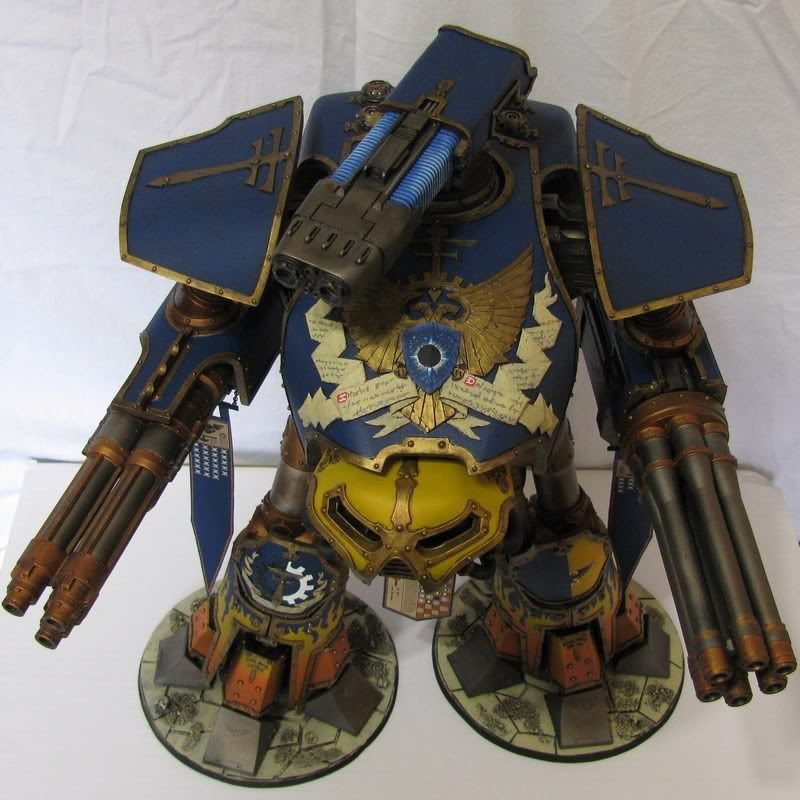
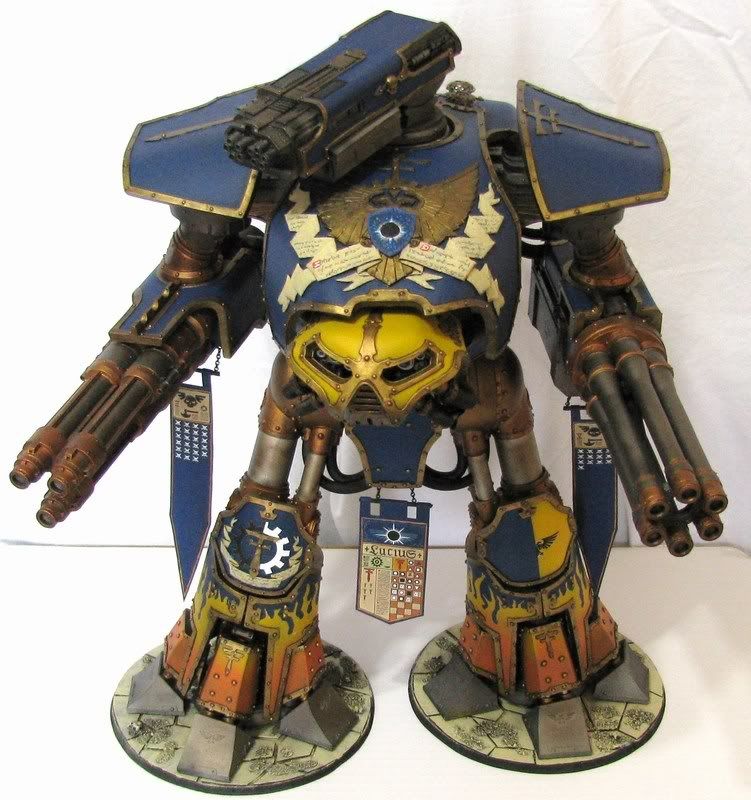
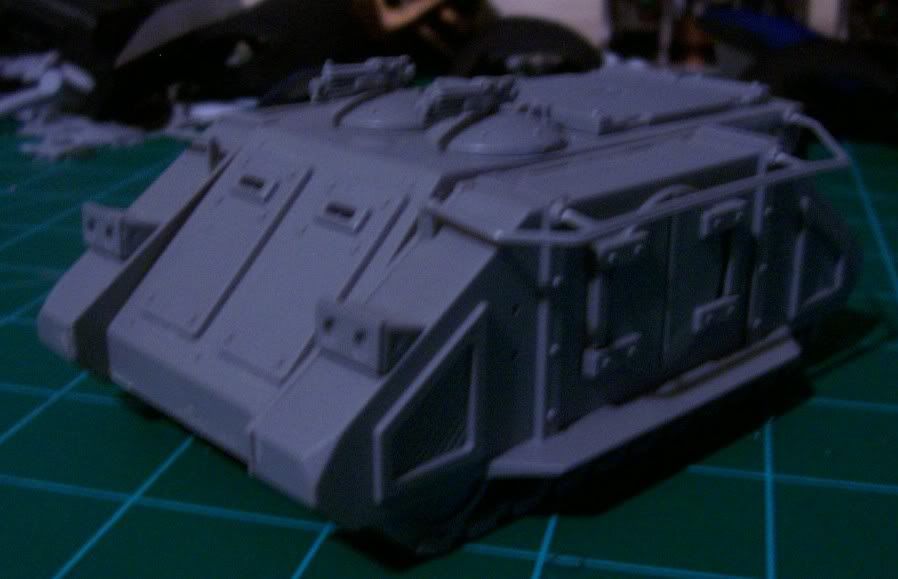
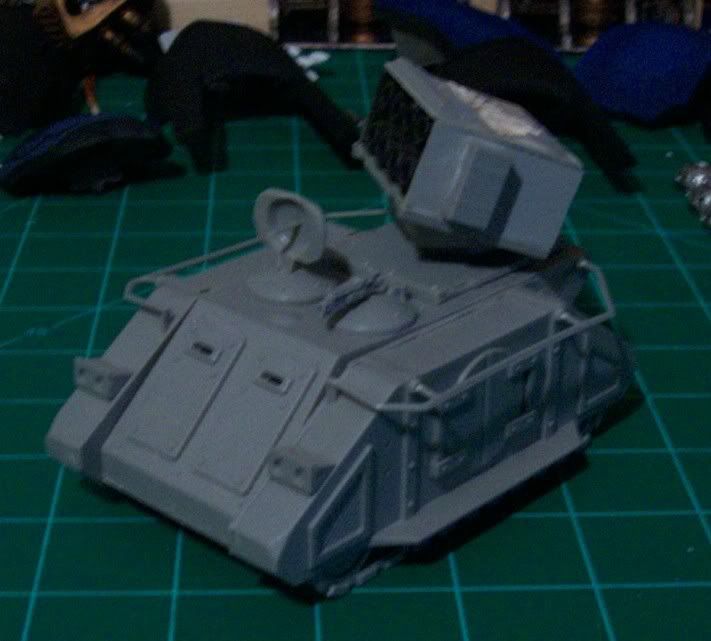
I've looked through the instructions and handled the resin a bit already. The instructions are thorough and easy to read, despite being designed by a person whose first language is not English. On a scale of one to ten I'd put the usability of these instructions at an easy nine. For reference I'd put the Reaver Titan instructions around a four at best. There is even a line drawing of the mecha on the last page which you can photocopy and color to try out color schemes before you begin painting, very thoughtful. On to resin quality. The overall quality is good, but there are some parts that have quite a few pinholes in them. These are easy enough to fill but are, so far, the only real complaint I have with the kit. I will say there are no warped or miscast parts to be found though, that's a plus. Another note on this kit; the kit is positionable. The arms and legs have hinge points which require brass rod to be used in the hinge. While the instructions are very clear on what size rod and what length go where, the rod material is not supplied. It just seems like it would be that much better if the kit had the rods included and it wouldn't cost that much extra to add them.

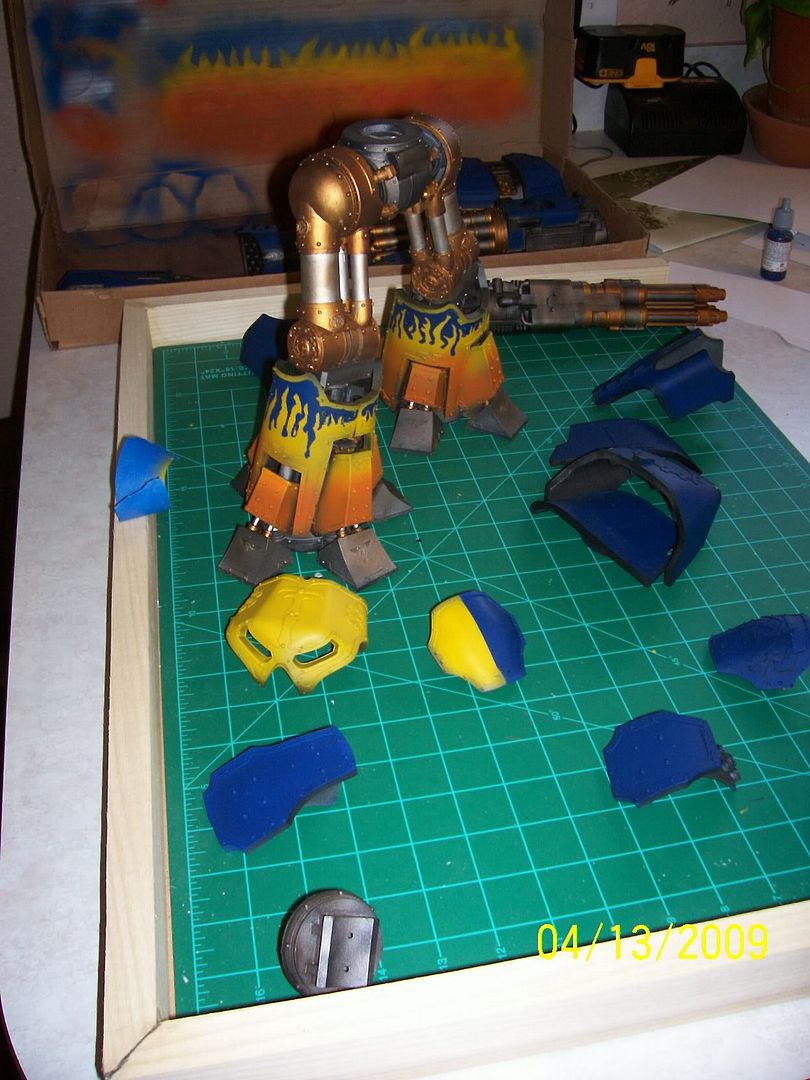
Overall I'm pleased with the kit and excited to start building it. Unlike the Reaver Titan project, this will not be a straight through all in one go project. I will take breaks and work on other things as needed to not go ape-shit crazy like I nearly did working on the Reaver. So, look for updates in the future. Cleaning and assembly could start very soon!

Wednesday, November 11, 2009

Way Back Wednesday #1

I was inspired by John over at Santa Cruz Warhammer and his blog Remember the Titans, Some Bits Box Justice to delve into the realm of old minis. I've decided to make this a semi regular event of between one and twenty or so parts. Depends on when I run out of old minis or motivation. So welcome to issue number one of Way Back Wednesday!

The mini I chose for this week is an Inquisitor from way back in autumn of 1989. You can see this fellow and his compatriots on the Stuff of Legends site, HERE.

The paint job is not going to win any Golden Daemon awards, but I assure you it is an improvement on what was there before.


As you can see, this mini is from before the Inquisition started sporting their ubiquitous -I- symbol on everything. He could be used equally well as a Rogue Trader or other adventurer. The backpack is not original, though it is custom made. The originals were not that spiffy anyway and are nigh impossible to get hold of now days. Besides, some custom power armor should come with a custom power plant! The catalog description says he has a combi weapon. I can only guess it's a combi bolter/sap.

Thanks for stopping by and checking out the first installment of Way Back Wednesday! As usual all comments, critiques, and name calling are welcome. Though any name calling comments must rhyme and include the word porridge.

Monday, October 12, 2009

Crimson Fist Dreadnaught Conversion

This is a project I started about three years ago and just now got around to finishing. At least mostly finishing, I can always find one more thing to touch up. At some point you just have to put the brush down!

I can't take any credit for the idea on the conversion. I saw it on the internet several years ago and decided I'd have a go at it. I'd reference the page where I saw it, but that page was several pc builds ago and I no longer have the bookmark.

This is also my first attempt at painting vehicles and also at using decals "correctly". By correctly I mean I used 'Ard Coat to put down a slick finish then applied the decal and put more 'Ard Coat on top, finishing up with a spray of DulCote.

I've tossed in a couple Marines for scale. One of them is a slight conversion too, he's a lefty. Here's some pics!


The legs, obviously, come from a Sentinel. I feel that they convey movement much better than the standard legs and with the armor plates to bulk them up a bit they don't look too spindly. As for the paint, well I'm still not sure I'm set on how I want to paint my Crimson Fists. I think they are already dark enough not be mistaken for Ultra Marines, but I'm going to play around with the blue a bit more before I commit.

I hope you've enjoyed seeing what I've been working on for far longer than it should have taken. Hopefully future updates will be at least a little quicker. All I can say is, babies slow you down sometimes... as Drax is about to find out!

Wednesday, September 23, 2009

I'm still here... lurking...

So as some may have noticed, I've not blogged in a fair bit. What? You didn't notice? Um... well... it's a fact, I haven't. I'd like to blame a plethora of things for my not doing much hobby stuff, and therefore having nothing to blog about. Alas, it all comes down to me not doing anything when I do have time. It seems the longer you go without doing anything, the easier it is to put it off one more day. Even things you enjoy, sad as that my be!

I'm really hoping to get some inspiration and get some work done. Lord knows I have plenty to work on! I have a couple Space Marine Dreadnaughts to work on, the minis from my Space Hulk, a Tyranid army still in boxes, an Ork army still (mostly) in boxes, Marauder Destroyer, Macharius Vulcan, Land Raider Prometheus, tons of IG, fantasy Undead army still in boxes, fantasy Empire still in boxes, some Eldar Storm Guardians for my Altansar force, many boxes of Imperial terrain that are to be a large fortification one day, an AGX-04A1 Gerbera Tetra Custom to be assembled, and a fantastic BRIEGEL resin kit by Luca over at Kallamity.

This brings me to another problem I have. I created this blog as a 40k hobby blog. But, as can be seen by the last two projects listed above, I have a very diverse Inner Geek. And working on non 40k projects does help me avoid total burn out. So, here's the deal. I would like feedback from the community as to whether I should create a separate blog for non 40k material, or just lump all my geeky-ness into a pile here? I'm not big on polls, but I'm going to post one for a few days. Look left. Any advice on blogging, time management, baby burping, or general commentary are welcome!

Sunday, July 12, 2009

Finished Reaver Titan (pic heavy)

Here it is, the final Reaver Titan post. The following is mostly pictures of the finished Reaver. Questions and comments are welcome as always! I’m using a new blog editing tool, so if anyone has any strange issues with the appearance or functionality of my blog, please let me know that as well, thanks.


Some shots of the banner details follow. The banners were done by Ron over at From The Warp and he did an excellent job!


I always enjoy the looking up view…


Some various pics with alternate weapons on the carapace.


That’s it! This has been a challenging, but unbelievably fun project to work on. There are definitely things I’d do different, but that can wait for another post… or another Reaver?


I’d really like to thank all the folks who have been reading this blog and following along with this project. I’ve enjoyed it, and I’ve enjoyed bringing you all along for the ride. I hope you’ll all join me again for my next project… I think this Reaver needs some air support, Marauder Destroyer inbound!

Tuesday, July 7, 2009

Off Topic News and Updates

It's been a while since I've posted and I do apologize to my friends out there in the blogger world. I've been pretty busy and distracted the last month or so, but I have been lurking your blogs as I've had time.

So, what's been keeping me so busy? A several things really. I'll share the largest distractions with you here in this blog.

First off, two weeks ago my wife gave birth to our son! Thomas Elliot was born June 23rd, 2009. He was 8lb 5oz and 21" long at birth (ten fingers, ten toes and all that good stuff). He and his mother are doing fine and everyone seems to be healthy. Here are a couple pictures of him taken today.


It turns out that nobody makes a 40k "one-sie". And his mother tells me he's too small to assemble or paint anything yet too. I guess I'll just have to give him a few months and let him roll dice for me... come to think of it... those are probably too small for him to play with, double damn. Ok, so he probably won't be old enough for the 40k hobby anytime soon. Maybe by the time he is I'll have an army painted for him to play with!


My second distraction came just a short time before Thomas arrived. While it doesn't compare in ability to be cute, fill a diaper or keep me up all night, distraction two is a lot of fun in its own right!


I've always wanted a bike and recently had a chance to take the rider safety course and get my motorcycle license. By the way, I recommend that class for anyone who rides or wants to ride a motorcycle. The bike is a Ducati Monster 1100S, and it's a blast! I've always wanted a Monster, so choice of bike was pretty easy. Also, a couple guys at my local GW store and I are thinking of starting a 40k biker gang... well, not really, but we may be terrorizing the streets together all the same. It would be a bit of an eclectic group, one Ducati, one Aprilia, and a Buell.

I appreciate folks stopping by. I do plan to get back on the blogging and I think this little ice-breaker might be just what I needed to get back to blogging after too long away. I still owe you guys a finished Reaver blog and blog on Reaver building 'what to watch for'. Later guys!

Wednesday, May 27, 2009

New Space Marine Game Trailer on IGN

Have a look at this.

IGN Video: Warhammer 40,000: Space Marine Xbox 360 Trailer - Battle Trailer


I'm pretty freaking excited. I've been following this game for a while now. Looks like it will be pretty freaking cool!

Here is an earlier build video with designer commentary. It appears that they've changed design teams and possibly the antagonist from Chaos to Orks, but it's still cool to see.

Leaked Warhammer 40K: Space Marine Footage Shows 'Intimate Brutality'


Saturday, May 16, 2009

GW Valkyrie Painting Contest...

I won! Yes, I know I've not posted much the last few weeks. I've been concentrating on getting my entry for the Valkyrie Painting contest finished. That, and reading as many of you guys blogs as possible. Oh, and working on some prototypes for my Ad Mech themed guard.

I was pretty confident going into the competition, at least until I saw the other entries. There were some really nice Valkyries. An interesting note also, out of five entries, there was only one that was not a Vendetta! But, I think that a striking paint scheme (or at least a unique one) and attention to interior detail probably helped me stand out.

Usual camera caveats apply. It really looks a good deal better in real life than I am capable of capturing in a picture. If I can get some better pics with some better light later, I'll add them to a future post. So here we go!

First up the all important ID shot...


Then a couple shots with ground support...


And last we have a shot of the first of the Ad Mech themed guys this Valk might tote around...


Not shown due to lack of camera skill are a detailed interior including door guns/gunners that swing back out of the way so the doors can be closed. The model was done mostly with an airbrush with large chunks being assembled after painting. The las cannons were converted from extras I had left over from a Land Raider Prometheus.

The prize was pretty sweet as well. First up I received a thirty dollar gift card, not a bad deal on its own. The real prize though is a free landing pad terrain piece of some sort that I get when they are released with Planet Strike in July! While I've not seen it yet, judging by the past 40k terrain pieces I'm excited. Plus, it'll make a nice place to park the Valkyrie!

I appreciate you stopping by. Any comments or critiques are welcome as always. No pressure but for extra points you can leave a comment in Quatrain Poetry style.

Thursday, April 23, 2009

Reaver Titan Pt 17 (So close I can taste it!)

Work has progressed at as fast a pace as I could keep. My last estimation of 'one more week' was obviously a little optimistic in hindsight. The gold trim all over the Reaver took almost half a week by itself! It involved two to three layers of gold to get a good coat, using wash to line the boarder between trim and armor, then washing the actual trim, and in most cases going back and adding a little extra wash to rivets to pick them out. This part alone makes me think I'll probably never do another Reaver again!

Anyway, the Reaver is almost done. I still need to add the Ad Mech guy in the back, the hoses to legs and arms, put some words on the scroll work, and add some other details like purity seals and what-not. Let's look at some pics of the almost finished titan with some guard minis for scale comparison... the priest from earlier posts even managed to sneak in there.

A group shot first...


A Guardsmen eye view...


A view from above...


A generic side view...


And, the last thing the enemy sees...


I wanted to share what I had so far as I won't be able to finish till after this weekend in all probability. We have company coming and so I don't expect to be able to wrap this up till next week. There will likely be two more Reaver posts. One will be mostly pictures when the Reaver is really completely finished. The other will be a small collection of things I've learned and things to watch out for if you ever build one of these. Not sure which will come first yet though.

Thanks for stopping by. I appreciate the name suggestions from the last post. So far Moridan 7th's Ignis Domini is looking like it may be the name. Comments, critiques, and criticisms are welcome as always and are appreciated most in that order!

Wednesday, April 22, 2009

Titan Names?

Time is fast approaching when the Reaver Titan will need a name. In fact, tomorrow when there is some decent natural light, I'll be posting pics of an almost finished Reaver! That's right tomorrow, mark your calendar... it's the day after today. Just scroll work and some details left to finish. In fact, I took it for a ride this evening to my local GW to see if it would hold together during transport and it came through without a hitch! It was a big hit there, by the way.

On to the question at hand. I'll be needing a name. Here is a list of Legio Astorum Reaver Titan names from the Imperial Armor Six book; Tritus, Honorum, Invictorus, Astor Tyrannis, Questor Tyrannis, Invigila Alpha, Invigila Beta. There are a couple others, but that should give a feel for the way the names go. I purposefully did not paint my Reaver to copy any in the book and so that's why I'm not borrowing names from it. I went to an English to Latin translator, but as we know, Imperial Gothic is more like latin-lite. I would appreciate suggestions in the comments. All suggestions will be taken seriously and I may pick my favorite few for a poll. Come on folks, gimme some ideas!

Monday, April 13, 2009

Reaver Titan Pt 16 (No Lack of Progress, Just Updates)

I'm sorry for the lack of updates on the Reaver Titan project this past week or so. I've had a lot going on and all of my free time has been spent working on the Reaver instead of blogging about it. I thought I'd give you guys at least a quick update to show that work is, in fact, continuing!

The past week has been spent airbrushing, masking off areas, more airbrushing, and in some cases repeating the whole process all over again. I've been working in the Kitchen as it affords me easy access to water for diluting paints as well as for cleaning up. A hearty Thank You to my lovely wife for being so understanding and sharing her counter space with me! Without further ado, on to the pics.


First off, let me explain the flames you may have noticed on the Titans legs. They are based off the art in the Imperial Armor Six book. Yes, the flames are reverse flames. A quick glance around the 40k universe will show that GW uses reverse flames on dark backgrounds and regular flames on light backgrounds. I'm sure this is for contrast. With that out of the way, the flames aren't as crisp as I would have liked them, but I'm going to call it good.

The work done to get to this point has been exhausting. What's left? Trim, touch-ups, basing, and final assembly. I'm hoping to be done in the next few days, certainly by the end of this week!

I thank you for coming to take a look. Feel free to leave a comment if you wish!

Monday, April 6, 2009

Things Aren't Like They Used To Be...

And they probably never were. One of the wisest things I've ever been told.

You all have Ian over at Heroes Of Armageddon and his Blast From the Past blog to thank for this post. After reading his blog, digging up some GW fossils started to sound like fun.

First off we have a rare old figure. The Female Adventurer In Power Armor. I will tell you that the head is from a Reaper miniature as the original was basically a blob with a bowl cut. There were two different minis made, this is one, the other I lost a million or so years ago.


The next mini is one of my all time favorites. It's an original Keeper Of Secrets. It's been pulled apart as it has been my intention for the last couple years to redo this guy/gal/thing. I always liked the minotaur shape of these guys. It's more menacing than a scrawny hermaphrodite in my opinion.


The next is a complicated piece. It would make an awesome tutorial, but it would be over ten years too late. It's an old style Rhino that can be transformed into a Whirlwind. You see, once upon a time, there was no model for the Whirlwind. Conversion was the only way to go. I've got two of these around and about. The other is in need of some repair though. Believe it or not, the only bits absolutely necessary that didn't come with the rhino are two fantasy shields, and a large square fantasy base.

Here it is a typical Rhino...

Inside extra bits can be stored. The openings on the opposite side (old rhinos were the same hull piece top and bottom) have been covered up with plastic card.

A Whirlwind launcher is fabricated from plastic card and bits. It's mounted on a set of rear doors with a pair of old Warhammer Fantasy shields and some scrap sprue to make it able to rotate.

Swap out the front hatches for a blank one and one with a home made radar dish (that also rotates), and you have a Whirlwind!

The Aquila on top of the launcher is carefully cut out from a Second Edition Wargear Card and glued on. Gives a nice three dimensional decoration. The missile rack itself is made from the bottom of an old square Fantasy base.

Note the little bumps inside each 'tube' on the launcher which are the missiles.


There is my trip down memory lane. I've more old stuff hidden all about, but it will wait for another day. Thanks for indulging me.

Friday, April 3, 2009

Reaver Titan Pt 15 (Warnings and Updates)

Just a quick update and words of warning/wisdom for any future Reaver builders out there...

While it's often advantageous to assemble things in a different order than the instructions show, be sure to test all variables first. When gluing the toes in place on the foot, I made extra sure that the large piston guards would be able to be put into place with the toe already on. What I did not test, probably due to it's smaller less important looking size, was the ability to place the smaller toe pistons into position with the toe already on. Because of the way the toe pistons (two per toe) go into the large piston guard, there is no way to do it without placing them as you slide the actual toe into position. So, I got to wrench, twist, wiggle, sweat, and pray in an attempt to get the toes back off the titan with minimal damage. Thank goodness they all came off without damaging the feet or legs!


Another spot that can be troublesome, whether you follow the directions or not, are the pistons that actuate the hip joint. These simply don't fit well as the plating on the outer hip (the gold part) gets in the way. Here is a shot of some titan butt, or as I like to call it, "mechanicus porn".


On to better news!

The legs are starting to go together (now that the toes have come apart). The banners are in the works and we can all watch them come together over at From the Warp as Ron works his magic! And, I've finally found the right size drill bit and flush mounted some magnets to hang the banners from when they're finished...


It's Friday, things are moving along nicely with the Reaver so I'm not even going to suggest any kind of off the wall prose for comments. I will say that Klaus over at DEI GRECI mentioning his beergarden may just convince me to grab some beer and head out by the pool this evening! The wireless reaches out there so I can even check up on my fellow bloggers whilst I chill. That sounds nice... why do I even come in the house at all?

Related Posts with Thumbnails