Showing posts with label Conversions. Show all posts

Thursday, February 10, 2011

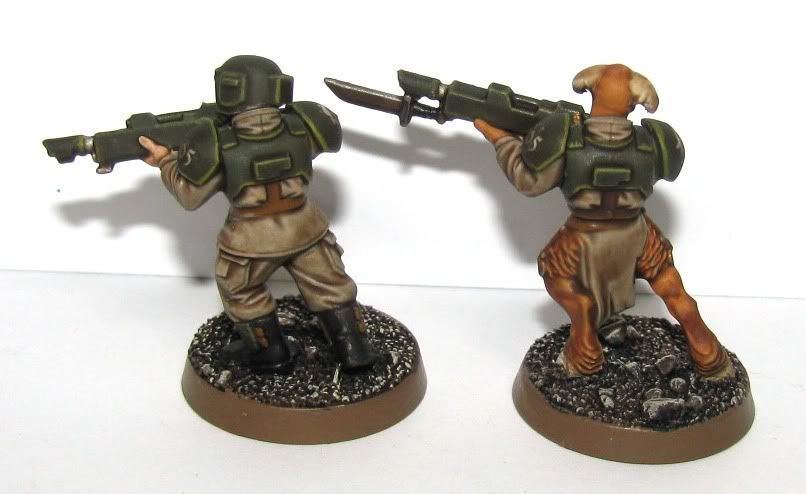
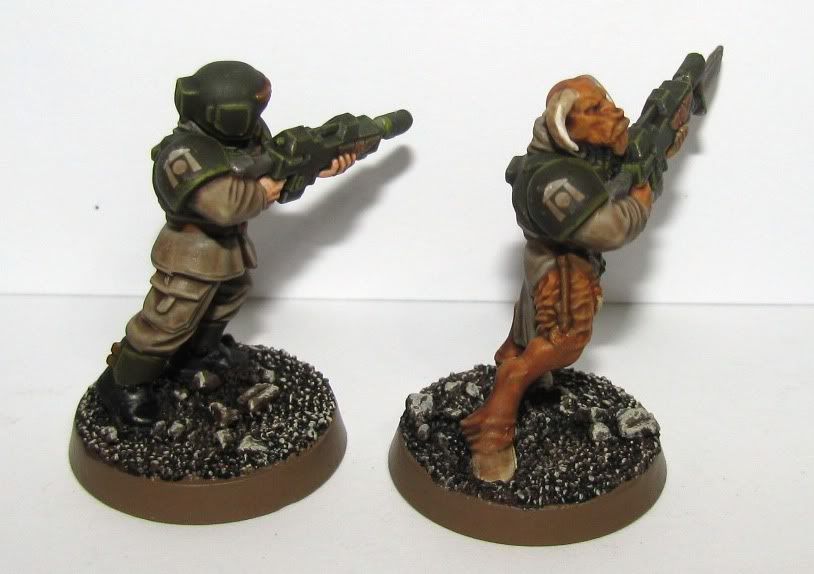
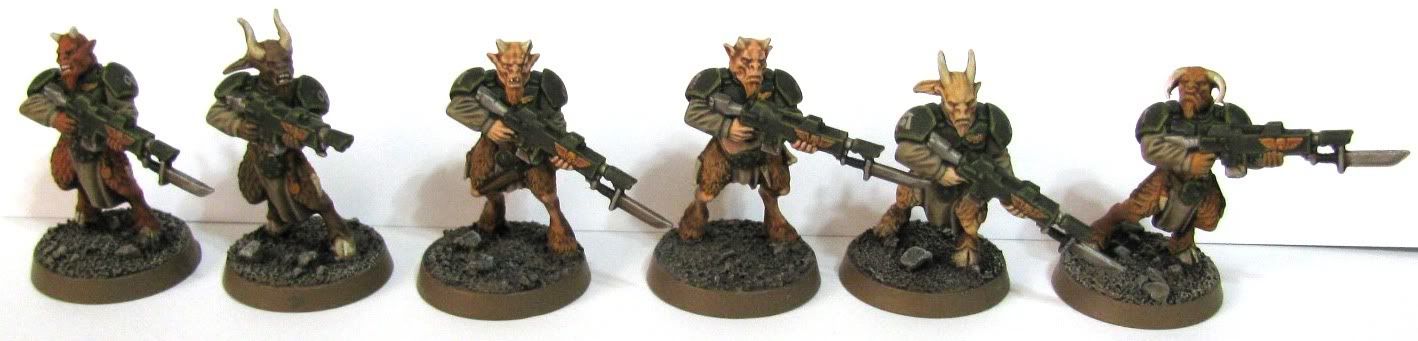
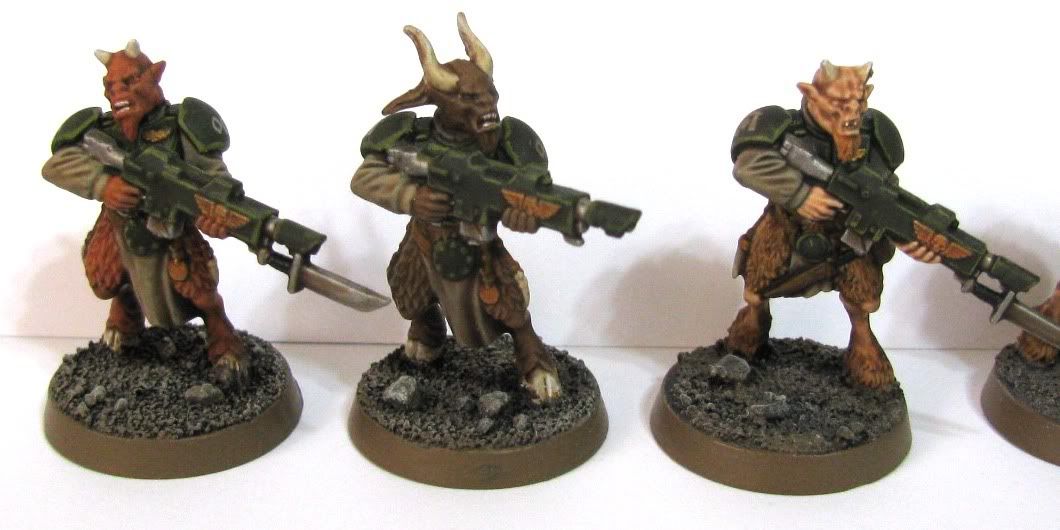
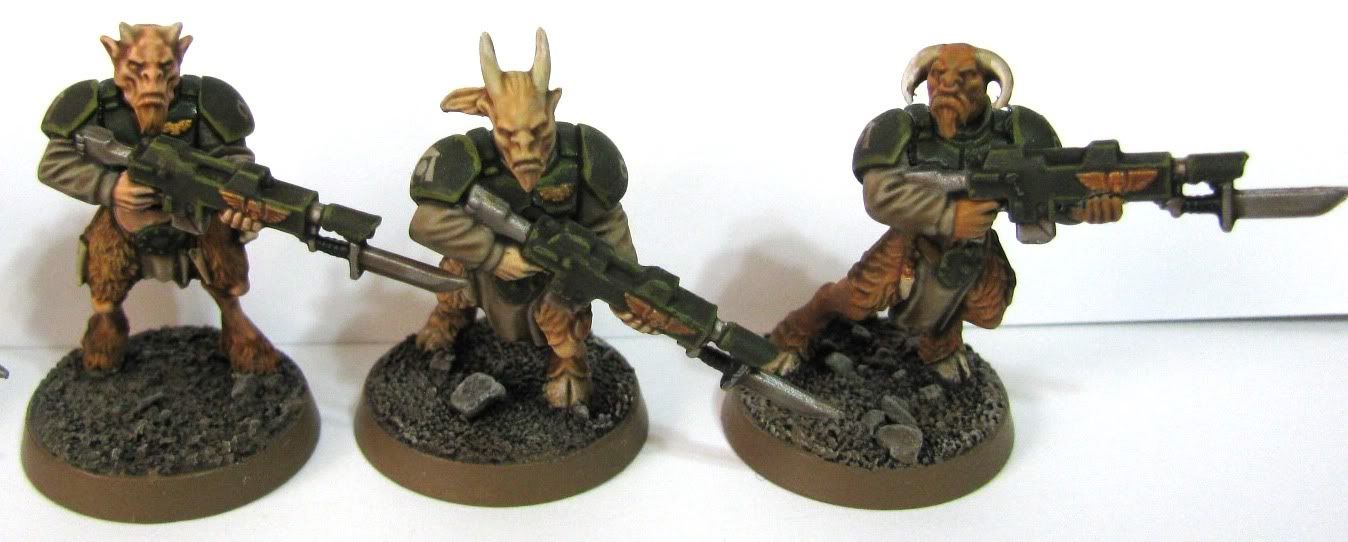
IG Beast Squad Finished

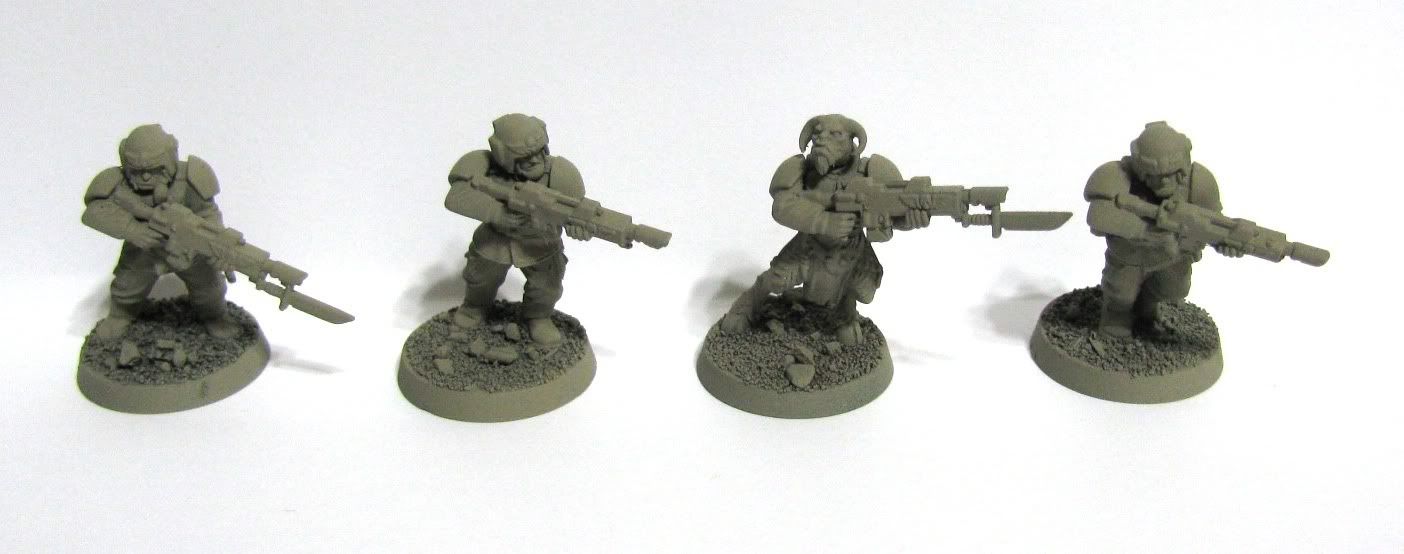
Just a quick update today. I've been working sporadically (when babies and real life allow) on my first full squad of Imperial Guard Beastmen using the new fantasy Ungors. I really like the way these guys came out! I'm thinking I'd use them for counts-as penal legion, but I might do a whole platoon with command made of beasties. Well, the junior officer might be a human of some sort... you can only trust these beasts to far!


I've got parts to do another ten of these guys. So, two penal legion squads or the start of a two squad platoon. I don't think I'd ever do an entire army of these as the cost per trooper is about double that of a plain old Guardsmen... in money that is. But, a couple squads will make for a nice visual on the field!

I've also been playing around with a salvaged Leman Russ tank and a Chimera. I'm not much of a tank painter, but once I have some decent progress to show, I'll do so.

Thanks for stopping by and having a look. If you have any comments, critiques, or at least a decent catch-phrase, feel free to share it in the comments section!

Saturday, January 29, 2011

IG Using New Ungors Prototype Finished

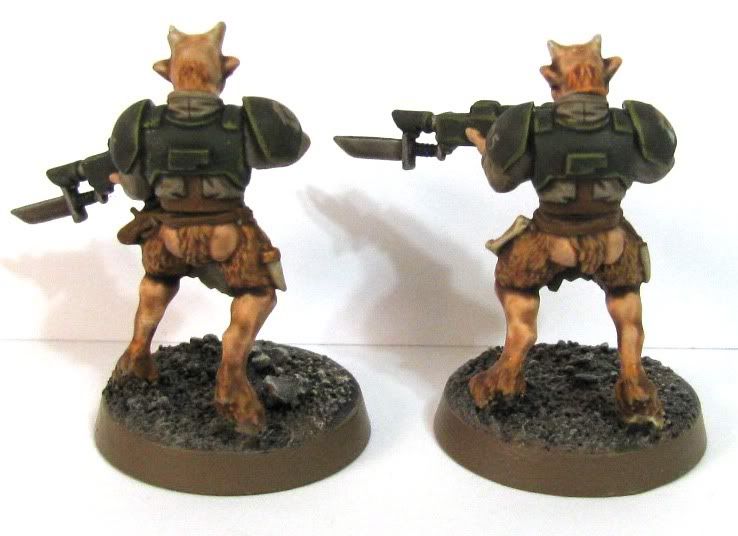
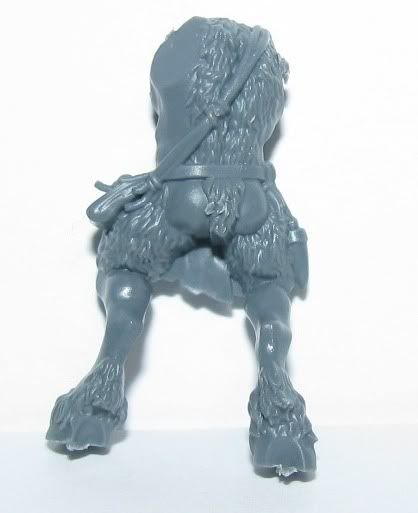
Last week I spoke a bit about the new Ungors and their naked butts. More importantly, I asked the question will they convert to beastman guardsmen as well as the old Ungors models did. This week I'd like to share the results... and another gratuitous butt-shot of the new Ungor models.

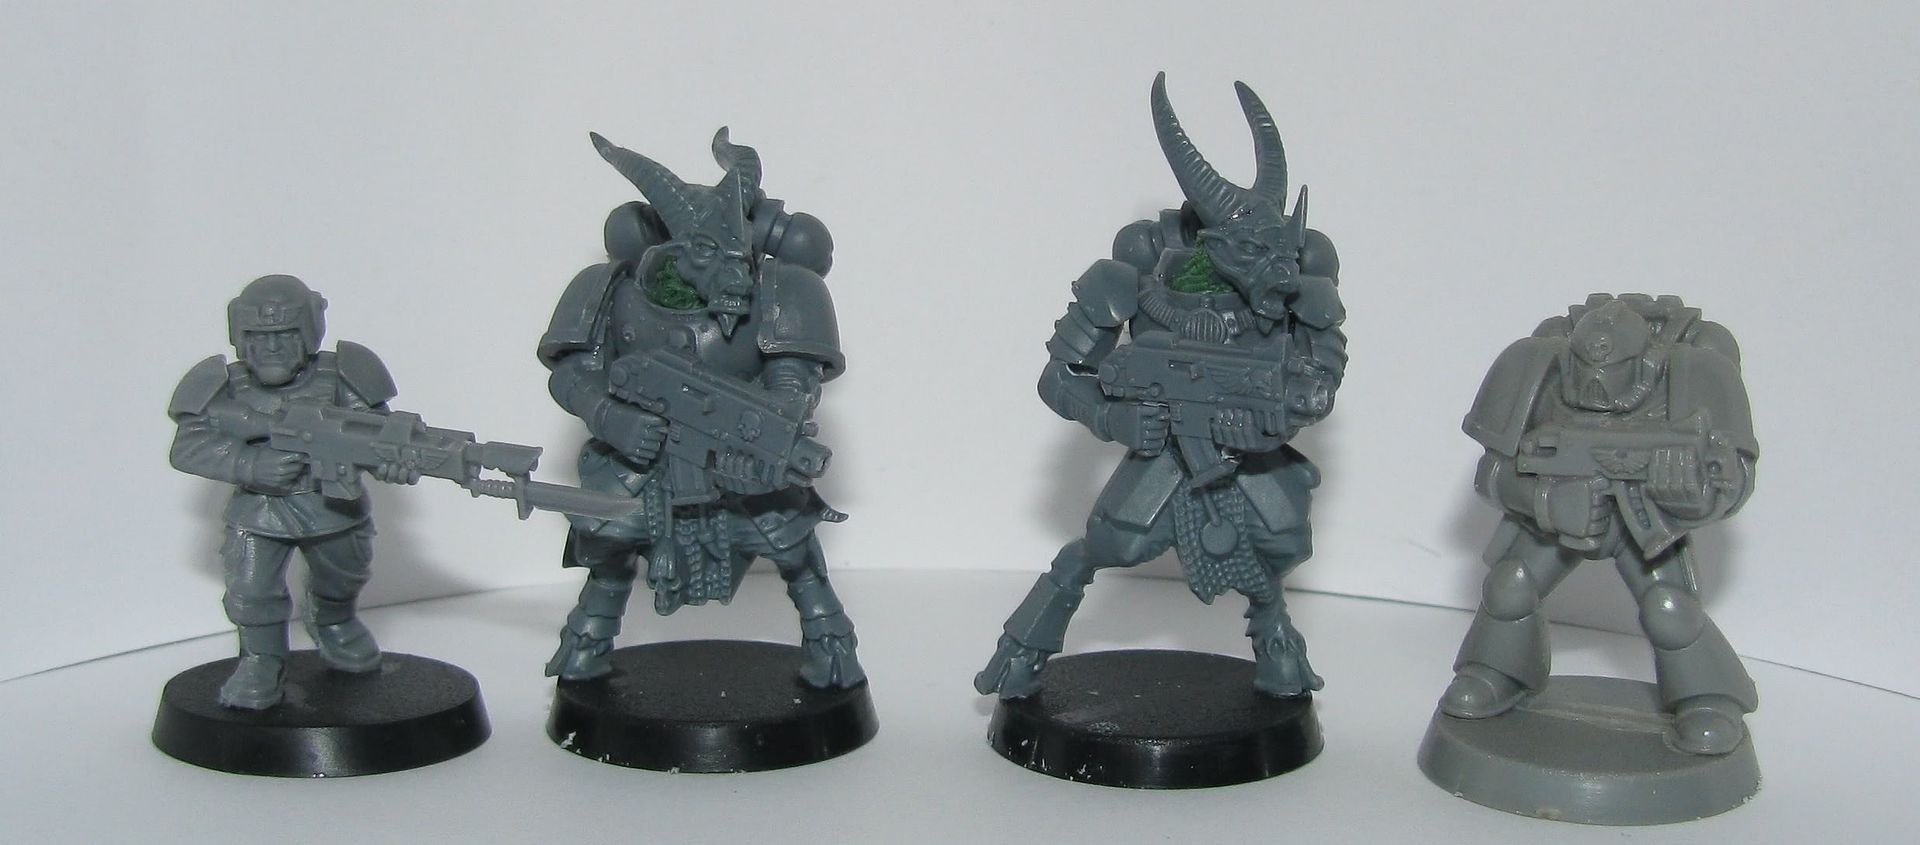
First a group shot to see how they fit in with the old Ungors (I encourage you to click for a larger view)...


I think they would blend in well enough if you have a quite a few models on the table though you can tell they are more closely related to each other than to the rest of the herd.


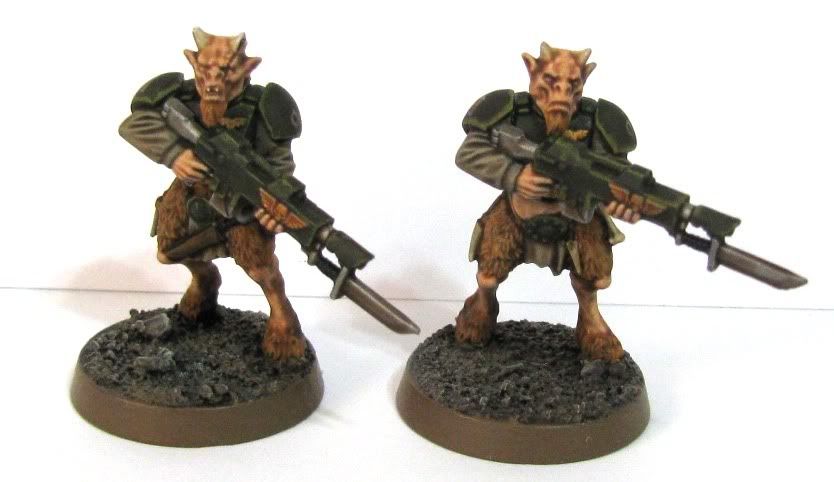
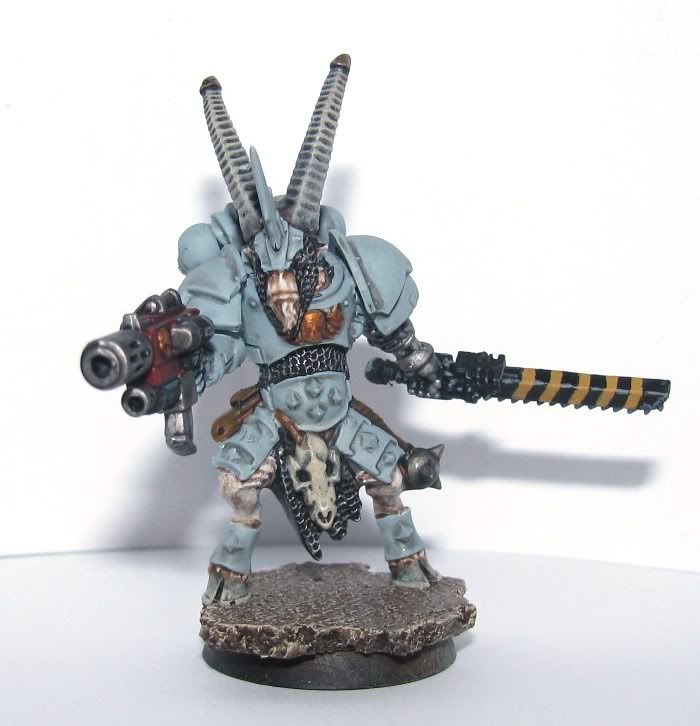
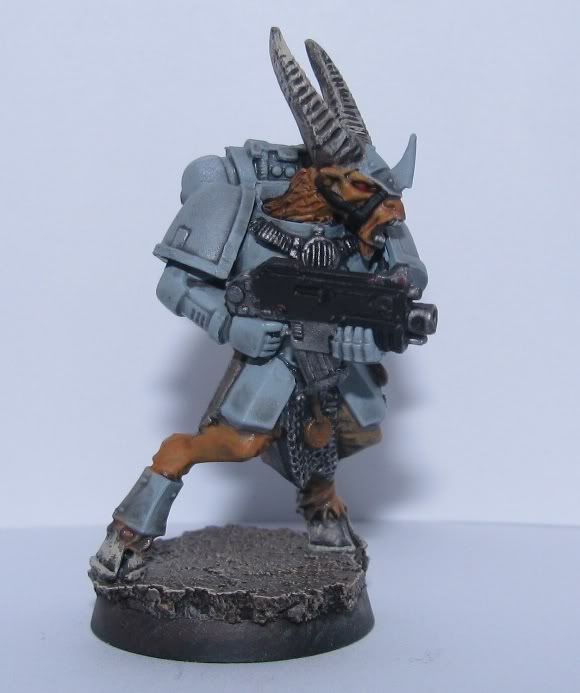
And as for the new Ungors converted, here are a couple shots of them. First the front.


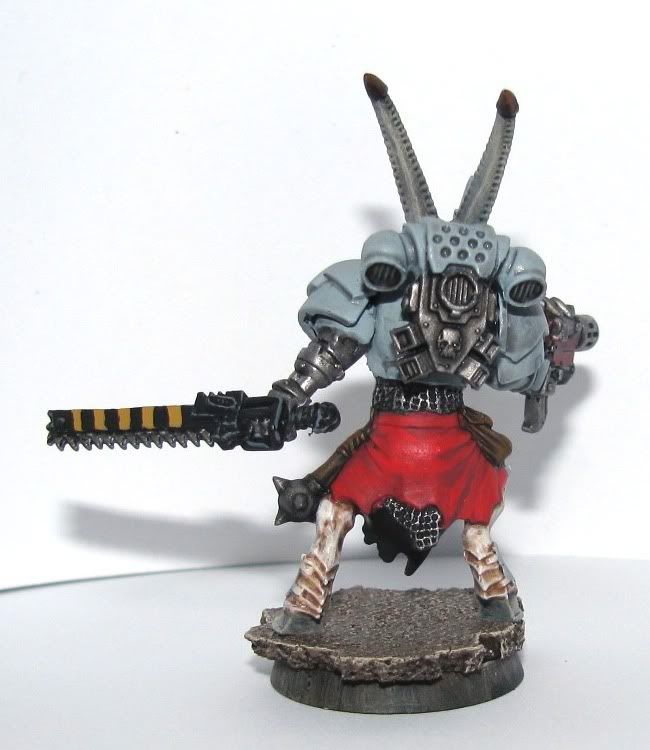
Finally, the sans-pants shot of the rear...


First off, my opinions (you are welcome to share your in comments). I didn't have high hopes for these guys at first glance out of the box. However, since then they've really began to grow on me. Of course, so will mold if you stand still too long. I think that the old Ungors were more of an animal that walked upright. The new Ungors seem more like a beast-man to me. This is also true of them when not converted and used as actual Ungors in Fantasy Battle. Since they are more man-like, I chose to paint them in the general theme of the GW painted ones. They have human flesh colored skin where there is no fur, and a darker color for the fur. Once again, I think this makes them look more like beastmen than upright animals. Another thing to note is that these can be bought by themselves in a box. The old Ungors were the minority in a box full of Gors. Not so much left over bits with the new Ungors. All in all, I think I like them just as much or maybe even more than the old Ungors I converted to guardsmen.

So what do you think? Old or new, which is better? Feel free to leave a comment and let me know what you think!

Sunday, January 23, 2011

Ungor Booty Call... WTF?

I just wanted to share a quick observation with you guys...

As you may have noticed, I like to do conversion and I have a soft spot in my heart for that rare creature, the 40K Imperial Beastman. I've used some Ungors from the old box to do some of these conversions and I think they have come out pretty nice.


But, those Ungor models are no longer made. There are new models for the Ungor that came out with the WHFB most recent Beastman Army Book. This could turn out to be a good thing, as you used to have to buy a box of combined Gors and Ungors to get just the Ungors, and you got more Gors than Ungors for your trouble. Now, you can buy a box of just Ungors... better right? That remains to be seen. I recently picked up a box of the newer style Ungors to see what kind of converting I could do to them. I was pleasantly surprised to see that they are not covered in Chaos symbols I'd have to shave off, nice start!


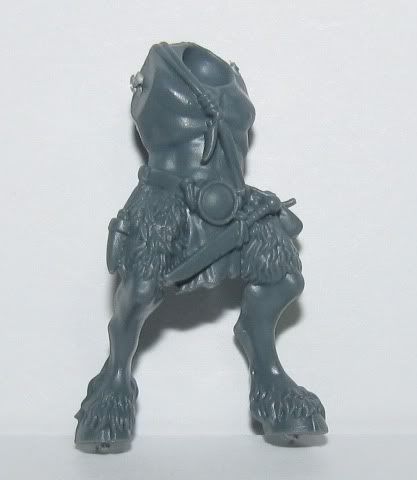
Then I turned the sprue over. I was dumbstruck. I think there is a reason you never see a rear shot of these models on the box, website, or anywhere else. But, I'll let you in on their dirty secret...


Yes, just like all cartoon bears, they have no pants on. That's right, bare, beastie, buns for all the world to see!

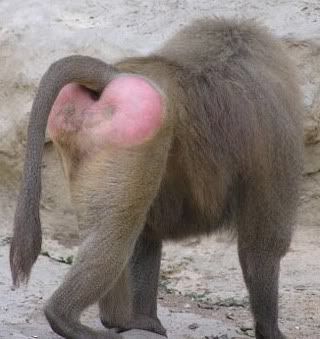
I haven't honestly decided how I feel about this yet. I guess there is something fittingly feral about running around with your (literal) tail hanging out. I will reserve judgment until I've had a chance to convert one or two and paint them up. Besides, I think they'd be the only bare bottoms on the average 40K game table. They might even make for a decent distraction technique? Maybe it won't be that bad? I've already found some reference material to work off of!


Thanks for stopping by. I'll keep you all posted on how these conversions turn out, until then, keep your pants on!

Sunday, January 16, 2011

New IG Go For A Dip

Quite some time ago I bought a can of the Army Painter Quickshade product, Strong Tone. My original intent was to paint a lot of skeletons for an Undead WHFB army. I dipped a few test skellies and they turned out really good. However, that army fell to the wayside and was eventually traded away on the Barter Bucket over at Santa Cruz Warhammer. Since I've been wanting to work on some Imperial Guard I was cruising the interwebs and found someone mentioning that they used Quickshade on their IG. So I figured since I already have the stuff, why not give it a shot? What follows here are my steps on some test minis and the results. One other note. I've been trying to get better at taking pictures as I work, so this post is pic heavy. And, as always, you can click any picture for a larger view.

As seen in my previous post, I have been trying out some new paint from Krylon in their camouflage line. So these guys were painted first in that product for a base coat of khaki.


Then I put some Catachan green on the armor and guns. Two light coats is quick work over the khaki color...
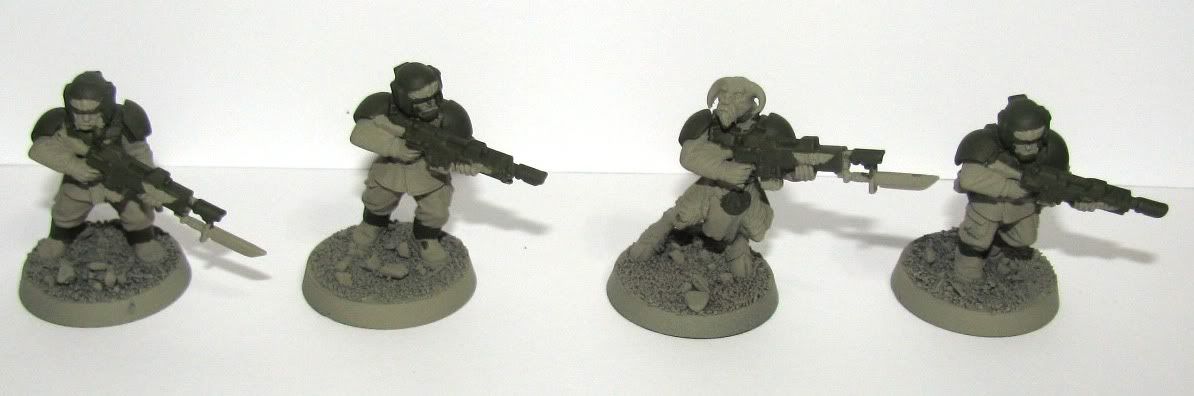


Chainmail for the gun parts, blades, and other metal bits. Shining Gold for the Aquilas, belt buckles, and a couple of details on the beastman.
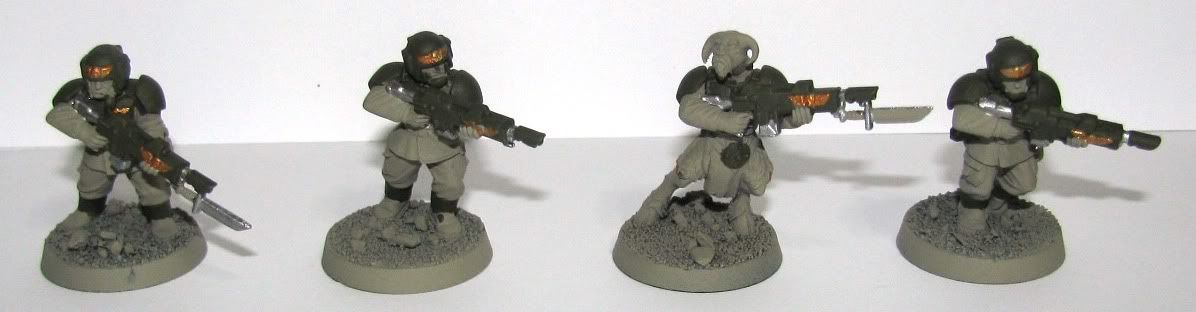


High Elf Flesh for the Guardsmen flesh and Vomit Brown for the beastman flesh & fur with Bleached bone for his horns & hooves. I also painted the belts, accessories and any other leathery bits with Snakebite Leather...
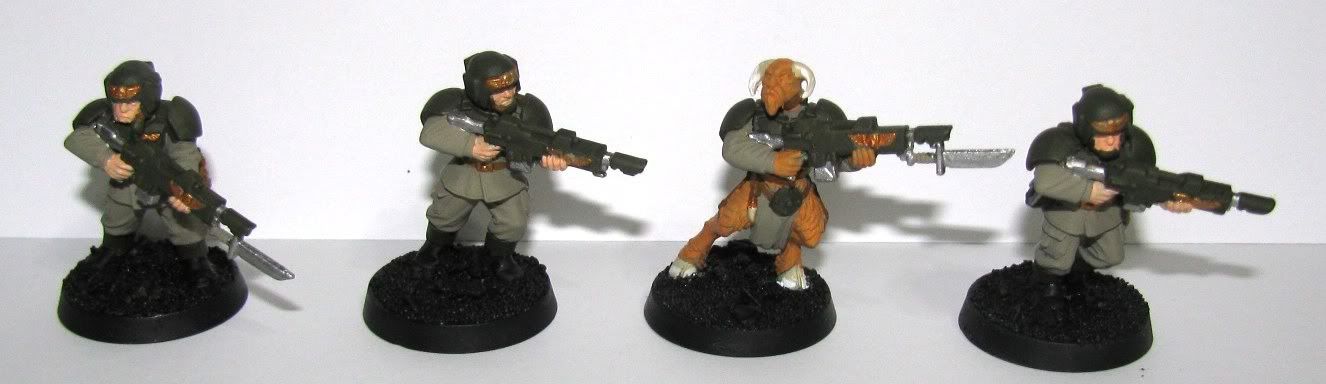


While it's hard to see, I did do some very basics highlights. I edged the armor and guns with Camo Green and highlighted the khaki just a bit with actual Kommando Khaki, which is very slightly lighter than the Krylon spray. So much so, that I'm not sure the highlight really did anything. I also hit the beastman's horns and hooves with a little Skull White...
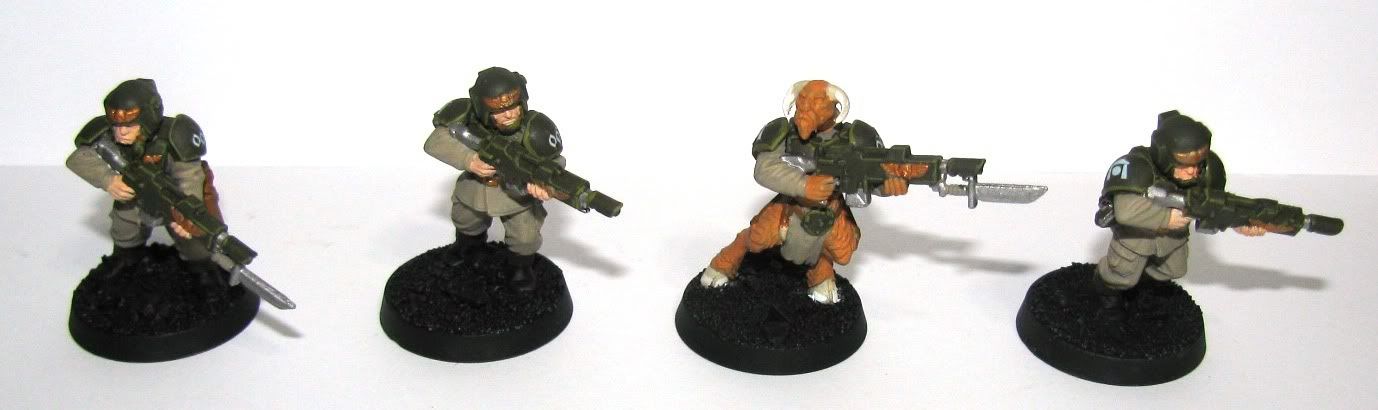


I'm terrible about squad markings and things like that. So I figured I'd use the IG decal sheet to cheat my way out of some freehand painting. I brush on 'Ardcoat first, then apply the decals using some Model Master Decal Solvent. After they are good and dry, I put another layer of 'Ardcoat on, just to make sure they are sealed down and hide any decal edges. I hit them with Testors DullCote to take the shine off before continuing...
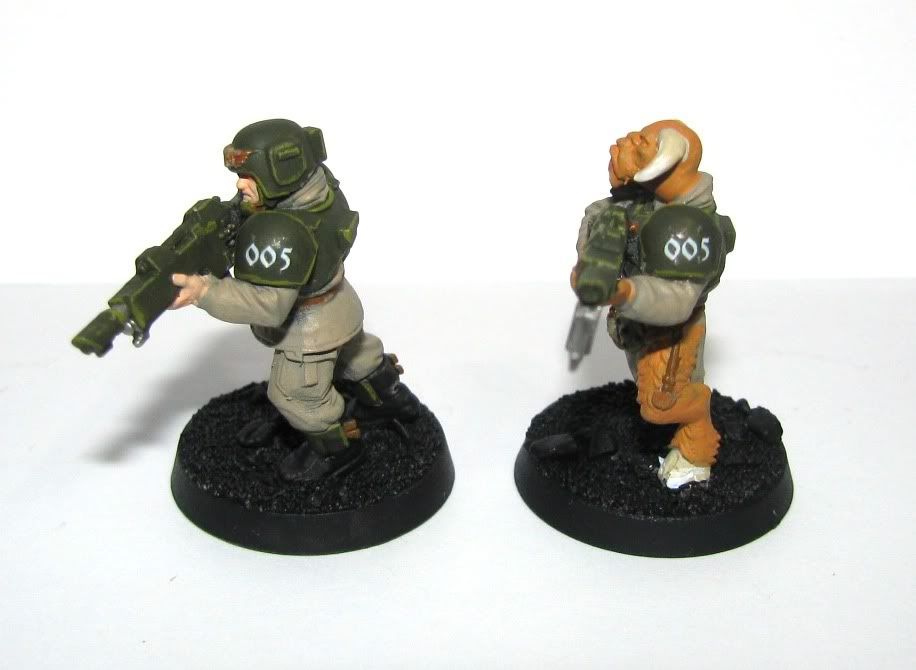
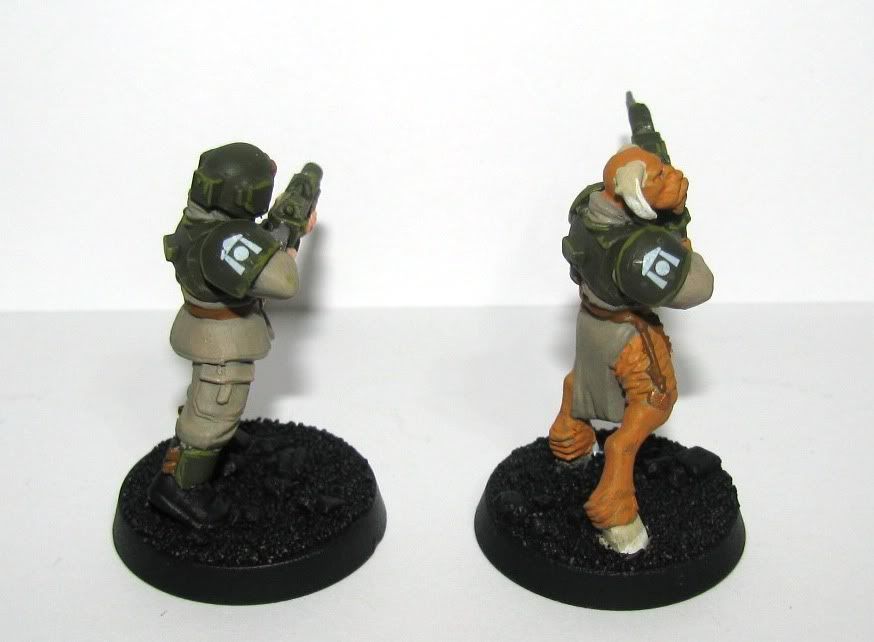


Next up is the dip. After reading lots of reviews and how-to's online, I decided that actually dipping the minis was not my best bet. So I used an old brush and slopped it on them manually. One thing I read that does seem to help is to hold the mini upside down while doing this. It really does help. As you can see below, they come out very shiny.
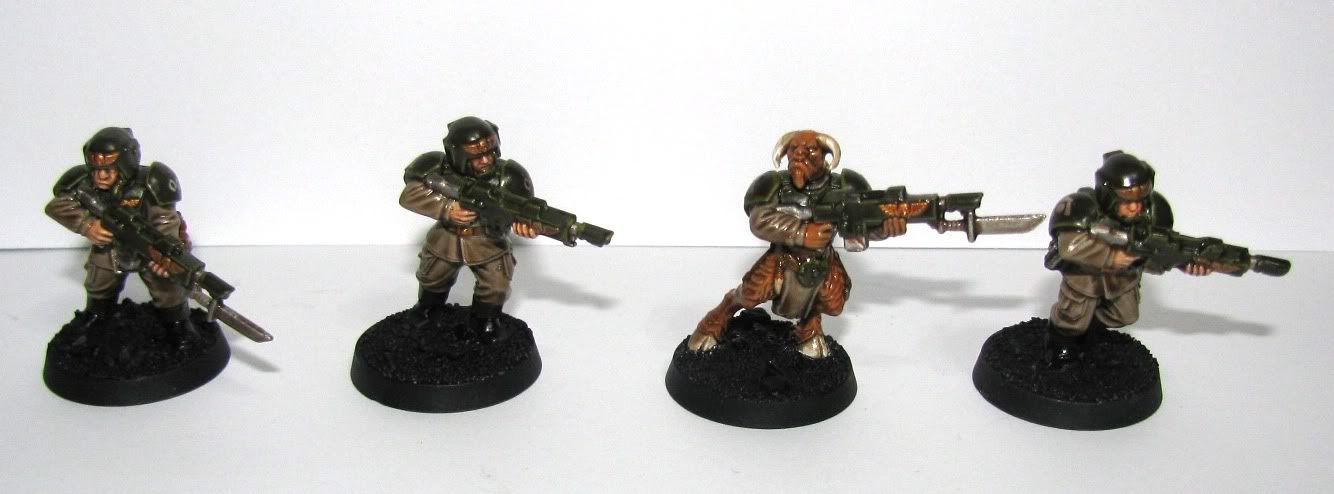
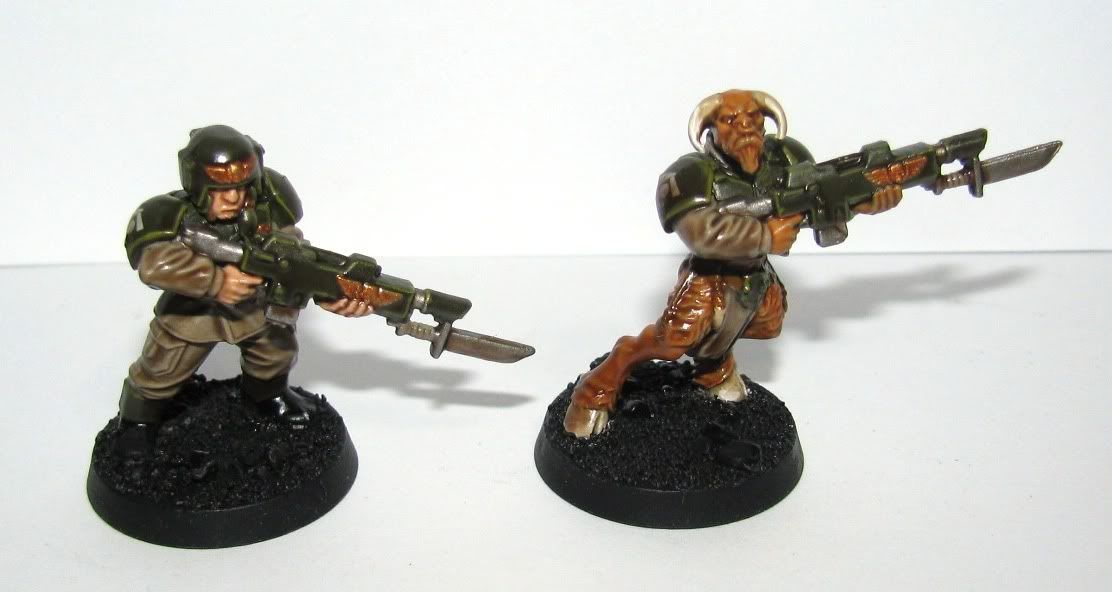
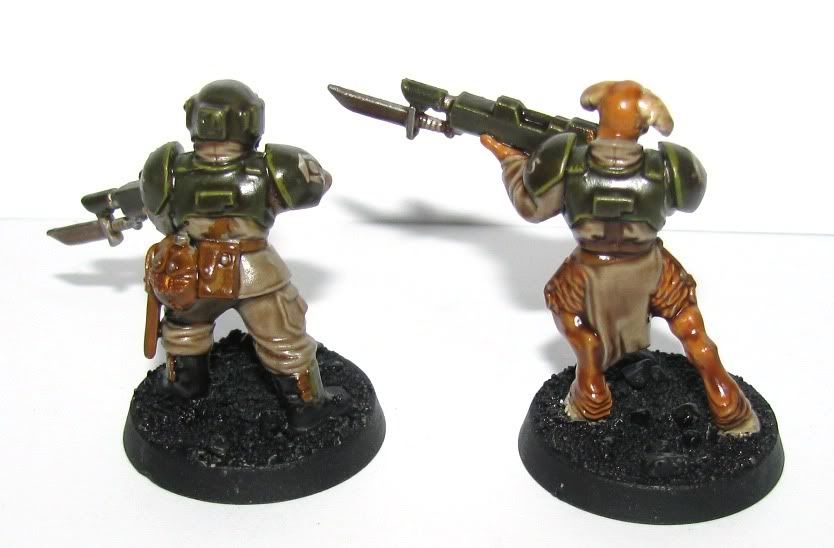


After a 24 hour dry time, the DullCote really makes them look better!
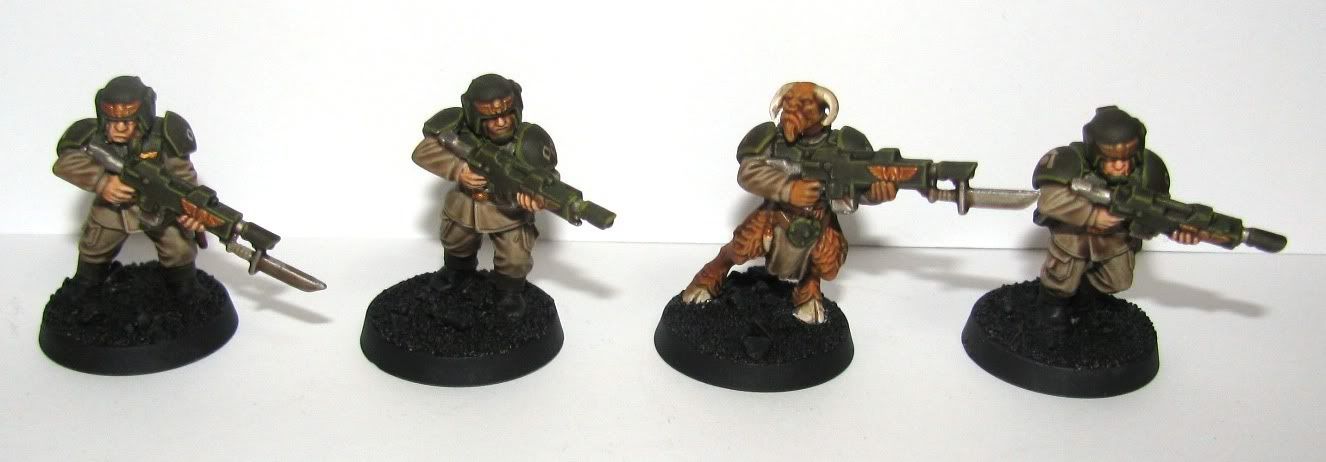


Some work on the bases and these guys are done.
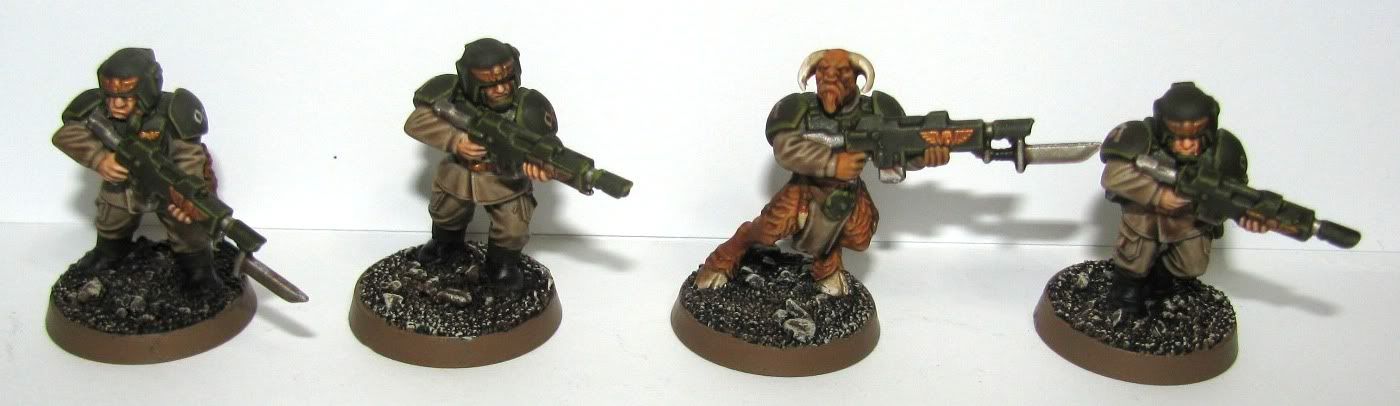


I'm not sure what happened with the bases. They don't look like my bases usually do? They might get a redo eventually. And oh crap! That beastmen has a nose ring. As you can see the Quickshade will not hide my glaring base coat faux pas, but it does shade a mini nicely.

I know some folks hate the dip, and say it's not the quality result that you get from hand painting. But I can say it makes these guys look better than the ones I hand paint and in a fraction of the time. So while I won't use it for everything, my Guard is definitely getting the Quickshade treatment.

Comments and critiques are welcome as always, I only ask that you work a wild African animal name into your comment somewhere. Something you've seen on safari perhaps...

Thursday, September 16, 2010

I've got the biggest horns (so I'm in charge)

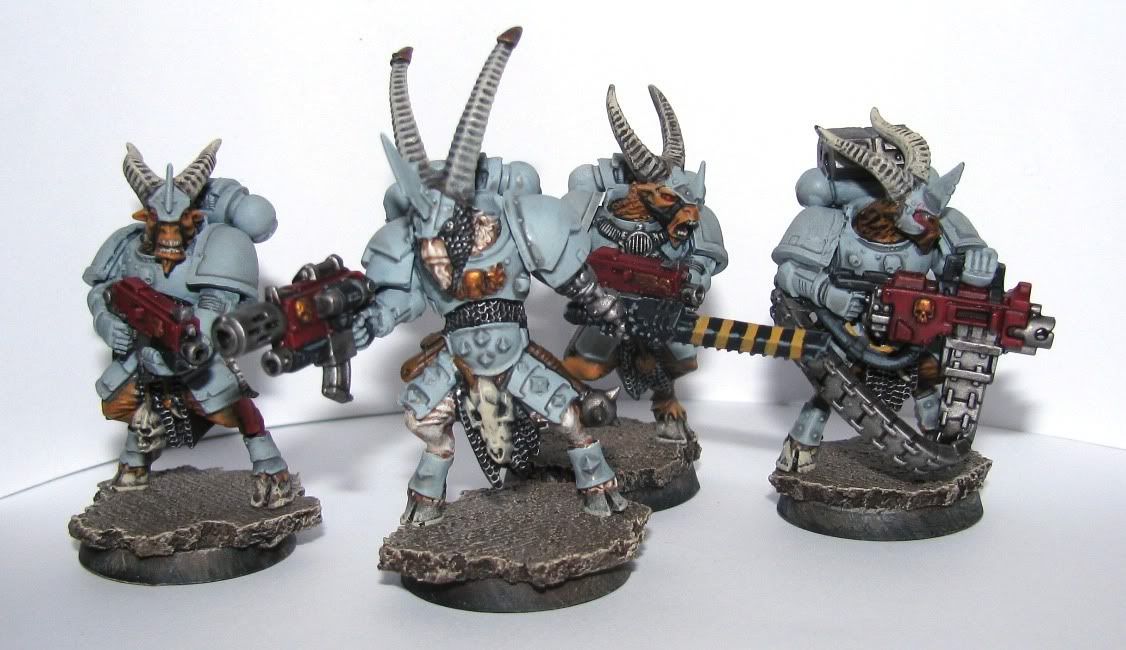
A quick update to share some progress I've made on my beastly kill team.

I wanted my squad leader type beastie to stand out from the crowd. So I gave him the biggest horns, the custom armor, a combi melta, and a bionic arm too! He was born with white fur, which I'm sure is some sort of rare omen of awesomeness when you're a space goat.


From the front you can see most of the conversion work. He has a torso that is made of a terminator chest with regular power armor back. I also slipped in a piece of plastic card to bulk him out a bit. The shoulders, bionic arm, and combi weapon are from the marine Commander sprue.


Not much to say about the back. I did use procreate putty to extend the chain mail that the mini already had in the front of the lower torso all the way around. It's not perfect, but it passes for chain mail.

Here is a group shot of the team so far...


I'm not sure I'm happy with the overall stance of the Great White Goat. I may try to get a little creative with the belt sander and grind away a bit of his base on one side. The idea will be to make him lean a tiny bit less to his right.

Well, work is slow due to the real world constantly interloping on my hobbies. It's not looking to get any better any time soon. Especially with Civ V coming out next week... woot. I just want to say I do appreciate all the folks that stop by and I'm determined not to let slow turn into stop.

Also, I've joined the Special Operations Killzone forum. All the cool people are doing it and you want to be cool don't you? Well, ok, it's for all the cool people who are interested in the Special Operations Killzone project. And, there's games on the bottom of the forum index page. Silly, fun, time wasting games. Damn them.

Hope you've enjoyed your visit. Feel free to drop a comment and say hello.

Sunday, September 5, 2010

Multiplying Beasts (Beast Marines Post)

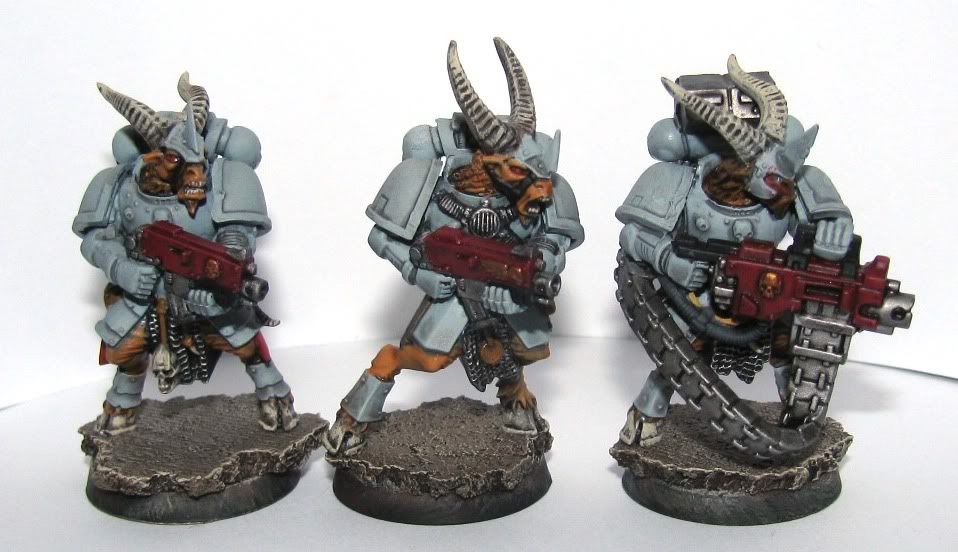
I've been really enjoying working on this little side project, so I thought I'd share my work.

These guys are a project inspired by horRAiN on his blog of the same name. I built one just for fun and liked it so much I wanted to build a few more. Luckily for me, Big Jim over at Galaxy In Flames gave me just the excuse I needed to build a small force of these guys...


The Special Operations Killzone rules are the perfect excuse to put together that small, flavorful, army you've always wanted but never had a reason to build. In fact, there are couple folks out on the interweb putting together forces made up of old or out of print minis. Check out Big Jim's Squat Team or B. Smooves cool Roge Trader era Marine Team for example. As a guy with not much hobby time and virtually no gaming time, I'm really hoping this skirmish game takes off. It would be awesome to be able to get some games in and this may be the way I find time to do so.

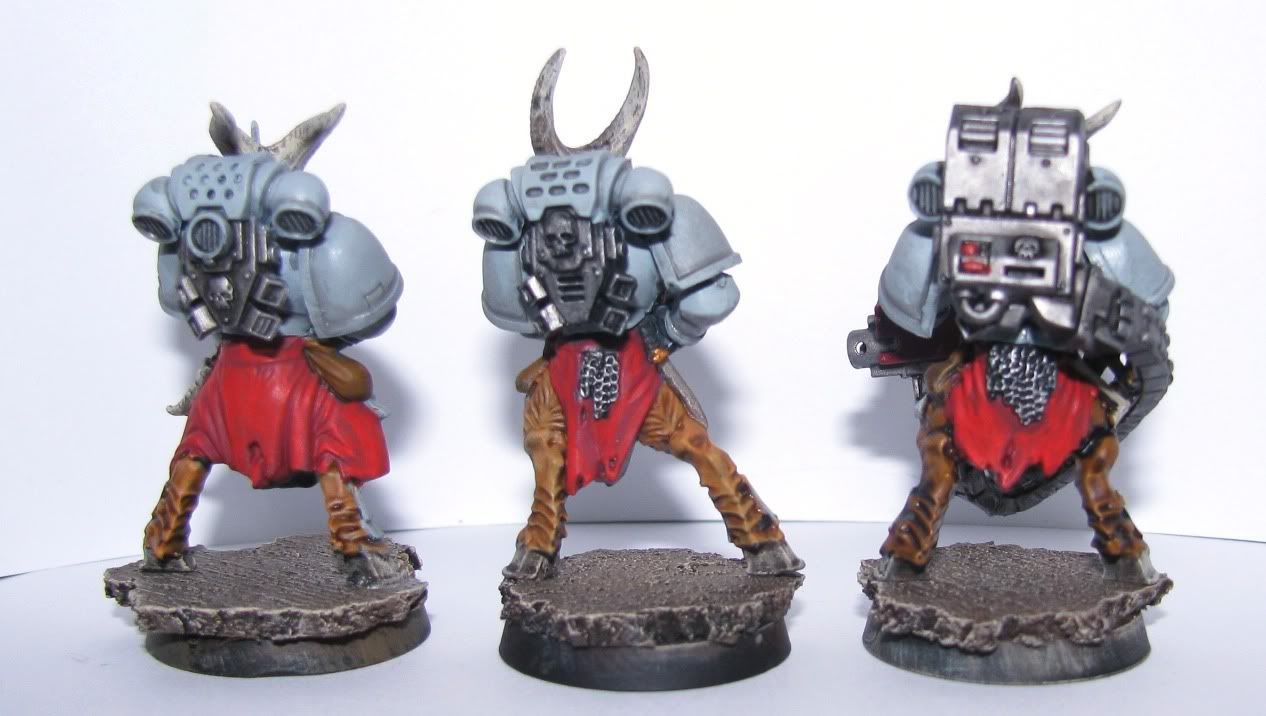
Anyway, back to the Beasties. I've got two with bolters and one with heavy bolter finished. I say finished, but I'm sure I'll be touching up crappy paint work till the cows come home. You can click the pictures for a larger, flaw spotting good time version...


You may notice that the flesh is not identical across all three. Since these are going to be part of a reasonably small force, I wanted to give them each a bit of personality. This will mostly be achieved by back story and festive naming, but also by not all having the exact same skin tone. We are all different, why wouldn't huge mutant power armor wearing goats be?

Comments, critiques, and pointing & giggling are welcome as always. So feel free to leave a comment if you like. Thanks for stopping by!

Monday, August 30, 2010

Beastly Marine (and camera fighting)

This blog is to show the prototype Beast Marine I've done up. I won't get sidetracked by how it took me all day to get a decent (but still not great) photo of it. I will however ask that if someone can explain to me how to adjust white balance on a point and shoot, that would rock. I get everything lit up all nice and pretty, then my camera helps me out by adjusting the white balance making the background grayish and darkening my pics. The armor on this guy, for example, is not such a bluish gray as it looks. I think it looks better in 'real life'.

Anyway, here are the pics. I realized while taking them I forgot to finish the bolter. Doh! You get the idea anyway...


I've also tried my hand at cork basing. I think I rather like the results. I don't see myself doing a huge army of these guys, but a Kill Zone team might be a good goal to go for!
Feel free to drop a comment. They are always appreciated!

Saturday, August 21, 2010

Opinions (I need yours)

Opinions, everyone has one and I need yours!

I stumbled upon this lovely little tutorial on the horRAiN blog about making Beastman Marines. I've made a few beastly guard in my day, but I'd never tried my hand at Beastly Marines!

Now I followed the tutorial with just a couple differences. My body to legs joint is a bit different, and I greenstuffed the heads to let them sit a bit more naturally. This is my opinion only as there is nothing natural about a goat wearing armor and firing a bolter. Swinging a two handed axe, maybe... but not firing a bolter.

I also tried incorporating the original beastman shoulder pads into the conversion. I've shot a pic of one with Marine pads and one with beast pads. I thought I liked the beast pads better until I looked at the pic a while. Now I'm not sure if it's better or just seemed better because of the extra work put into it. Have a look.


(end models are included for scale purposes)


So, which do you like better, Marine pads or Beastman pads? I guess I'll put up a poll for a couple days, though I'd love to hear your reasoning if you have time to drop a comment. Poll is at the top right of the page.

Thanks for stopping by!

Monday, October 12, 2009

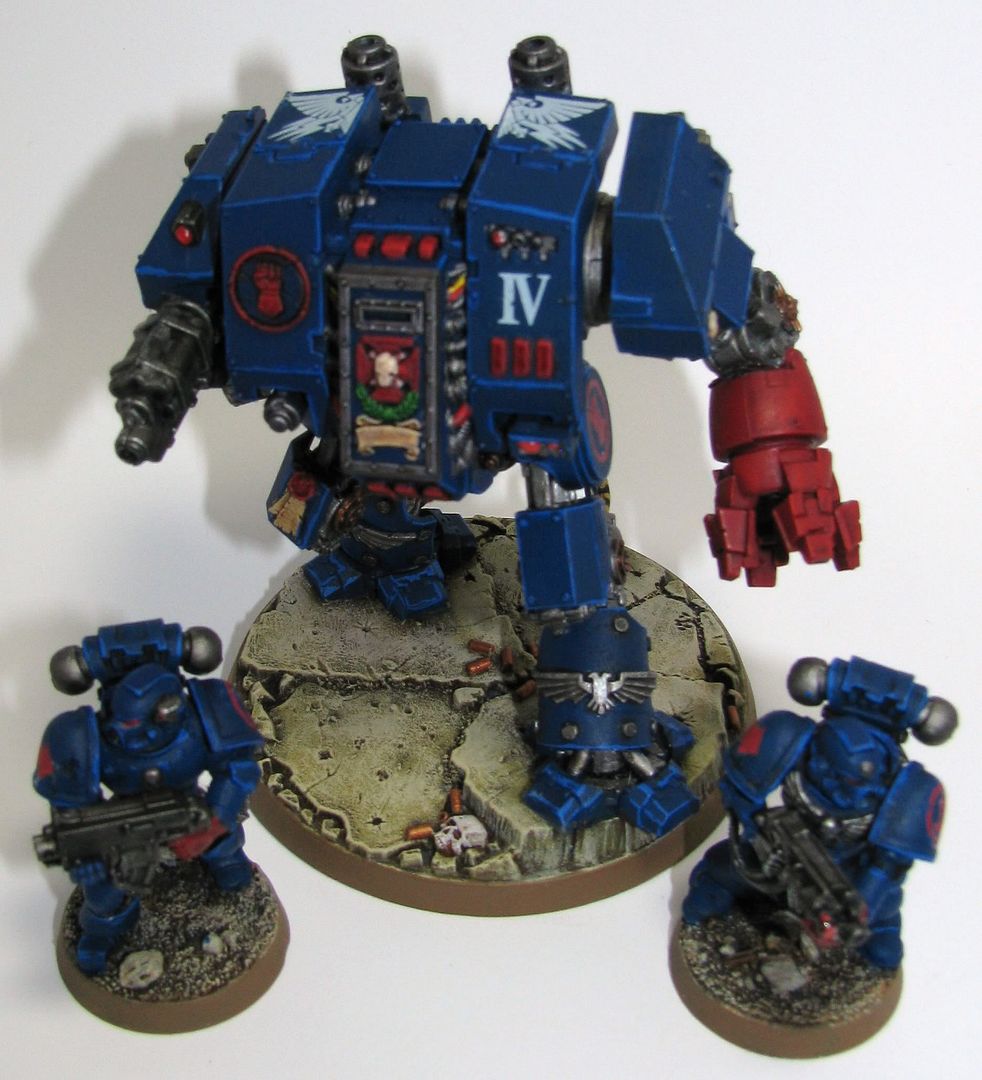
Crimson Fist Dreadnaught Conversion

This is a project I started about three years ago and just now got around to finishing. At least mostly finishing, I can always find one more thing to touch up. At some point you just have to put the brush down!

I can't take any credit for the idea on the conversion. I saw it on the internet several years ago and decided I'd have a go at it. I'd reference the page where I saw it, but that page was several pc builds ago and I no longer have the bookmark.

This is also my first attempt at painting vehicles and also at using decals "correctly". By correctly I mean I used 'Ard Coat to put down a slick finish then applied the decal and put more 'Ard Coat on top, finishing up with a spray of DulCote.

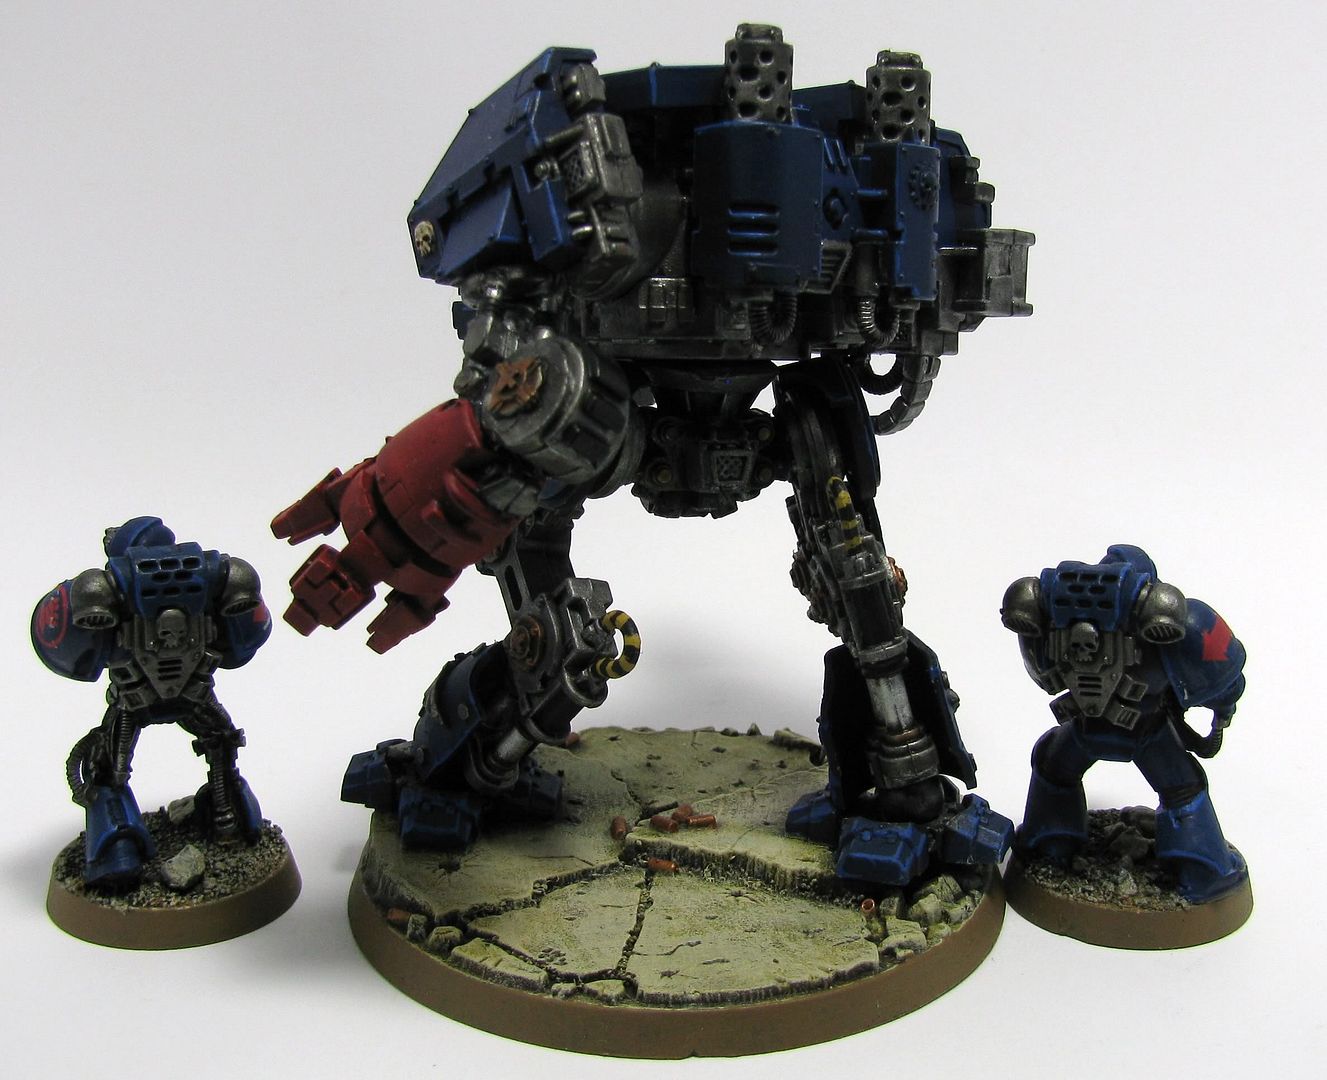
I've tossed in a couple Marines for scale. One of them is a slight conversion too, he's a lefty. Here's some pics!


The legs, obviously, come from a Sentinel. I feel that they convey movement much better than the standard legs and with the armor plates to bulk them up a bit they don't look too spindly. As for the paint, well I'm still not sure I'm set on how I want to paint my Crimson Fists. I think they are already dark enough not be mistaken for Ultra Marines, but I'm going to play around with the blue a bit more before I commit.

I hope you've enjoyed seeing what I've been working on for far longer than it should have taken. Hopefully future updates will be at least a little quicker. All I can say is, babies slow you down sometimes... as Drax is about to find out!

Wednesday, March 11, 2009

Reaver Titan Pt 11.5 (Carapace Weapon update)

Just a quick update on the Carapace Weapons project progress.

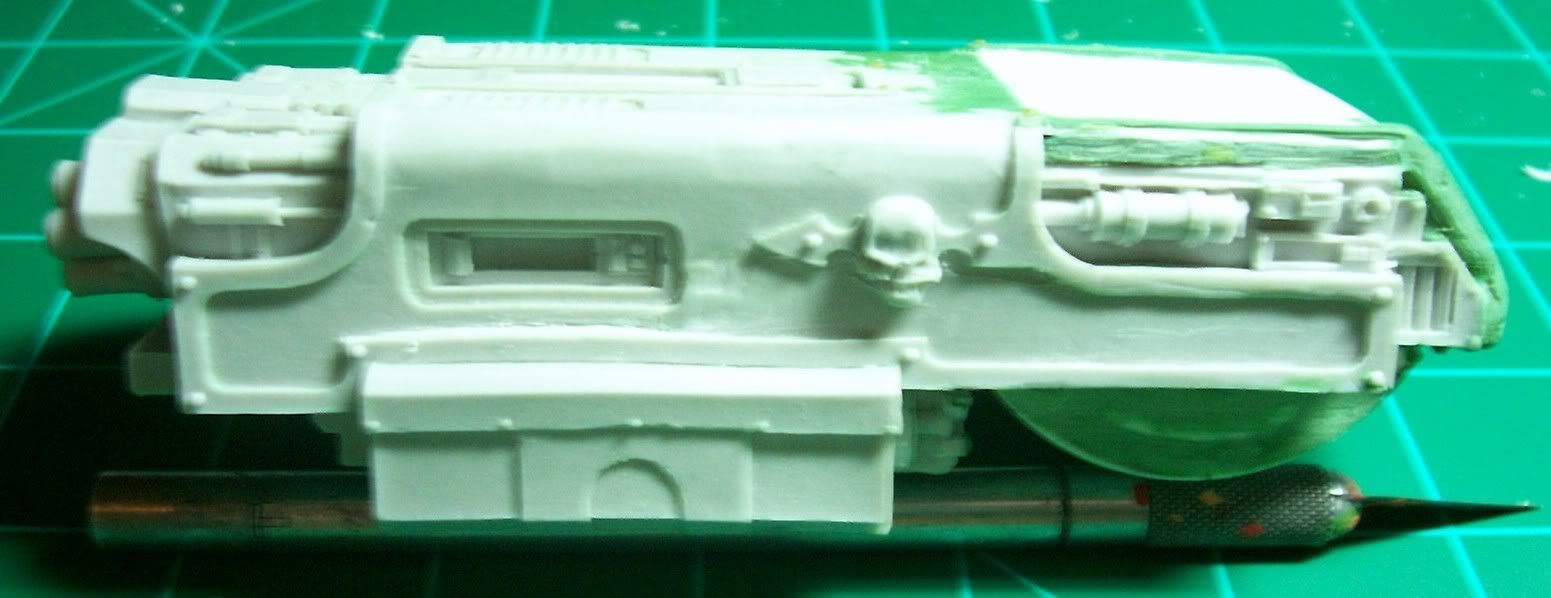
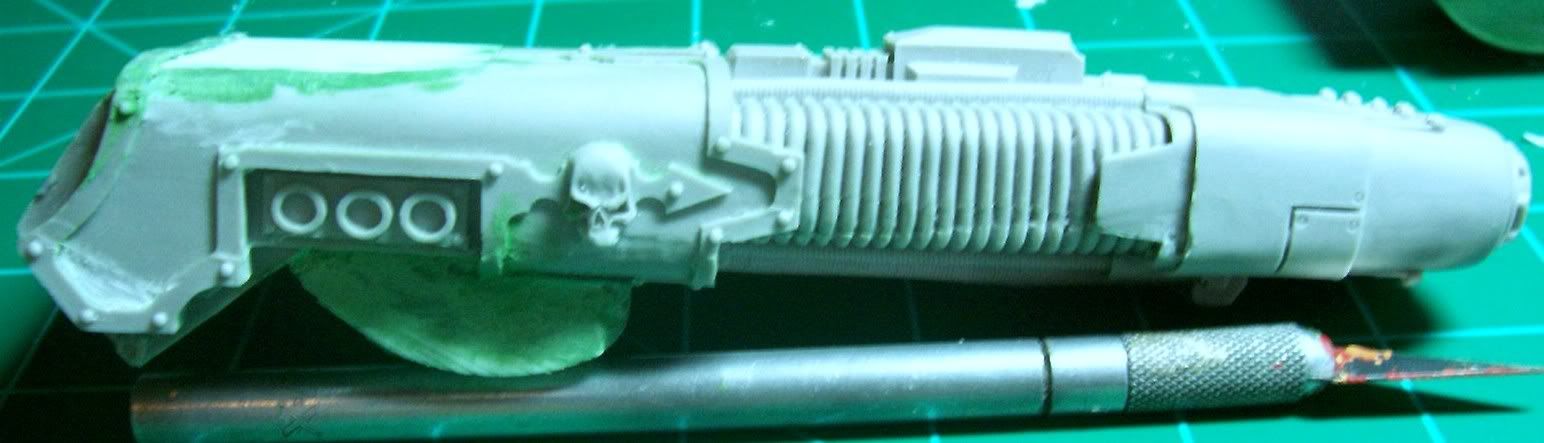
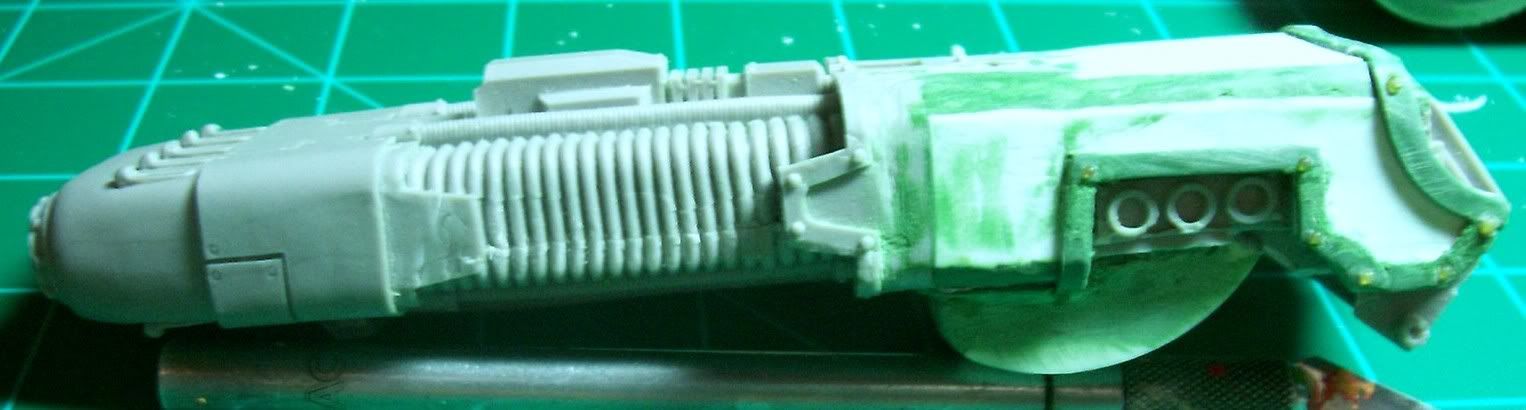
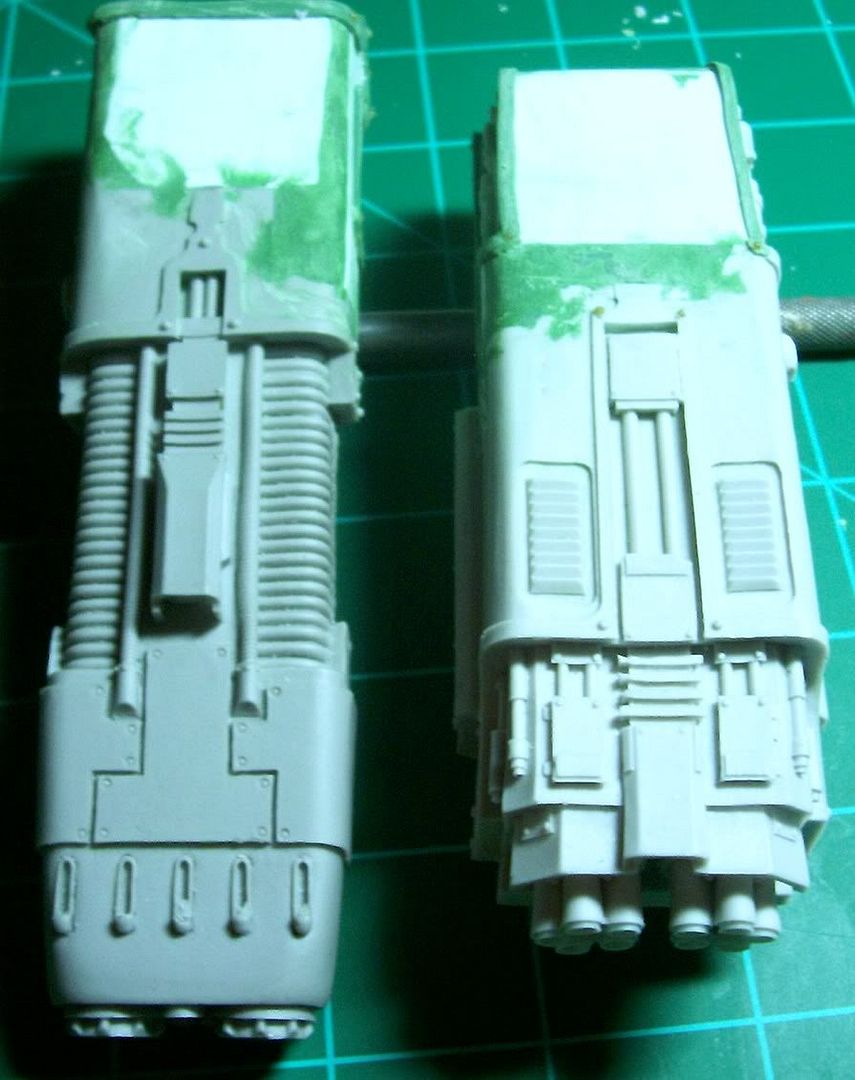
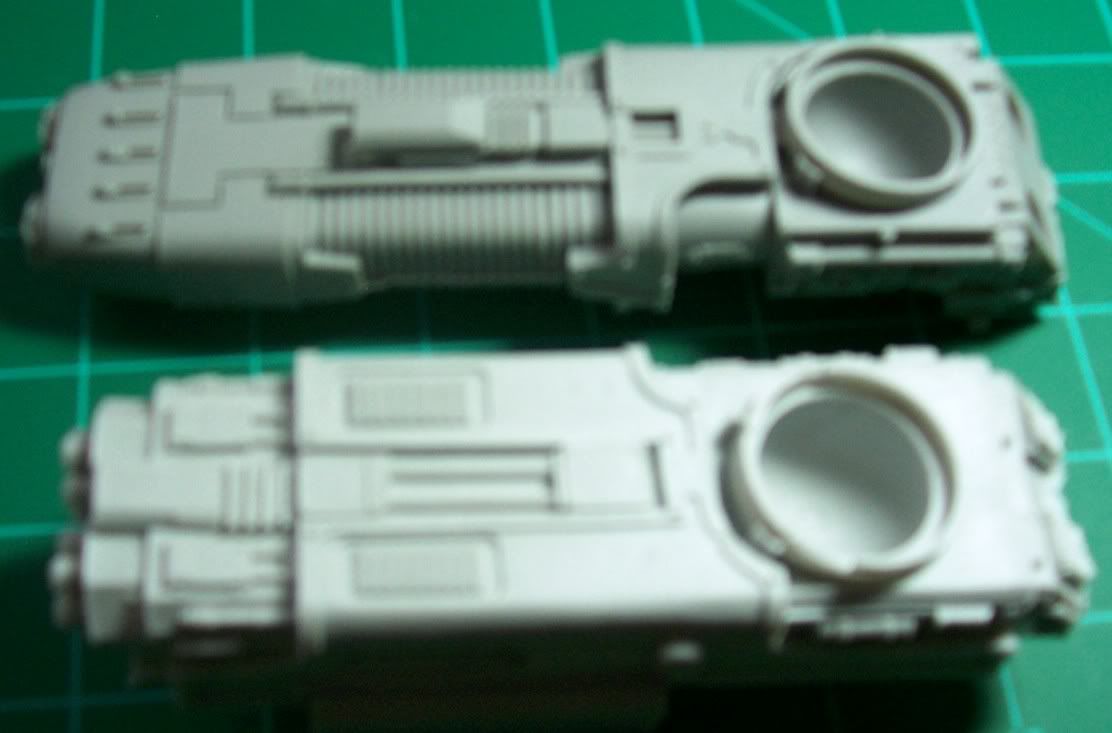
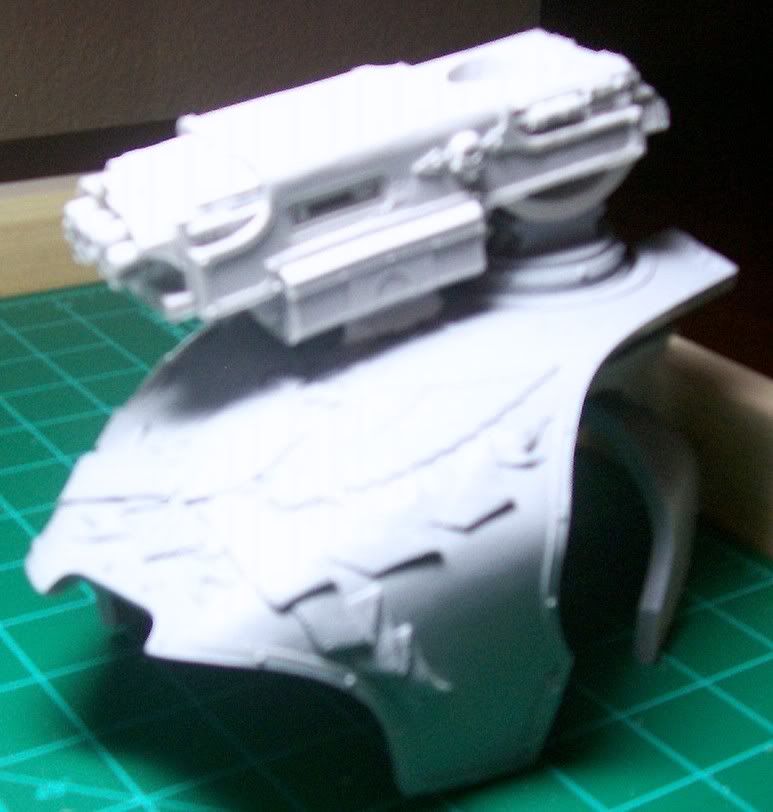
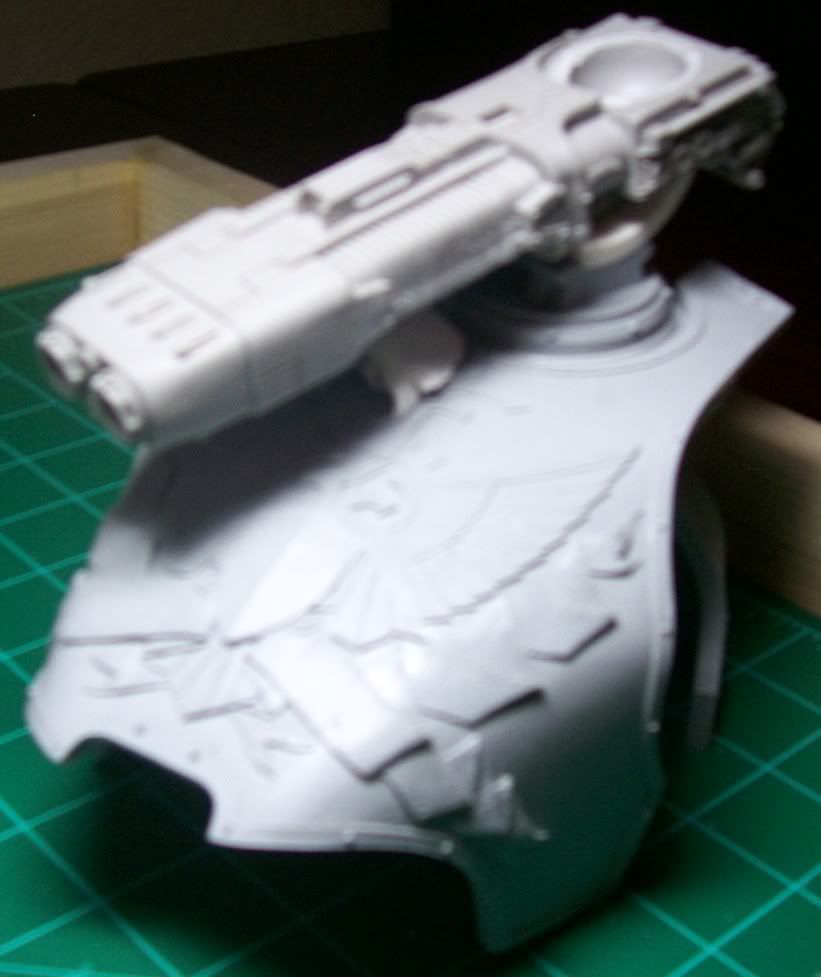
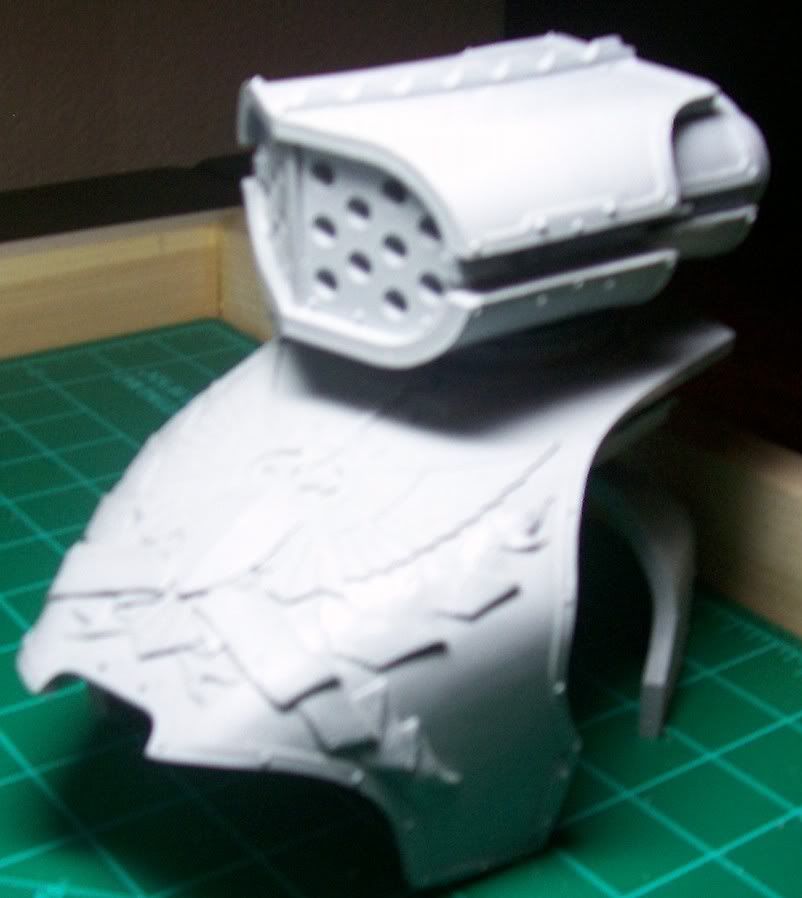
I've been working on getting the weapons introduced in the last post to look less like arm weapons and more like carapace weapons. The armor on the weapons was meant to look good on a Warhounds arms and thus was asymmetrical. I've been playing with plastic card, green stuff, and even Squadron Green Putty over the last couple days. The results won't win any beauty contests, but I think they'll look good with some strategic paint application. I even tried out the Rivet technique as featured on the Exponent Wargames site.

The photos will be presented all at once. The first two are the Vulcan Mega Bolter, Forgeworld armor side first then mine. The second two are the Plasma Blast Gun, again, original sculpted armor first, then my approximation. The last photo is a view of both weapons from the top. Enjoy!


Keep in mind I'm not a champion sculptor or scratch builder... yet. These skills need to be developed though... just in case... you know in case I have to start work on an Emperor Titan after this is finished. Oh come on! The Cyborg Trucker is doing it, I wanna be cool too!

Any comments, questions, or hideous laughter are welcome as always!

Sunday, March 8, 2009

Reaver Titan Pt 11 (What's on your back?)

Finally, back to the Reaver!

Warning, the camera is not my friend today. I'm completely out of practice and the pictures in this blog show it. I apologize up front.

The internet, being the glorious place it is, affords us a chance to meet a lot of people in exotic far away lands. One such person made me a rather unique offer a while back. This person was in a position to send me a couple of Warhound Titan weapons that were miscast. Now, the hows, whys, and WTFs I'm perfectly fine not knowing. The ends, in this case, justify my means.

This gives me the chance to do a little converting and add the possibility of variety on the Reavers Carapace mounted weapon. Except for the Apocalypse Launcher all the weapons available for a Reavers carapace are Warhound class weapons. So, I was more than a little excited when I got these in the mail a while back...


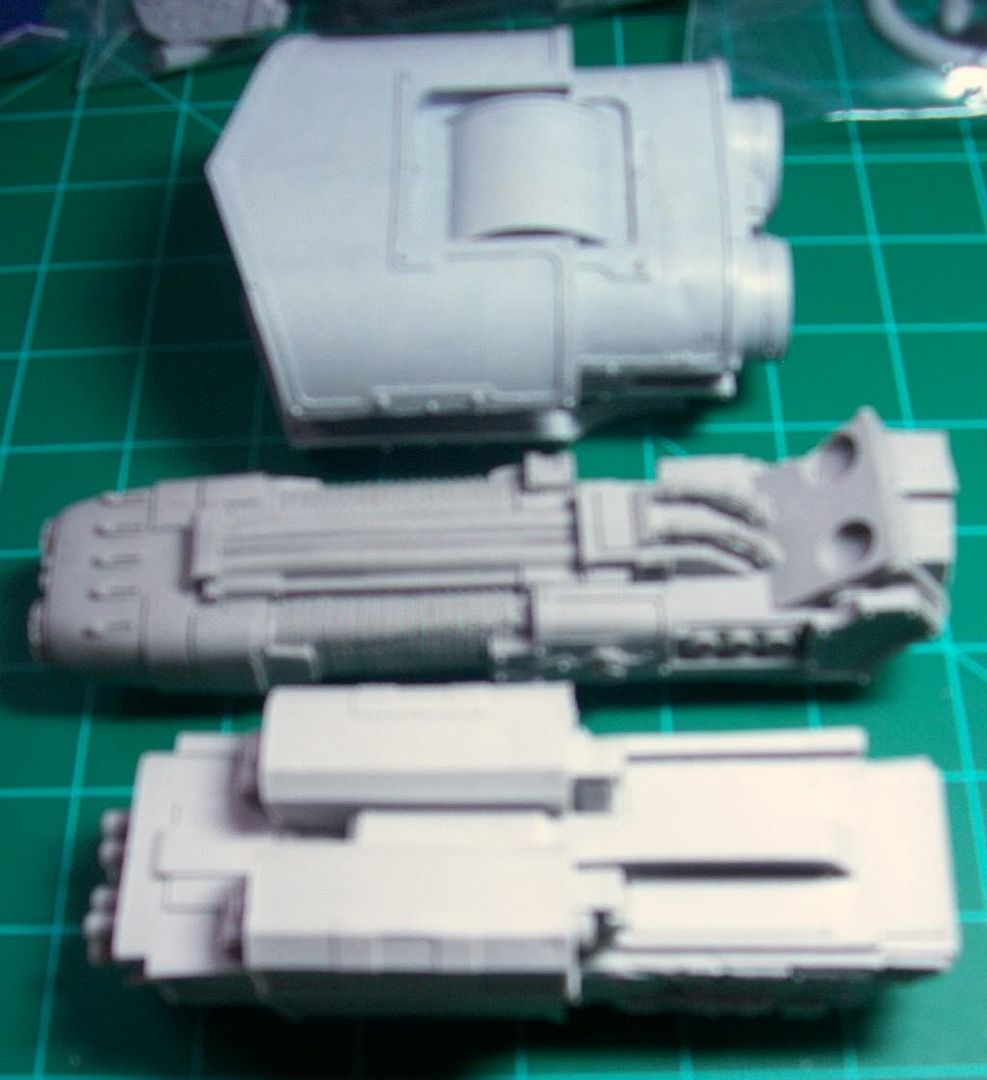
These will take a bit of cleaning up, and a good deal of conversion to look the way I would like. First off, the bottoms will have to have a bit of roundness added to them to mount to the part that rides in the carapace and allows the weapon to rotate. You can see the bottoms here, and the rounded area on the Apoc Launcher that the two new weapons are lacking...


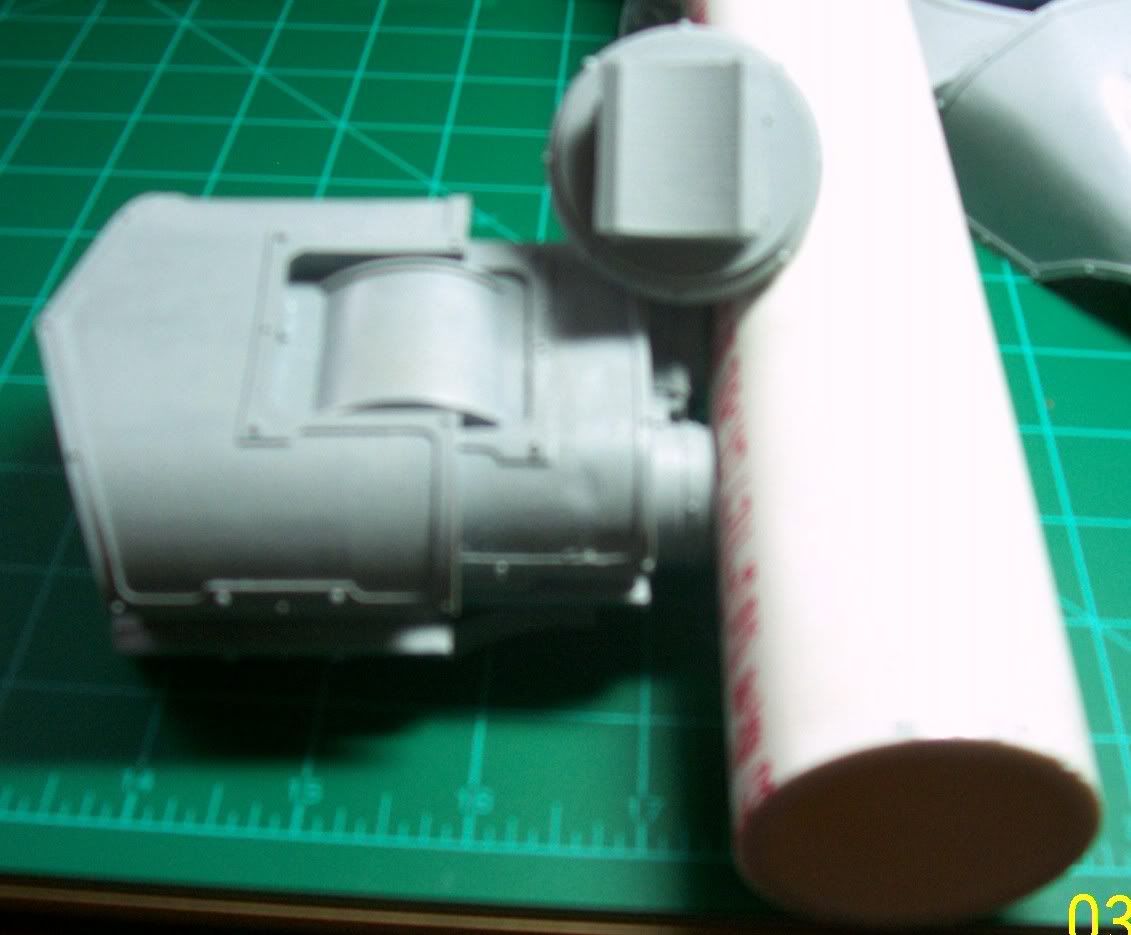
So, with this in mind, I went to my local DIY store and found a piece of PVC pipe. To my joy, I found that you can even buy it in two foot sections which is great as I don't need ten feet of the stuff. The curve matches that of the rounded part of the bottom of the Apoc Launcher perfectly!


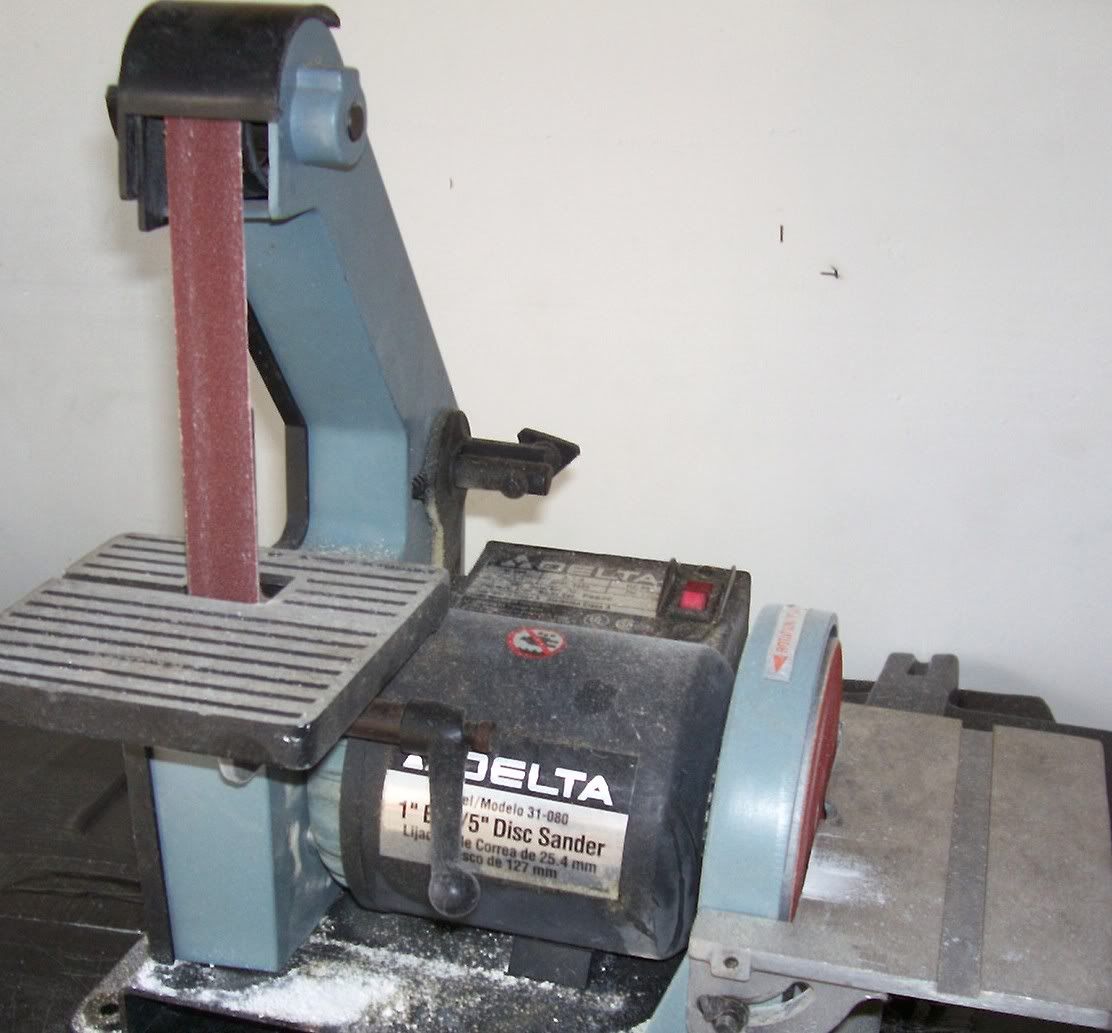
After a few minutes in the garage with two of my favorite tools, I had small pieces of rounded PVC pipe ready to attach to the new weapons. I really do love the Band Saw and the Disk/Belt Sander...


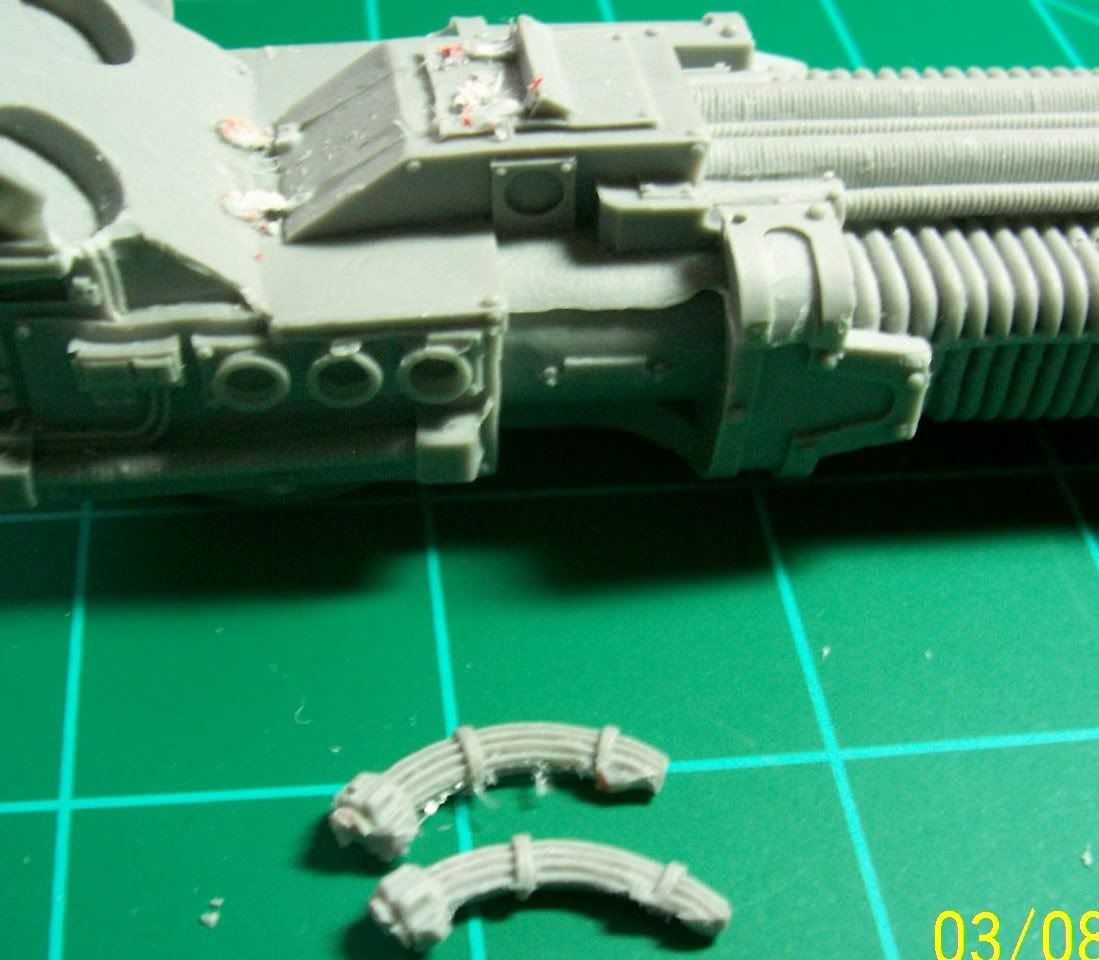
With the PVC bits ready to be added, I had to make sure that the weapons were ready for this step. The Plasma Blast gun has two small hoses that are right in the way of where the curved bit is going. As shown below...


A careful trim and I not only get the hoses out of my way, but have a couple of bits that can be used elsewhere sometime!


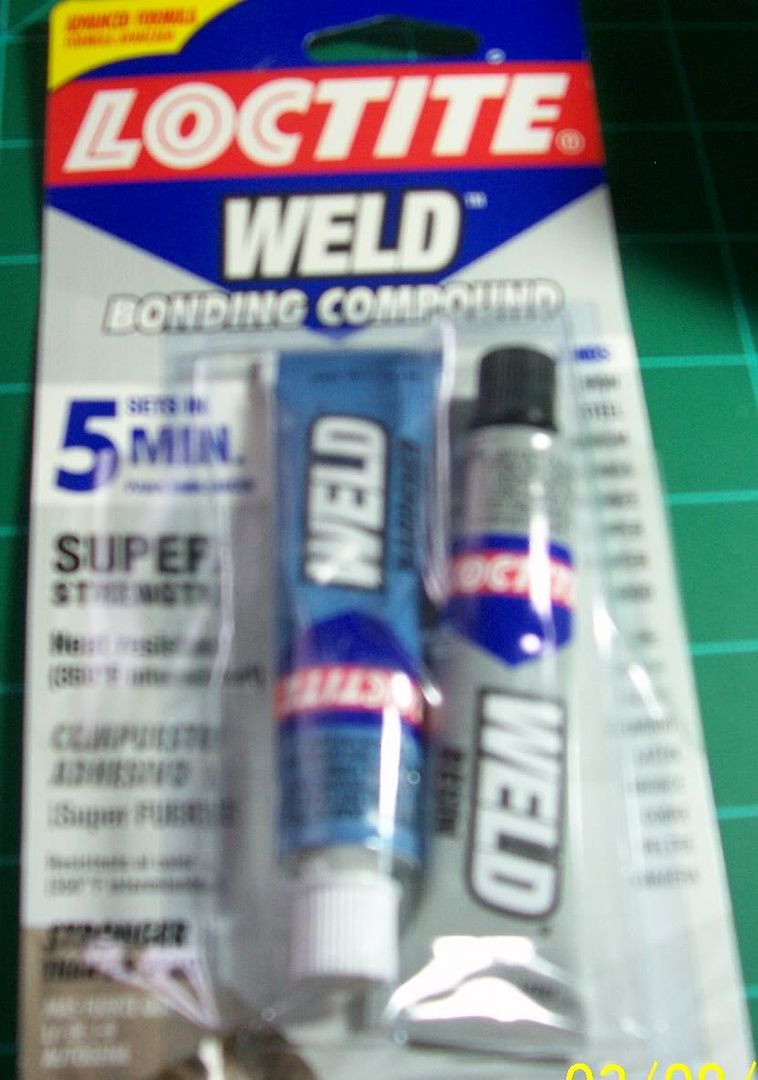
Two part epoxy is my weapon of choice for gluing large pieces. I'm a huge fan of JB Quick, but I found something new on the shelves at my DIY store. Loctite Weld. It claims right on the package to be a better bond than JB Weld (JB Quick's stronger slower big brother), so I decided to give it a go. So far so good, but I'll save a full review for another post...


Last I have a series of shots with the carapace propped up and each weapon mounted. Ignore the piece of cardboard holding the weapons up in the front, it's just for staging the mock up...

Standard Apoc Launcher

Vulcan Mega Blaster

Plasma Blast Gun


The weapons will take a good deal of work to make them look right, as I mentioned above. You can see from the pictures that the place where the Warhounds arm attached is a large socket joint. It is my intention to cover this and rebuild the armor plating to be more symmetrical. I also will try to extend the armor plating down to cover up part of the curved PVC that I added to each weapon the way the armor on the Apoc Launcher does. Some plasticard, putty, and bit of patience and I think I can do it.

Look for an update later this week in which I will have (hopefully) made some progress on the carapace weapon swap project. Please feel free to leave some feedback. Questions and comments are always appreciated!

Related Posts with Thumbnails