Thursday, June 30, 2011

Scratch Built Titan Pt. 6 (Titans are Disarming)

As I began work on the shoulders of the Titan, it occurred to me that being able to remove the arms would serve a couple of purposes. First, any dis-assembly should improve transport-ability. Second, there are a total of Four weapon arms on offer from the plans I'm working off, so being able to swap arms down the road may be cool as well. But how to accomplish such a feat of magic? With magnets!

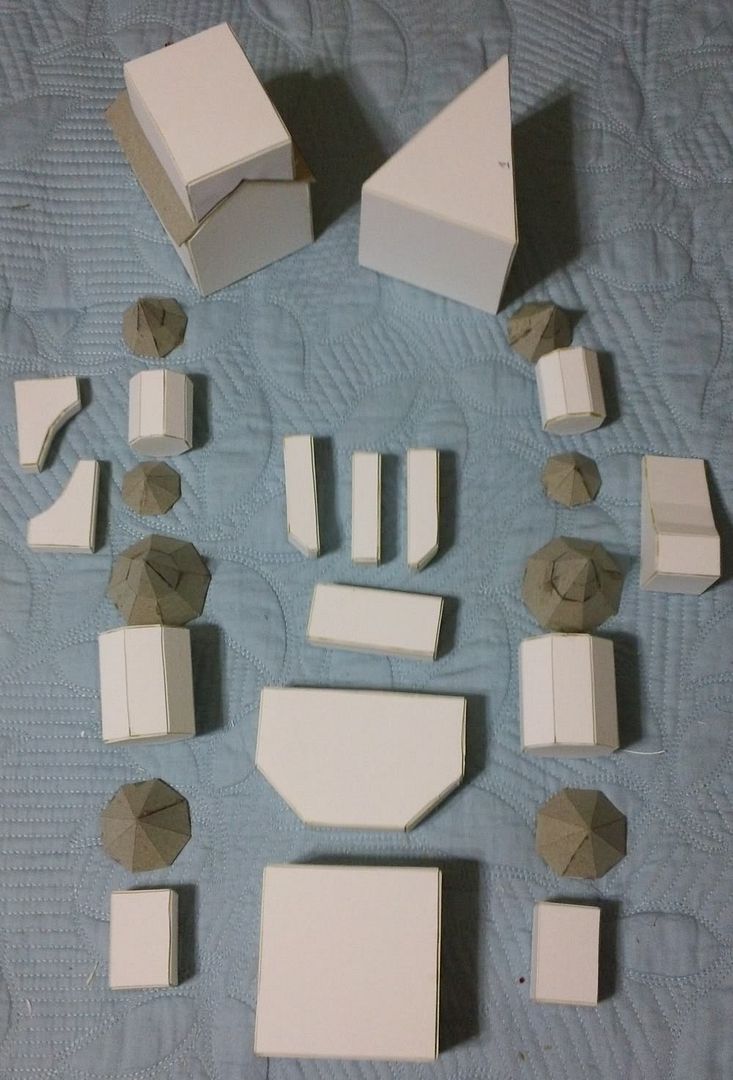
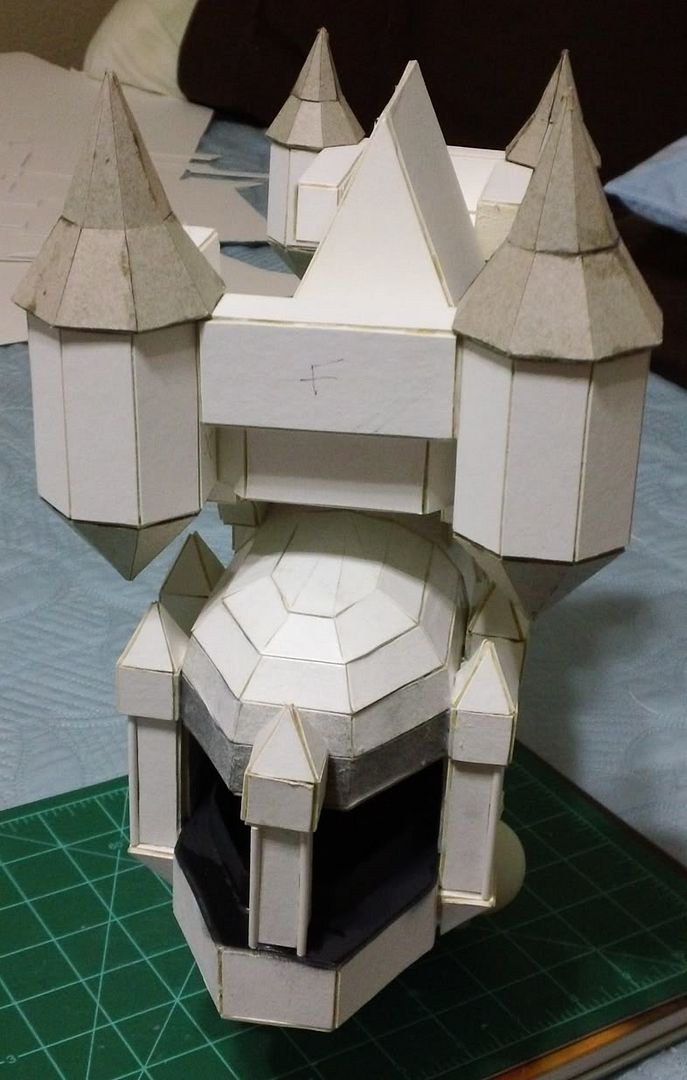
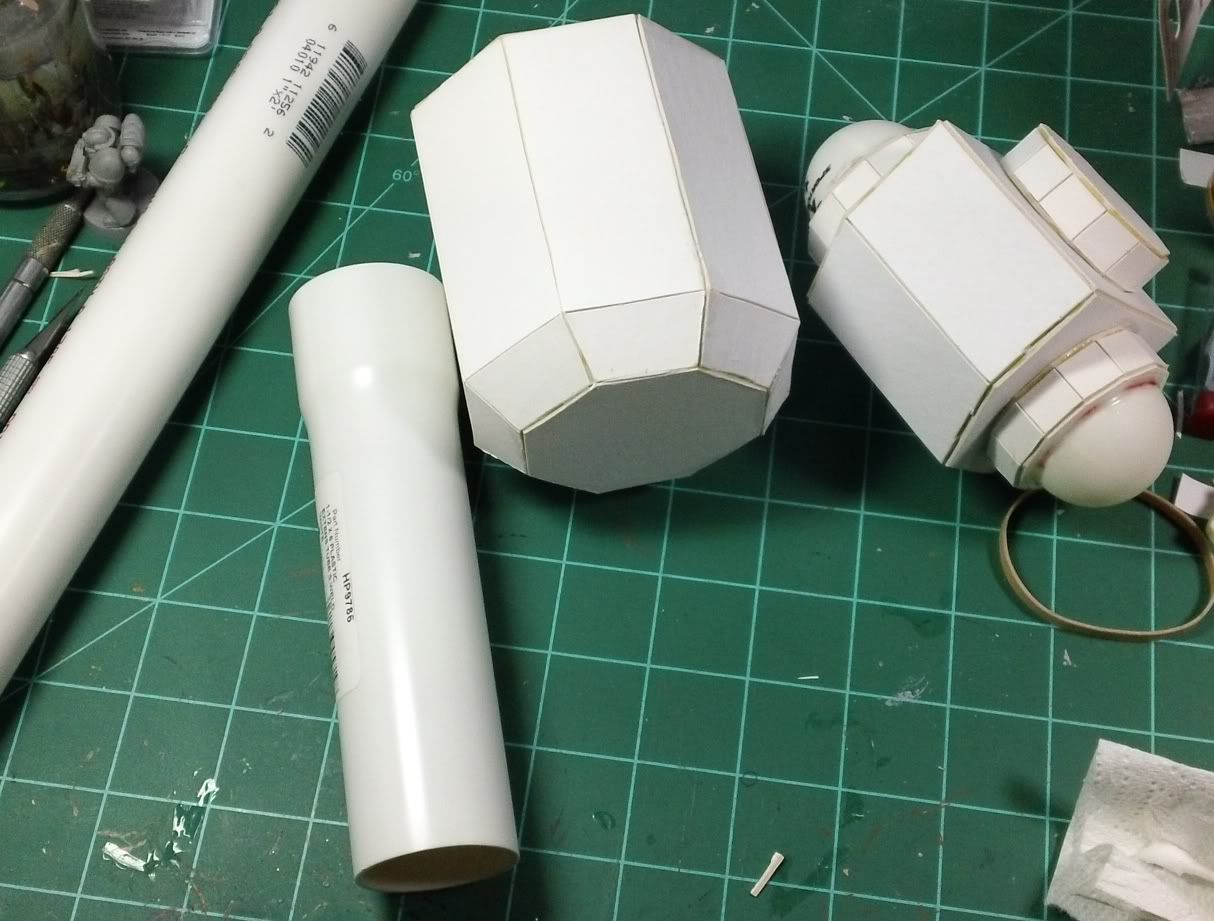
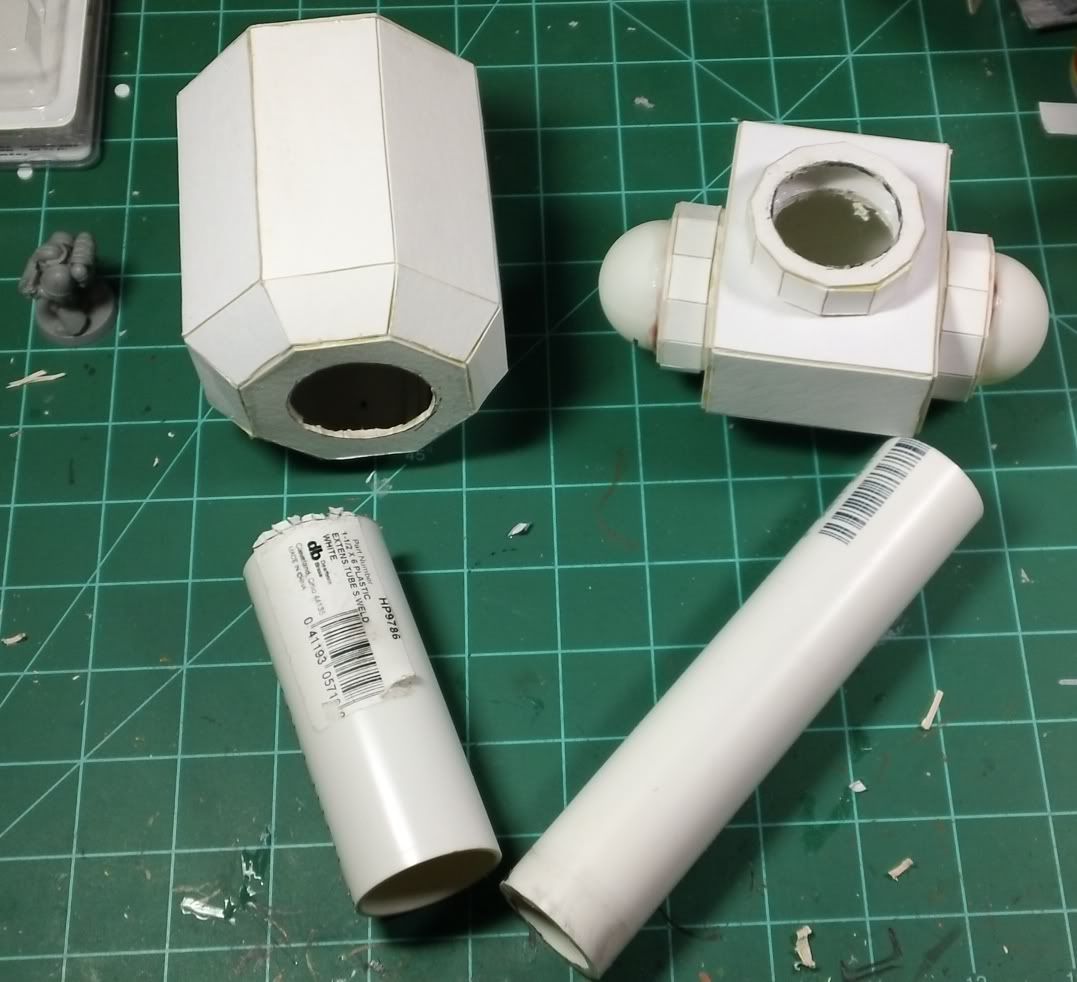
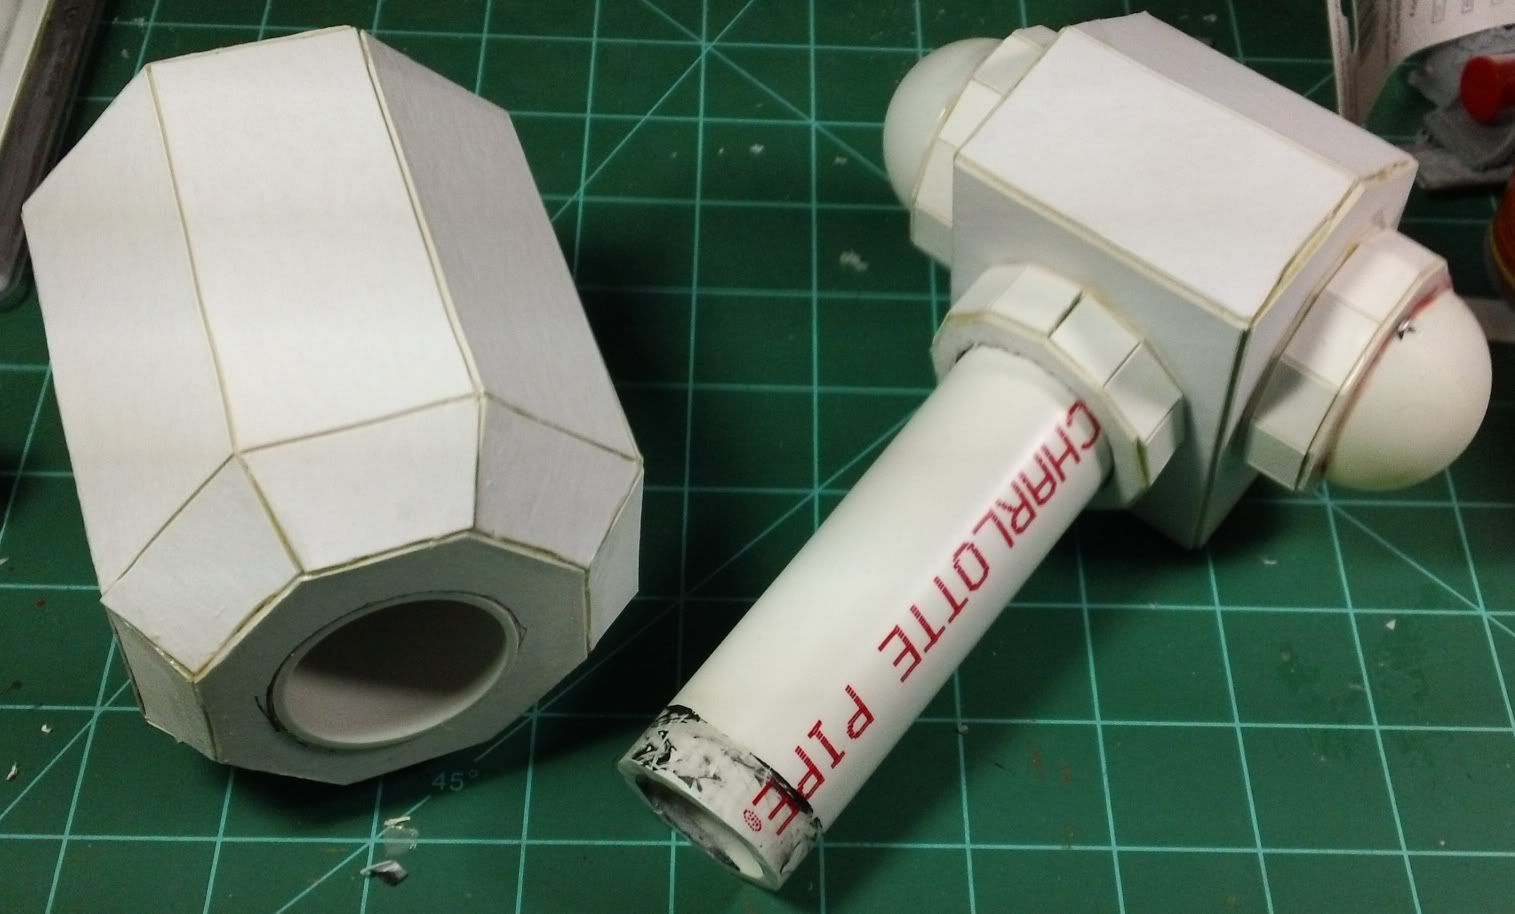
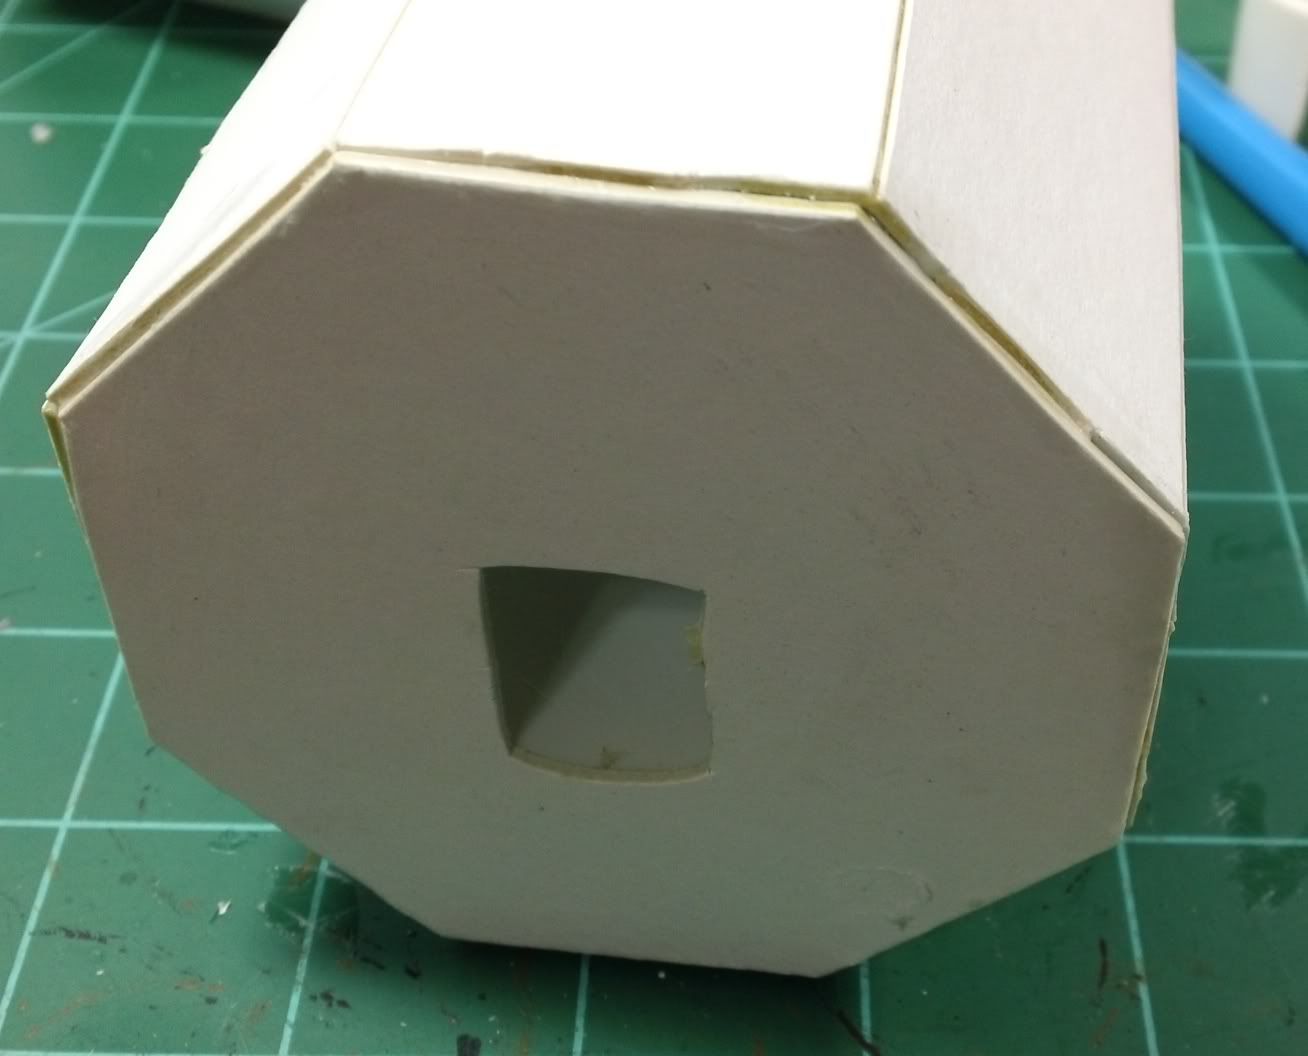
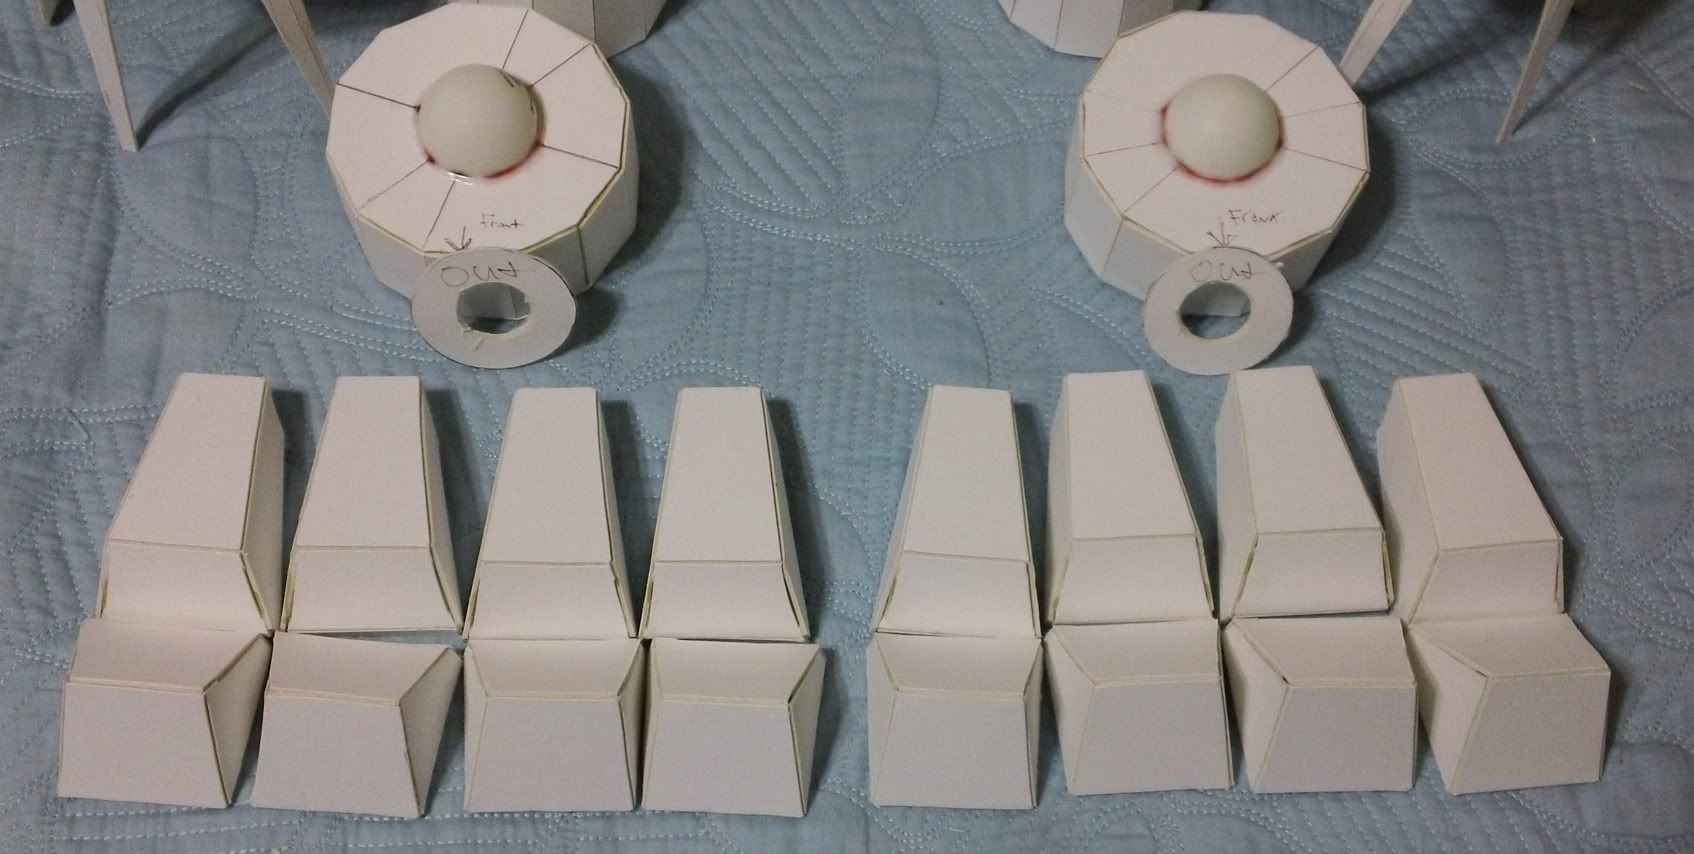
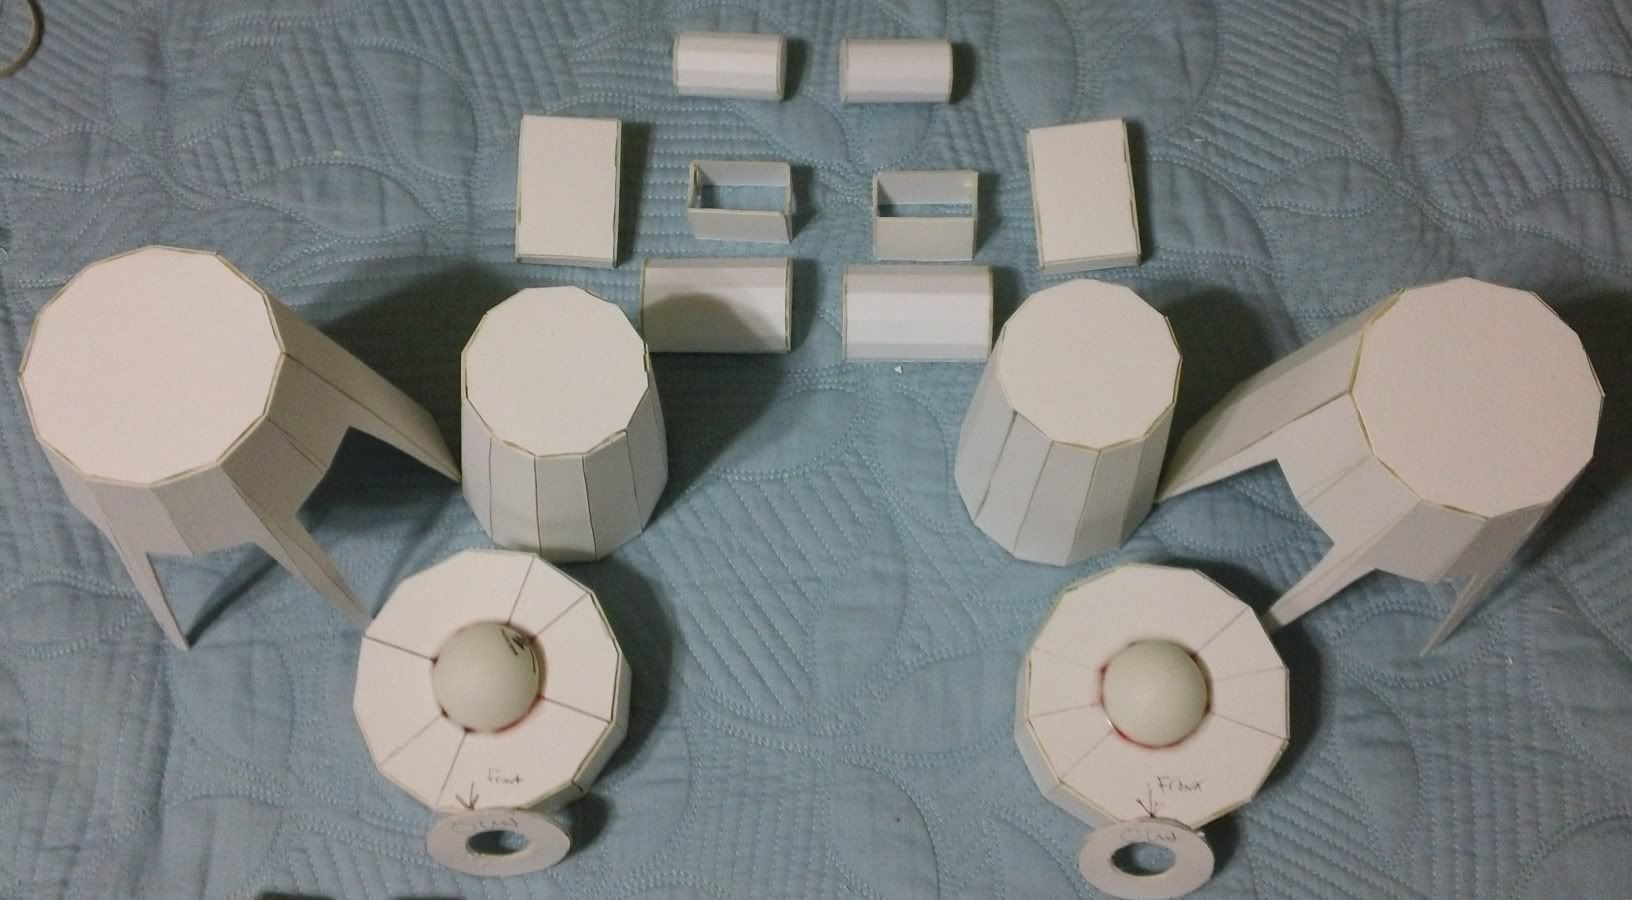
I've had some decent size rare earth magnets left over from another project and by sheer luck, I had just the right amount (after one broke in half). Most of this process will be explained in the following pictures. A couple of bits O'knowledge for reference; the shoulder is a large octagon. The arm bit is intended to be glued straight to the bottom of this octagon. The upper arm is different for guns vs fist. Only the upper arm for guns is shown in the pictures. Ok, lets go!

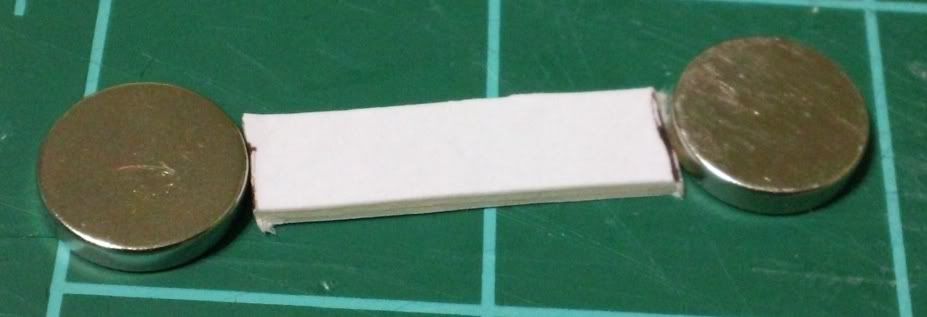
The plan is to put to magnets in each shoulder that will be mirrored in the removable upper arm pieces. After some measuring I found that these magnets can be placed about 1" apart and still fit nicely. I cut some pieces of scrap matte board to 1" to help line up the magnets while they are glued...


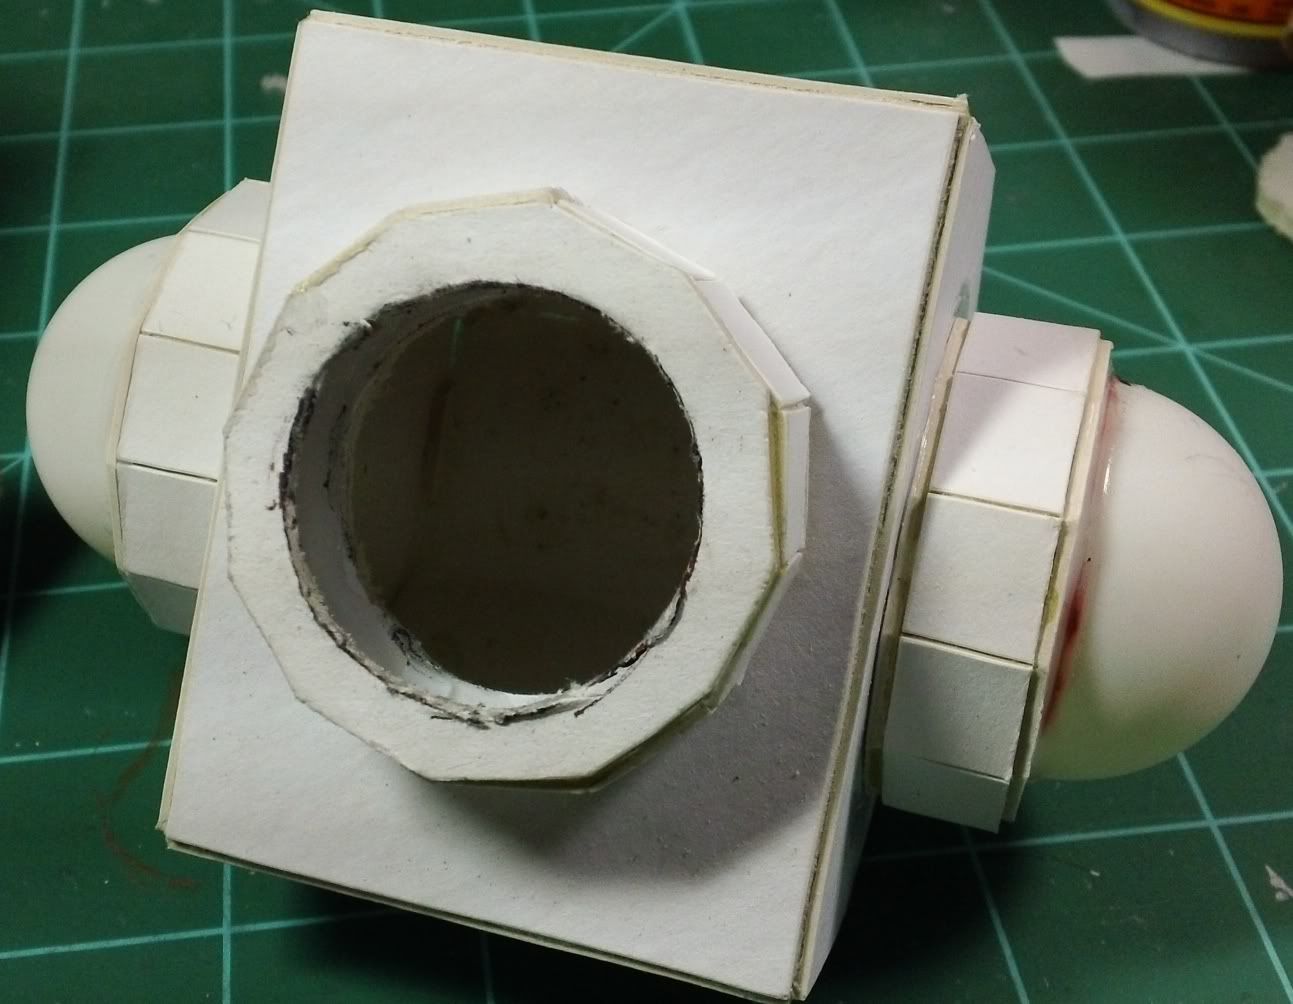
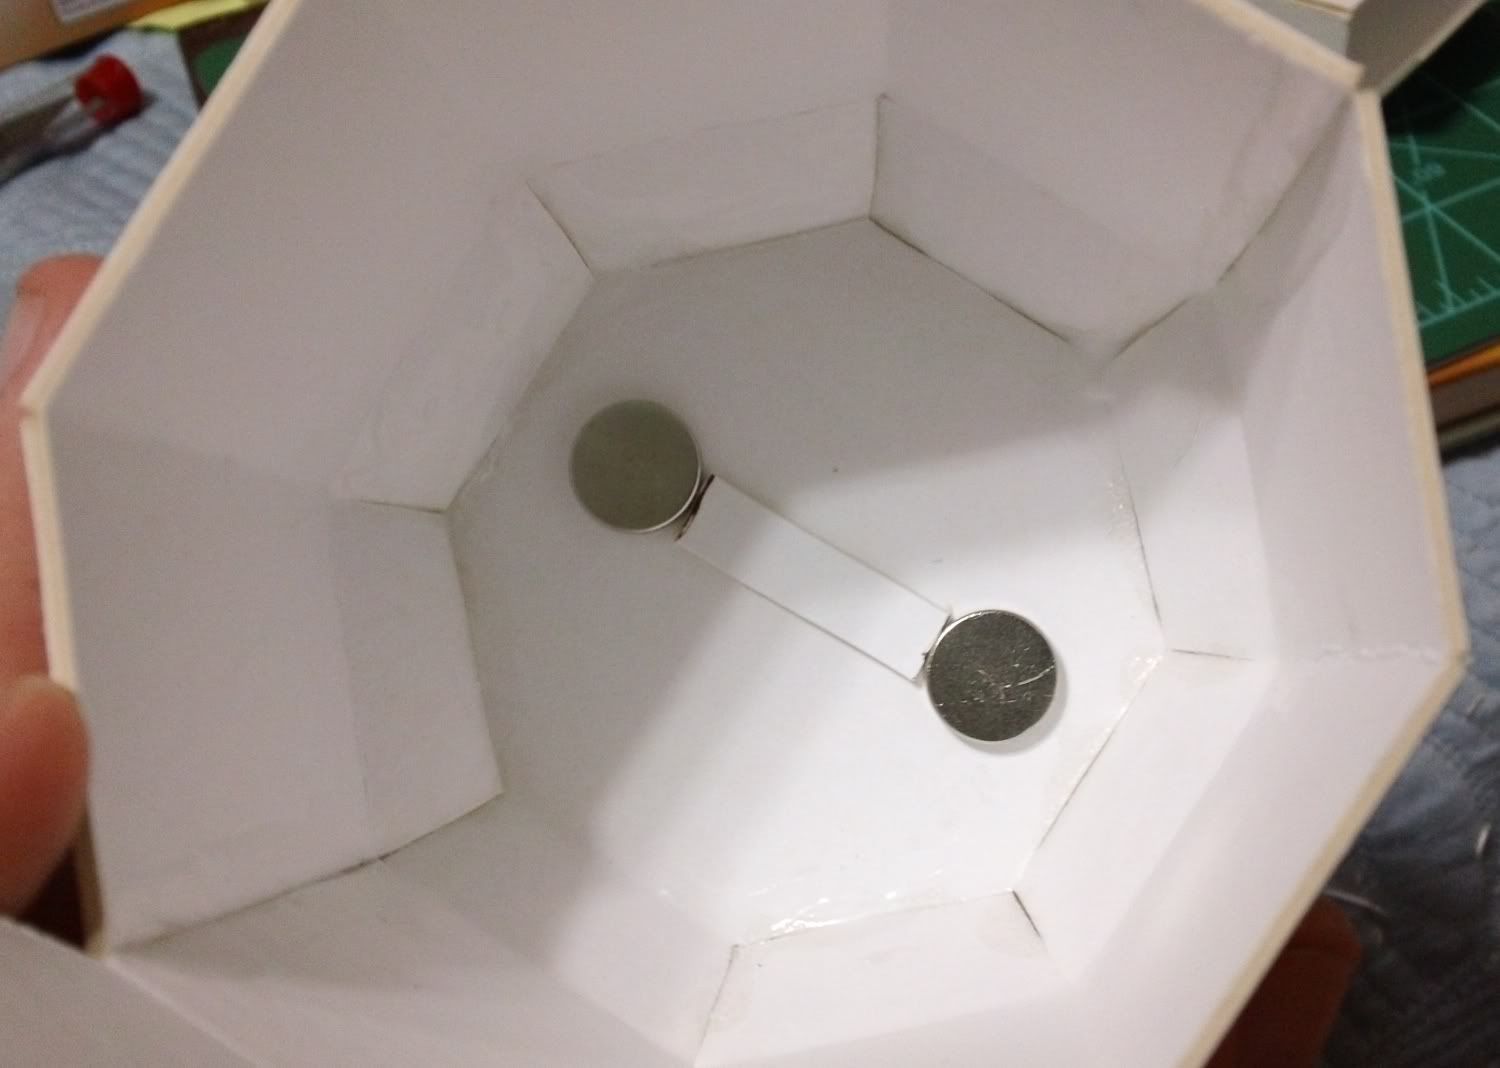
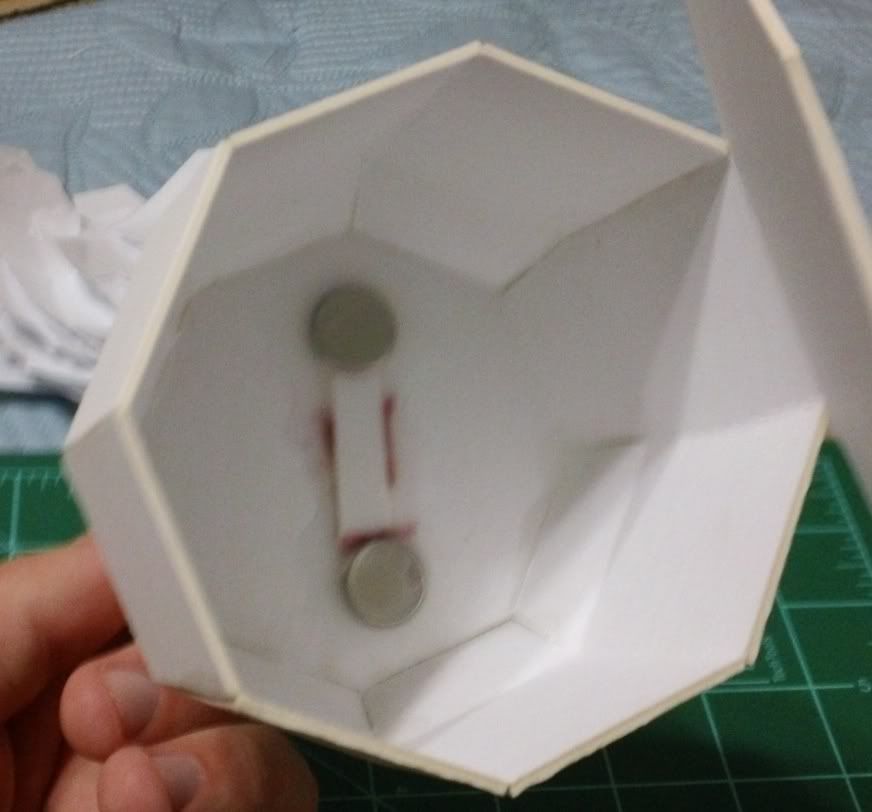
Here are the magnets lined up on the shoulder piece. You may notice they are not lined up with the geometry of the shoulder octagon. This is because I don't want the eventual pose to be arms straight at sides. Hopefully this slight angle will allow the arm to have a slight outward twist. How do I keep the magnets in place? With more magnets on the outside (not pictured)!


The next step is to liberally coat the whole inside of the piece with a mess of glue. I make sure to get a lot in the joins of the inside of the shoulder too, for extra strength...


After a few hours it dries strong and clear...


The great thing about this is, I used this first shoulder to line up the magnets in the upper arm, then used that arm to line up the magnets in the other shoulder, then used a shoulder to line up the magnet in the other upper arm.

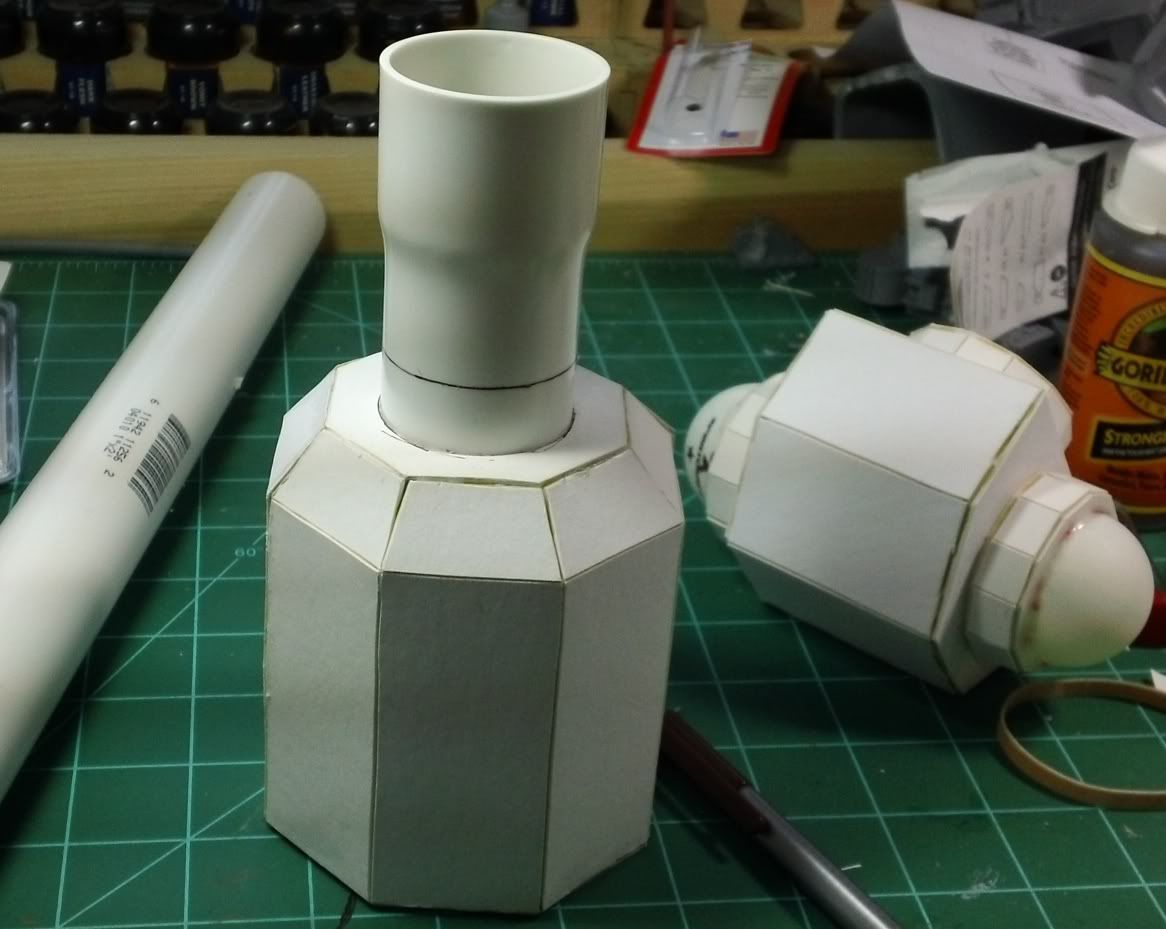
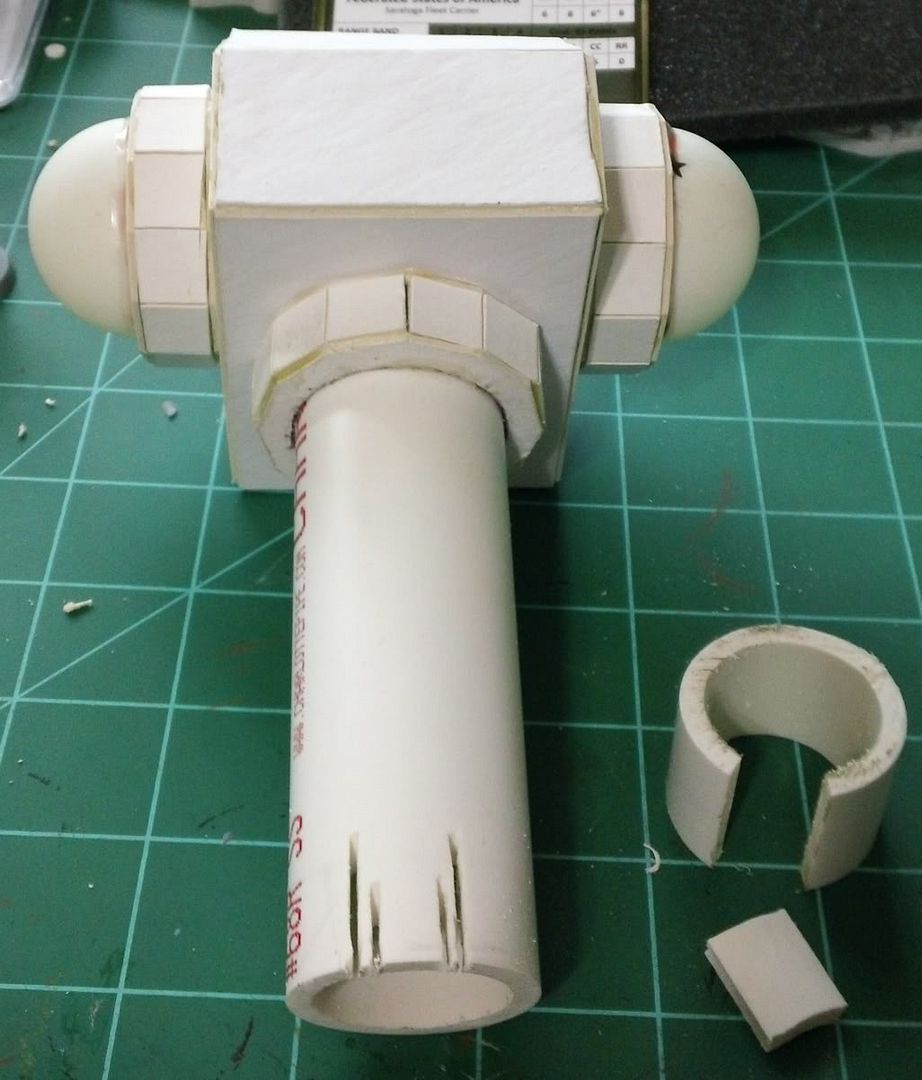
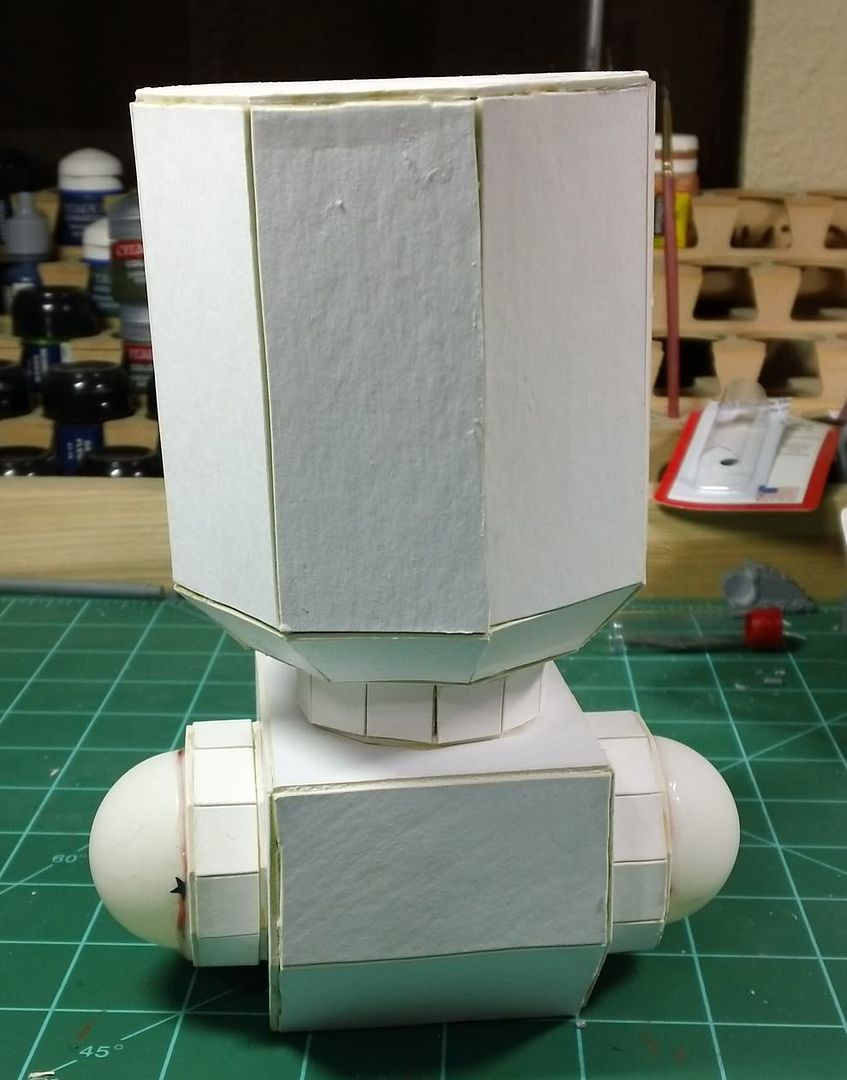
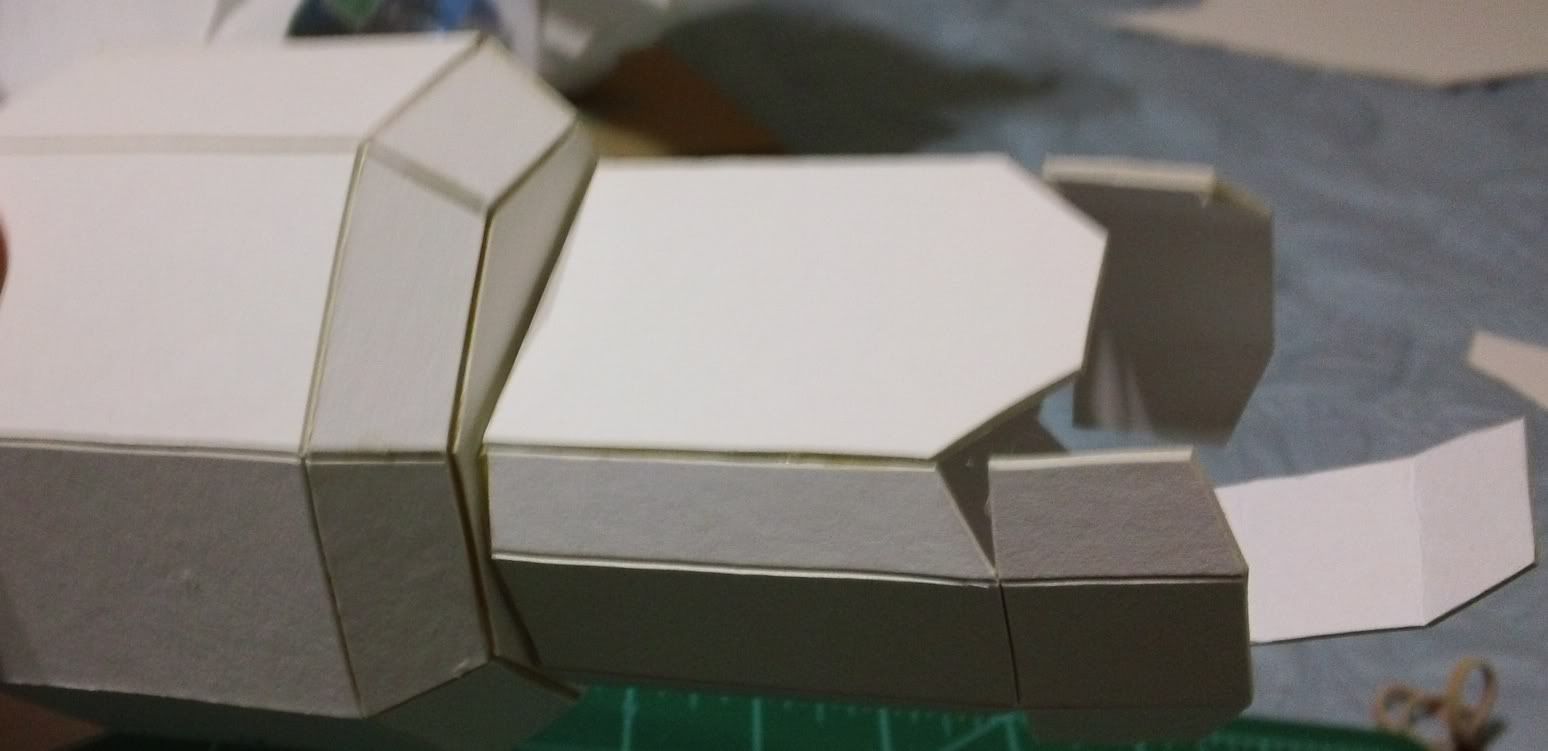
Here is a shot of a shoulder and upper arm magnetized and in position...


One last thing worth mentioning. I had intended to set the magnets so that both in the shoulder were the same polarity up then both magnets in the upper arms have the opposite polarity up. I messed this up on the first shoulder and one magnet is "north" up and the other is "south" up. However, I decided that this was a happy mistake. My plan for arm removal is to twist the arms moving the magnets away from each other laterally. The poles being opposite doesn't change the holding power but does mean that if I twist too far they will repel instead of locking back together with the arm backwards. Does any of that make sense in words?

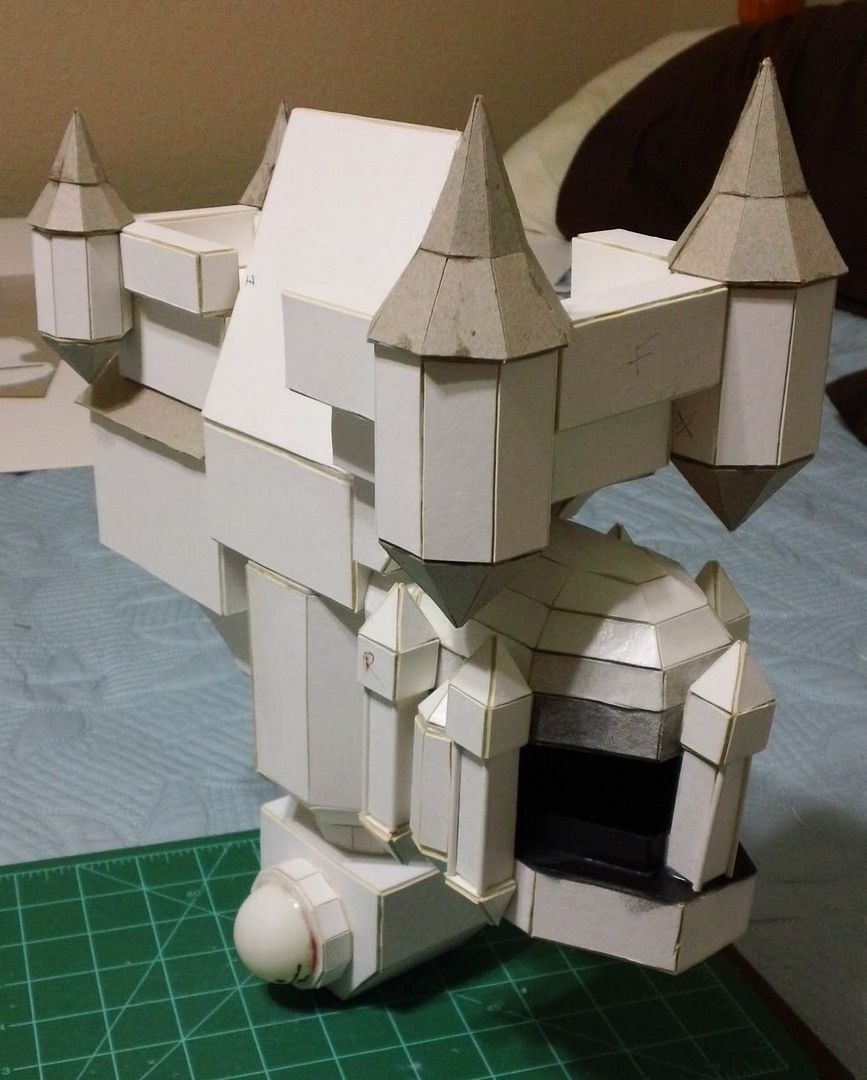
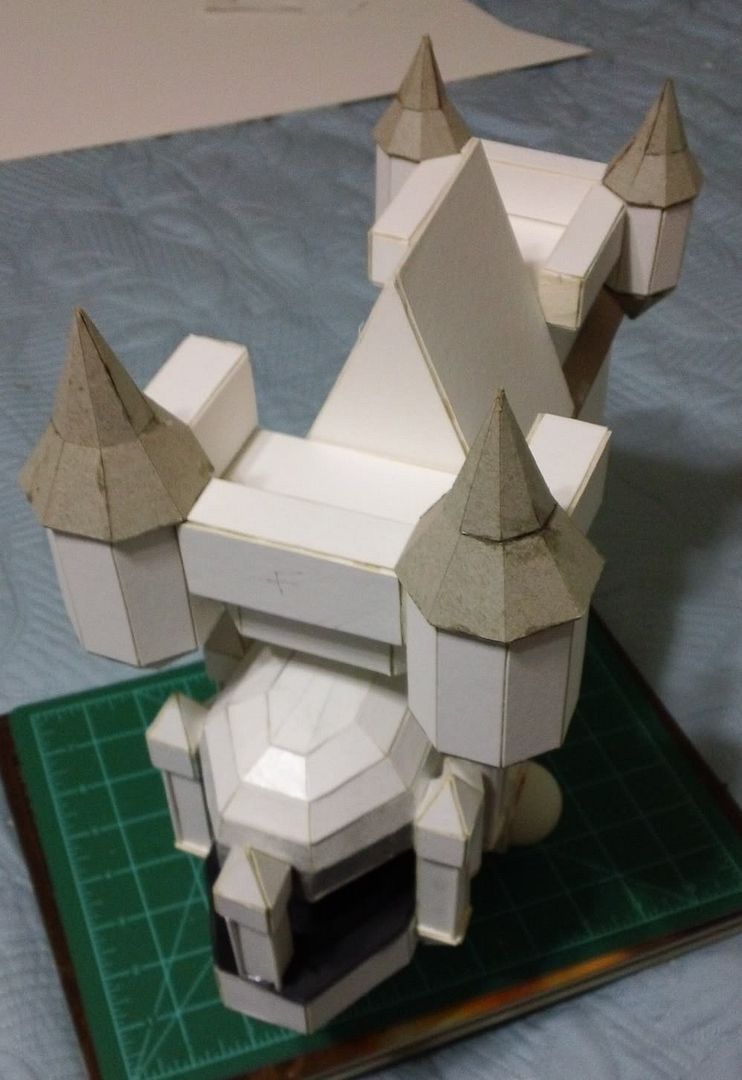
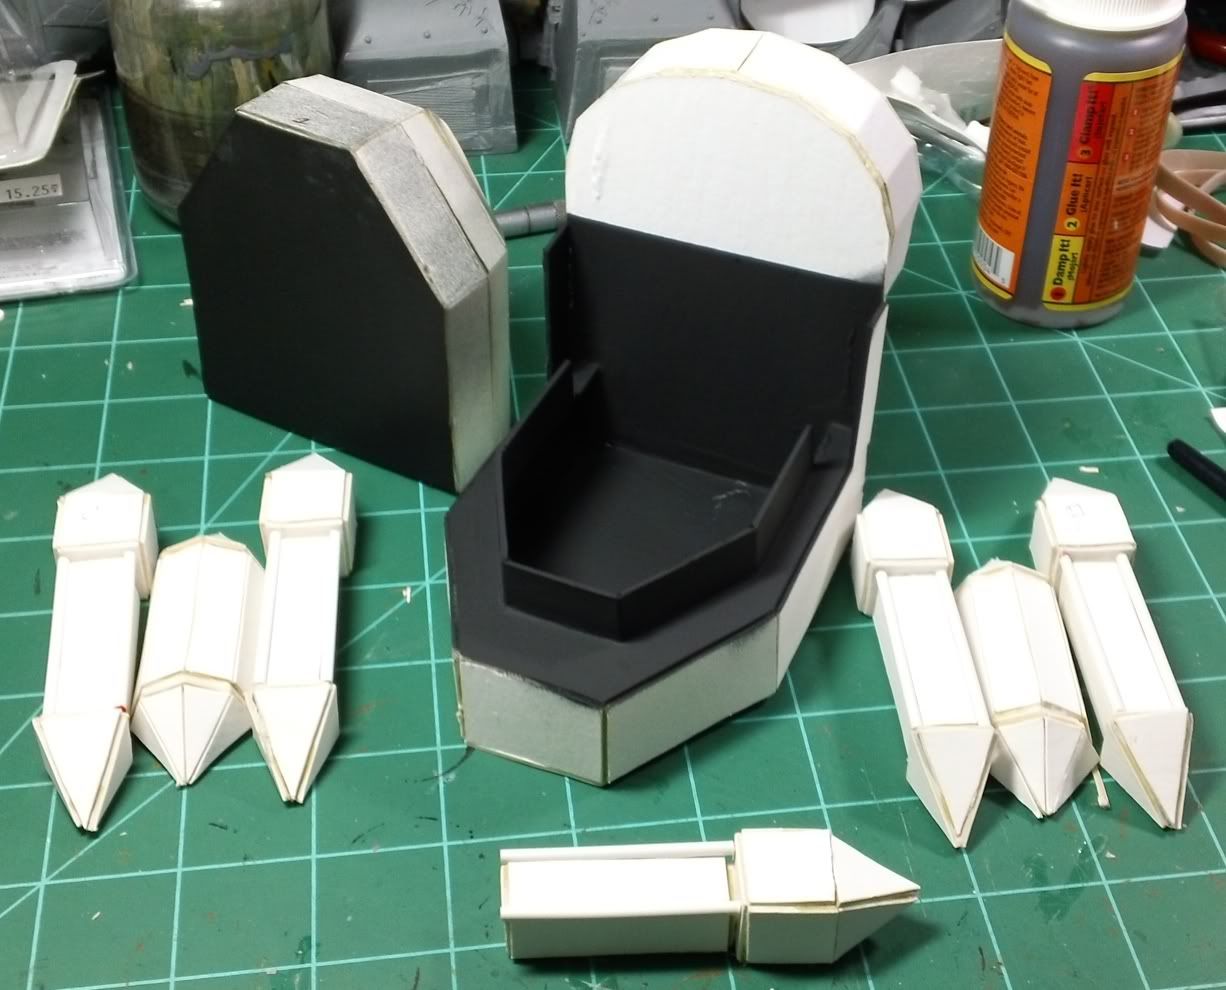
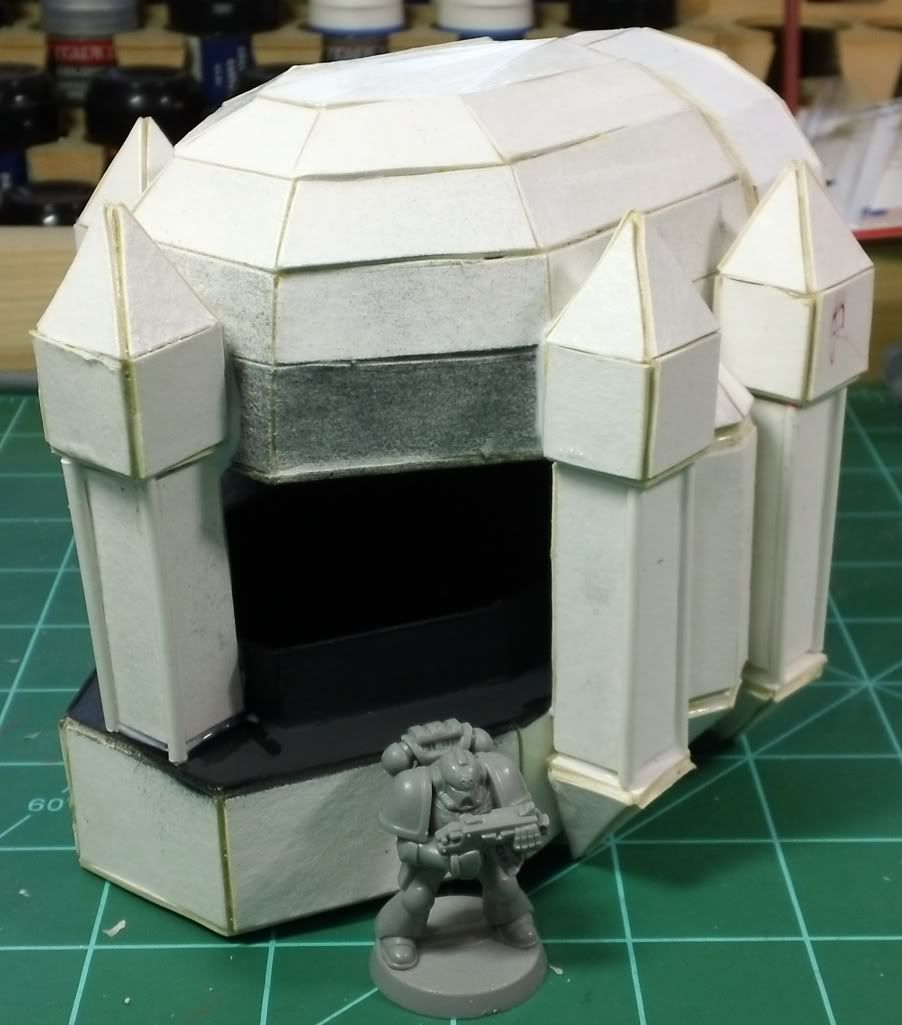
As of now I have the shoulders and upper arms magnetized and assembled. There are several more pieces to do on the shoulders so there will be a proper shoulder update later. I may decide to build an arm first to test the magnet strength... not that I can do much about it if it's too weak. Also, leg assembly has begun, or at least leg sub-assembly. I'll have to post an update on that soon too. It starts to look Titan-y when you start putting legs together!

Thanks for stopping by and feel free to leave a comment, question, or haiku.

Sunday, June 26, 2011

HiTech Miniatures Product Review "Six Nil Six Factor"

This is a quick(ish) product review I did for a miniature from HiTech Miniatures out of Poland. The miniature is their 28mm ArchFather Six Nil Six Factor. The bulk of the review is a video review as I'm still trying to get better at using my camera. It's really not the camera that needs much improvement though, it's me! You can see some detailed pics of the mini on the HiTech website I've linked to above. You all have the Table Top Fix blog to blame for this review. That blog catches just about every mini from every company known to man and shares it with the blogosphere. After the video I'll post some thoughts, some of which aren't included in the video.


Enjoy!


Pros:
Fast shipping from Europe, less than a week!
Quality sculpt
They included metal pins needed to complete mini
The subject is appealing and reasonably original (my opinion)

Cons:
The checkout process on their website is not user friendly
A few more pin holes than I'd like to see for the price

Overall, I'd say that if you see something on the HiTech website you really like, give them a shot. Just understand that you may be filling a couple pin holes when you get the mini. If you have any specific questions, I'd be happy to answer them.

Back to work on the Scratch Build Titan. The shoulders are in the works right now.

Thursday, June 23, 2011

Scratch Built Titan Pt. 5 (That's Church)

Part five of the Scratch Built Titan project brings us to the body of the titan. The body, in this case, being a church. Need help bringing the faith of the Imperium to a backwater planet? Drop a walking church on'em!

There was the printing, the sticking, the cutting, and the pasting. But when it was all done we end up with a collection of parts assembled as shown below...


You may note that there are two pieces in the upper left corner already assembled with a "roof" between them... I got a little ahead of the camera...


The different colored bits you see are made from cereal box material. It's a little thinner and easier to work with than the matte board so it's a great choice for the really fiddly tower bits. After some sub-assembly we end up with a group of three main pieces. The church itself on the top of the body of the titan in the middle of the shot below, the front balcony in the left of the shot, and the rear chapel & balcony on the right...


The above pieces then go together to form the overall structure of the titans body/church. This is not an exact science and much referring to the instructions and a finished example over at Tanks and Trolls was needed before I felt confident enough to glue the pieces together. This step also includes the addition of the head. I'm really not sure it was necessary to add the head at this time, but I went along with the instructions and did so. There is not much in the way of pose-ability with the head, so I don't feel like waiting for the final pose (as I do with man sized minis) would have changed the head's final position. Here are some assorted shots of the titan from the hips up so far...


I'm not sure why I didn't take any shots of the titan from the rear? Maybe the head seemed too pretty? Anyway, that's the progress so far. As I'm building this I'm really tempted to go ahead and assemble the legs. The left to right should balance themselves out reasonably well and I now have pretty much all the front to back assembly done. Which balances itself out nicely as you can see from the shots above, a little front heavy, but only slightly. Details and decoration may change the balance a little, but I can't imagine it will change drastically from where it is now. Besides all that I'm excited to see the legs under this thing!

Please feel free to leave a comment if you like. I'm happy to answer questions, ignore complaints, and hear your thoughts. Thanks for stopping by!

Saturday, June 18, 2011

Scratch Built Titan Pt. 4 (Waist not, transport not)

In the comments of my last blog entry, Mordian 7th of Mordian 7th fame suggested an awesome idea. So awesome in fact, that for the next week he shall be known as Mordian 7th the freaking genius. I've even added a holiday to my Imperial Calendar in the left sidebar in his honor. The suggestion was in regards to a way to make it so that the Scratch Built Titan would be able to be separated at the waist.

The items needed for this bit of the project were picked up at my local DIY store for about $3.50 US. They consist of a piece of pvc pipe and some sort of fitting I found that slips over it nicely. And of course the parts of the titan to be modified...


The first job was to carefully trace the holes that would need to be cut in the titan using the actual pvc pieces as a guide. Then of course, cutting those holes out. This one was a pain as it is two parts glued together, so three layers of matte board to go through...


Next I inserted the female part of this joint into it's titan piece and traced a line around where the cut needs to be for it to be flush. I've raised it up a bit so you can see the line in this pic...


Once that was cut, I placed the male part of the joint inside and traced around the edge where it needed to be cut off. I then subtracted just a bit for good measure and cut it to length. The results can be seen below...


Being extra careful and using Gorilla Glue (hence the extra caution) I glued each piece into its respective titan part...


Then I realized I needed some way to keep the waist from spinning around, which would cause imbalance I theorize. To do this was a little extra work, but I think it was worth it in the end.

I got a spare piece of the pvc pipe I bought and cut a small section out of it...


Then I cut a corresponding section out of the male part attached to the titan piece. You can see the beginning of this in the photo above. I cut vertical lines in the piece over and over until it was easy to snap the thin pieces off and clean it up with a hobby knife. This leaves a bit that will fit like this...


Next I cut an access hole in the top of the body. This will be covered by the Church part of the titan so no worries about the hole...


After roughing up the surfaces to be glued, I put the two titan parts in the position I wanted them to "lock" into. I glued the piece in place with Gorilla Glue using the access hole and a small clamp (sorry I didn't get a pic of that) to hold the piece while it dried. Resulting in a waist that no longer spins!


Here is a finished shot. It's straighter than it looks, but there is some sort of optical illusion going on in this pic...


Remember, this whole idea was sparked by a comment on my last blog. Your fellow bloggers can, and will, often think of things that you never considered. We are our best source of ideas for each other to tap.

Thanks for stopping by. Feel free to leave comments, criticisms, and witticisms in the comments area. Especially if you have any awesome ideas, I love to steal those!

Wednesday, June 15, 2011

Scratch Built Titan Pt. 3 (It takes hard work to get a head)

I've decided to head for the... um... head for the next part of the scratch built titan project. No, not the restroom/water closet, the actual head. Bear with me, the blog gets better though the jokes stay bad.

The head of the BlockHead titan, which is the one I'm working from, is a nice conglomeration of fiddly bits. Once built, the fiddly bits go together to make bigger fiddly bits before finally being assembled into a head of sorts. But on to some pictures, I'll add more wordy bits at the end.

Here is a shot of the sub-assemblies...


Since some areas will be particularly hard to access once assembled, I went ahead and sprayed some black primer on them. I made sure to mask areas that I wasn't ready to have paint on yet...


A little glue and patience and we have a completed head (minus detailing)!


An ancient Space Marine has volunteered for scale showing duty


Some items of note...

1) I've decided that the pieces will never be perfect. While the plans are awesome, they do not take into account the thickness of the material so you will never have perfect pieces.

2) Number one above doesn't really matter. In the big picture with detailing and paint, the imperfections will be less noticeable. I've looked online at a lot of scratch built items and I've noticed that if you look long enough you start to see the little imperfections in them all.

3) Klaus over at DEI GRECI is the exception to rule number two.

4) While not completely necessary, a coat of slightly watered down pva glue (white glue) brushed on seals the surface nicely, hides some surface flaws after priming, and is too easy a step not to do.

5) If you get Gorilla Glue on your skin after it becomes tacky, you must submerge the affected area in warm soapy water or acetone for about five full minutes. No amount of scrubbing will substitute.

Now, for all you folks who actually made it this far, I have one more head conversion to share with you. I present a peek into the Inner Geek's real world. Think of it as a reward... or possibly a punishment. I give you... The Hair Cut...


Here we have a common variety Hairy Geek...


Yes, hide your wives and daughters...


Next we come to the awkward "Mohawk" phase...


The Mrs Geek really digs mohawks...


And finally we come to the full on summer do!


I've never had a shaved head before!


A big thank you to my awesome wife for the haircut!

Why? I guess curiosity overcame vanity?

Comments and pointing and laughing are welcome... as always.

Thursday, June 2, 2011

Scratch Built Titan Pt. 2 (Legs and Hips)

While I've not updated on the scratch built titan, it isn't from lack of work. It is, however, very slow going. That's a lot of matte board to cut and paste! I know it won't look like it, but the update today is actually many (many) hours of work. Let's get on with it, but first a look at a mock up of a shin and toes... basically everything below the knee...


Getting there took a ton of cutting out and building toes though...


Sixteen pieces to make eight toes in total...


Next is a shot of the toes all assembled and the feet with their ping-pong ball joints. The small circles are homemade washers as I could find no one that sells a washer with a 1" inside diameter...


The more middle-y bits, from bottom to top; feet, shin armor, inner shin, lower knee, middle knee, knee cap, and upper knee...


A quick look at the upper leg and hip area. From the bottom up we have; thigh, ping-pong ball hip joint parts, hip to body connector (yes out of order for visibility sake), hips, and body base...


Finally we have a group shot of all the parts up to this point...


There are some parts that have a definite placement and others that can be adjusted to pose/balance. I'll glue the pieces with no adjustability next, but the final leg assembly will probably have to wait till near the end to ensure proper positioning and balance.

Things I've learned so far;

Ping-pong balls come in two sizes 38mm and 40mm. (I used 38mm)
You can cut a ping-ball in half, but it isn't necessarily easy.
Paper can/will dull an exacto blade faster than you ever imagined.
The legs of this model will use more than 6 exacto blades and 5 oz of Tacky Glue.
I'm a ninja at cutting a straight line with a hobby knife. No really, I am.
The legs and hips have used about 1.5 sheets of 32x40" matte board.

That's going to wrap up Pt. 2 of the Scratch Built Titan project. Work continues and is fun enough to keep me chugging away. However, if you want to watch another scratch built project come to life, I'd recommend checking out Admiral Drax's "decidedly blocky 'landing craft'-type assault vehicle". Must be something in the air making folks want to scratchbuild... or something missing from our wallets!

Thanks for stopping by. Comments and witticisms are welcome as always!

Related Posts with Thumbnails