As with any other resin kit from any manufacturer in the world, the MD suffers from its share of warpage. So I thought I'd share my technique for taking the bends out.
I start with boiling a pot of water on the stove. Once it's boiling I back the heat down from a high setting to a medium setting. This should let the water get down to just below a boil temperature-wise. I keep a bowl of cool water on hand as well, to cool the parts down once I get the shape I want. I skipped pictures of that stuff as I'm sure you know what a stove, pot, water, and a bowl look like.
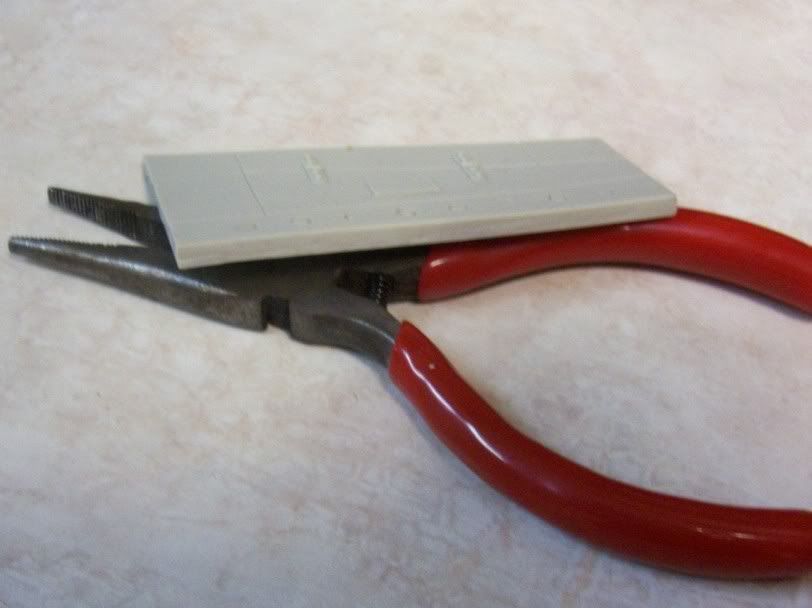
Instead I thought I'd show you the kinds of things I had to straighten out. The thicker pieces, like this Tail Plane, I hold submersed or partially submersed (depending on how much of the part is affected) for about 20-25 seconds.
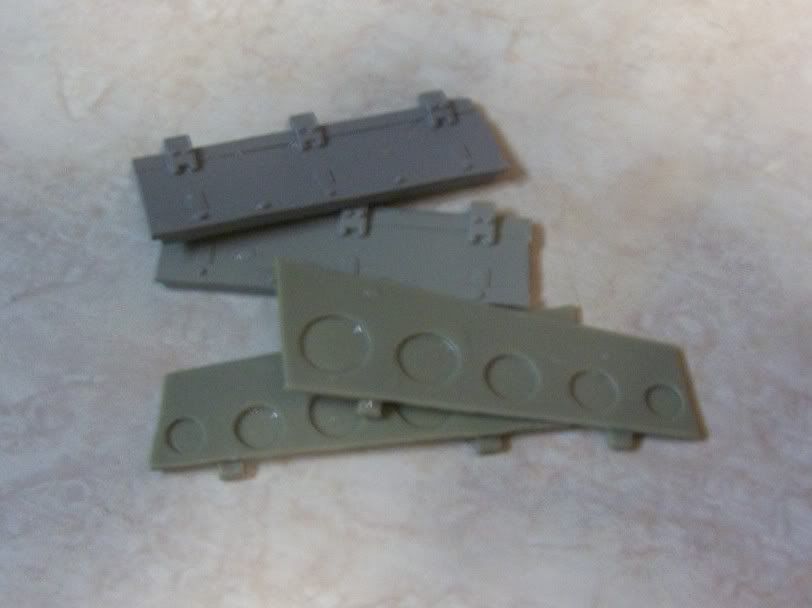
For thinner bits like these Flaps and Bomb Bay Doors 10 seconds or less should do.
For even thinner bits, you have to be careful and probably use a 5 second or shorter dip in the hot water...

For the thinnest of parts, like the Canopy Frame, I literally just dip and remove. This still gets the parts as soft as a wet noodle so extra care must be taken with parts this thin.

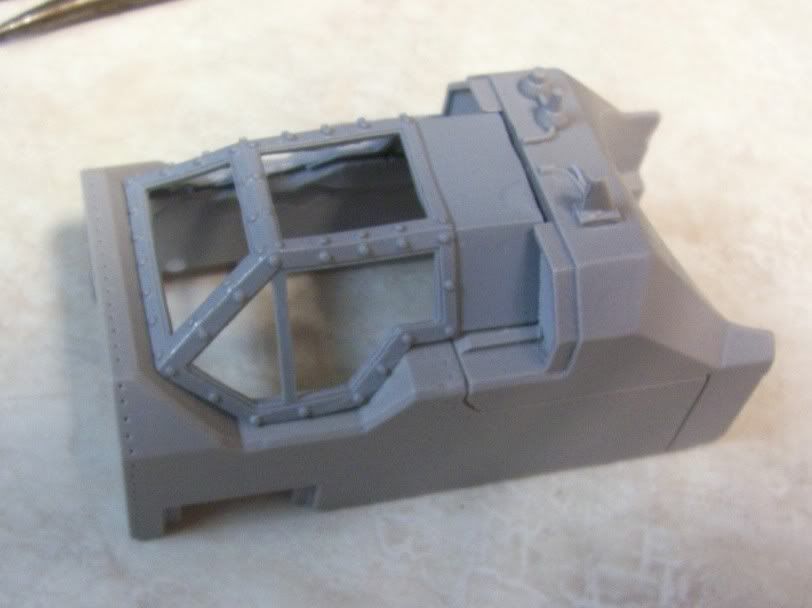
Whenever possible, it's also a good idea to have the piece that the part will mate up with on hand. This insures you get the shape you really need. In this case I put the part in it's position over the cockpit to make sure it fit correctly.
These are not all the parts I had to straighten out a bit, just examples of different types and sizes of parts. With this stage out of the way it will be some priming and painting and some parts assembly next.
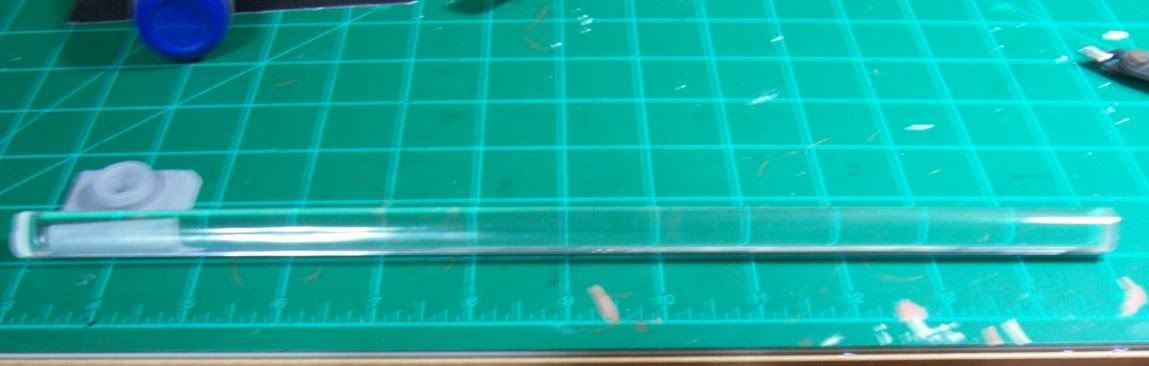
For the product review, I'd like to share with you my experience in finding a suitable mount to fly this bird when it's complete. I found acrylic rods for sale over at Dragon Forge Design. The site lists a six inch acrylic rod with a resin bit to assist in mounting the rod to the flyer of your choice. The product page can be seen here. I knew I wanted my Marauder to fly a little higher than 6 inches, in fact 12 inches is more what I wanted. I emailed Jeff at Dragon Forge Design and he was able to custom cut me a 12" acrylic rod with no problems. Not knowing much about acrylic rods and such I was a little worried that the weight of the Marauder might be a little much for a 1/2" diamter rod. Nothing could be further from the truth. I think you could just about put an actual airplane on this rod and not bend it.
I would definitely recommend Dragon Forge Design for anyone looking for a way to raise up their flyer model. He also carries a large assortment of custom bases and such. In my opinion the products are priced reasonably and the customer service is excellent!