I figured magnetizing the struts and such to the plane would be easy enough. The problem was magnetizing the flat pad at the bottom of the gear in a way so that it could attach to either the bottom of the struts, or the bottom of the plane with struts set aside. Then it occurred to me that the pads are only detailed on the upper side. When the gear is up you see only the flat bottom, easy to replicate with plastic card. More on this towards the end. First, here's how I got my landing gear struts and plane magnets to line up.
First I drilled a hole almost deep enough to set two magnets on top of each other into.

It is important that the top magnet is slightly out of the hole as can almost be seen here...

I placed a small drop (very small) of super glue on the top magnet surface and then held the gear strut assembly in place firmly.

This attaches the top magnet to the strut assembly in the just the perfect spot. Next I went back and drilled the hole a little deeper so that two magnets would sit in the hole without sticking out. They are quite flush with the planes surface. I placed a second magnet on the one that is now glued to the strut assembly. Put a little glue into the hole in the plane and used the magnet and strut to push the second magnet into the plane body. This assures that the magnets are polarized correctly, though if you're careful you could just as easily push the magnet into the plane with your finger or other non metallic tool.
Now with the strut assembly magnetized, I added a brass rod pin to help against twisting forces. There were two small rivets on the back side of the struts, I simply shaved one off and drilled through where it once was. Leaving the brass rod sticking up out of the whole replaces the rivet. The rod is larger than the diameter of the old rivet, but I think it looks fine. They might have used a larger rivet in order to make it more secure in 40k pretend land anyway!

I mentioned earlier about the pads on the gear being fabricated. I just laid out an existing pad and traced around it to get the general shape. Then, cut it out and trimmed it to exact size. There is a slant at one end and this was added by scoring the plastic and bending it carefully.
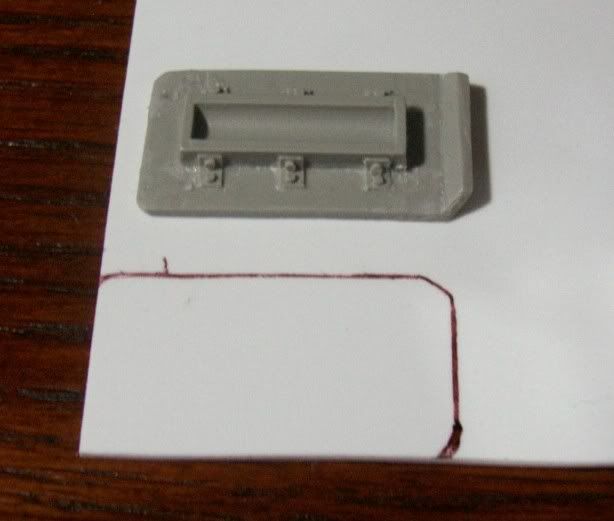
The original...

And the copy...


(Since you never see the underside of the 'up' landing gear, it doesn't matter much how it looks!)
And a shot of the whole bunch happily magnetized together...

I know this was a lot of post for just a bunch of landing gear. I wanted to share the way I did it in hopes of inspiring others. Even if they're only inspired to tell me their favorite way to magnetize flat surfaces together!