Saturday, January 29, 2011

IG Using New Ungors Prototype Finished

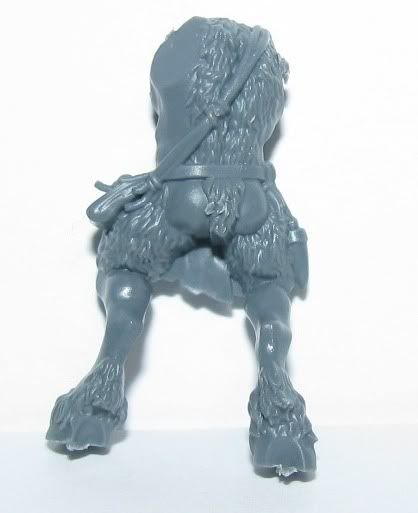
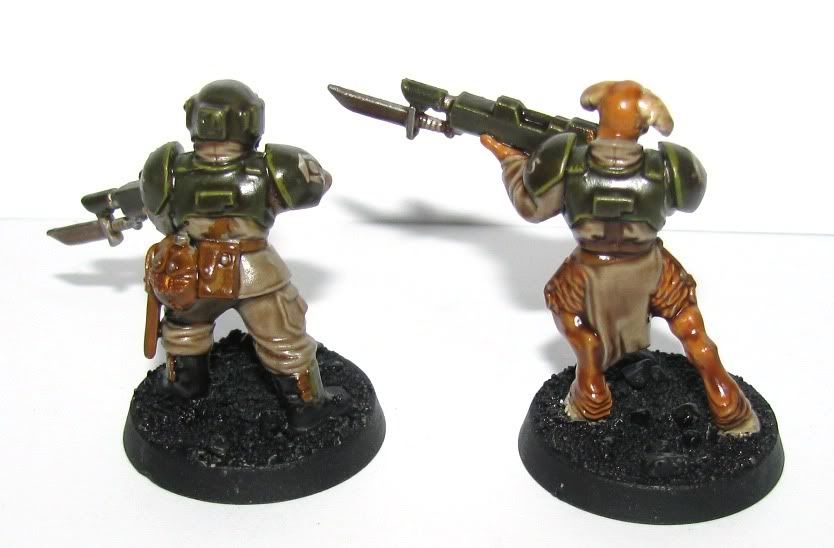
Last week I spoke a bit about the new Ungors and their naked butts. More importantly, I asked the question will they convert to beastman guardsmen as well as the old Ungors models did. This week I'd like to share the results... and another gratuitous butt-shot of the new Ungor models.

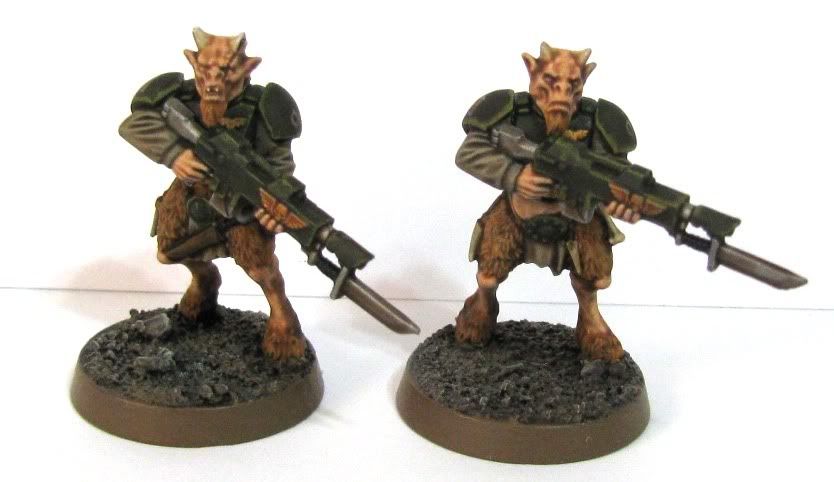
First a group shot to see how they fit in with the old Ungors (I encourage you to click for a larger view)...


I think they would blend in well enough if you have a quite a few models on the table though you can tell they are more closely related to each other than to the rest of the herd.


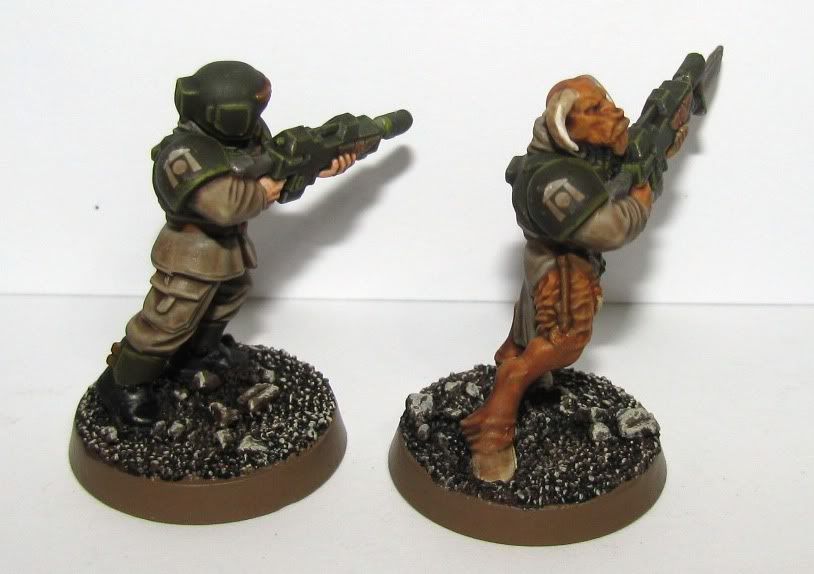
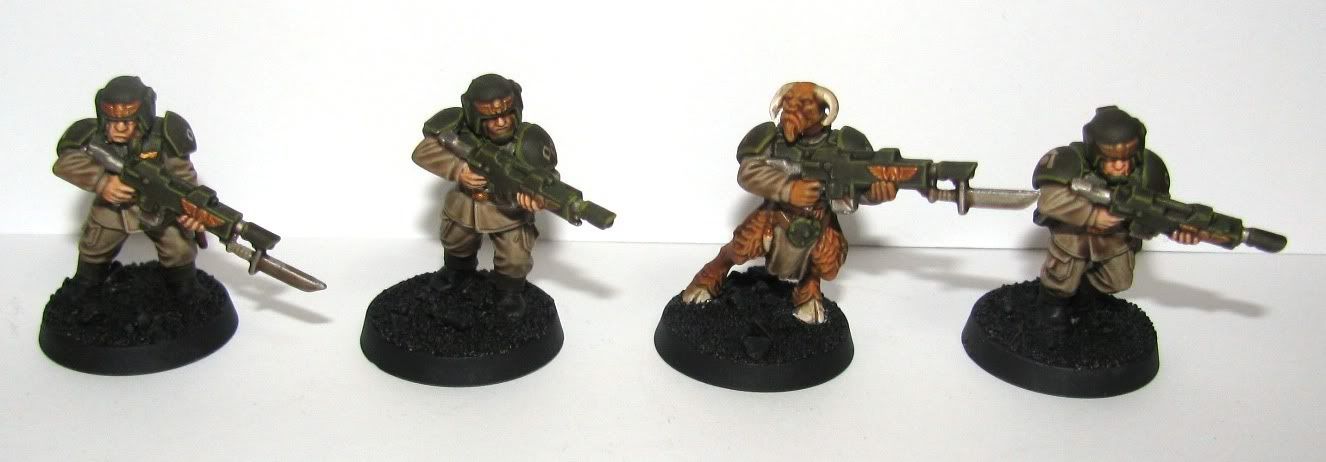
And as for the new Ungors converted, here are a couple shots of them. First the front.


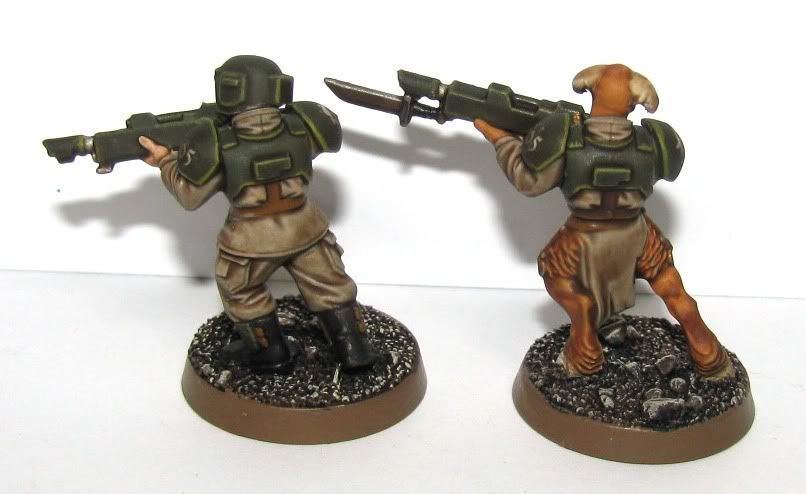
Finally, the sans-pants shot of the rear...


First off, my opinions (you are welcome to share your in comments). I didn't have high hopes for these guys at first glance out of the box. However, since then they've really began to grow on me. Of course, so will mold if you stand still too long. I think that the old Ungors were more of an animal that walked upright. The new Ungors seem more like a beast-man to me. This is also true of them when not converted and used as actual Ungors in Fantasy Battle. Since they are more man-like, I chose to paint them in the general theme of the GW painted ones. They have human flesh colored skin where there is no fur, and a darker color for the fur. Once again, I think this makes them look more like beastmen than upright animals. Another thing to note is that these can be bought by themselves in a box. The old Ungors were the minority in a box full of Gors. Not so much left over bits with the new Ungors. All in all, I think I like them just as much or maybe even more than the old Ungors I converted to guardsmen.

So what do you think? Old or new, which is better? Feel free to leave a comment and let me know what you think!

Sunday, January 23, 2011

Ungor Booty Call... WTF?

I just wanted to share a quick observation with you guys...

As you may have noticed, I like to do conversion and I have a soft spot in my heart for that rare creature, the 40K Imperial Beastman. I've used some Ungors from the old box to do some of these conversions and I think they have come out pretty nice.


But, those Ungor models are no longer made. There are new models for the Ungor that came out with the WHFB most recent Beastman Army Book. This could turn out to be a good thing, as you used to have to buy a box of combined Gors and Ungors to get just the Ungors, and you got more Gors than Ungors for your trouble. Now, you can buy a box of just Ungors... better right? That remains to be seen. I recently picked up a box of the newer style Ungors to see what kind of converting I could do to them. I was pleasantly surprised to see that they are not covered in Chaos symbols I'd have to shave off, nice start!


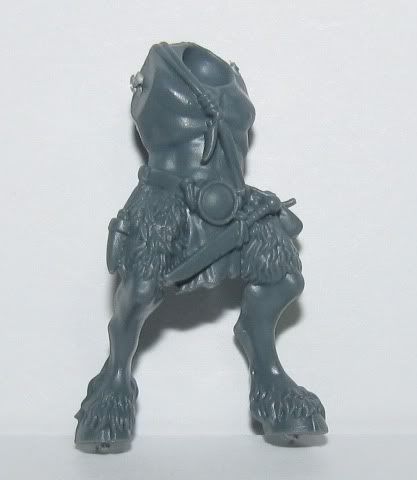
Then I turned the sprue over. I was dumbstruck. I think there is a reason you never see a rear shot of these models on the box, website, or anywhere else. But, I'll let you in on their dirty secret...


Yes, just like all cartoon bears, they have no pants on. That's right, bare, beastie, buns for all the world to see!

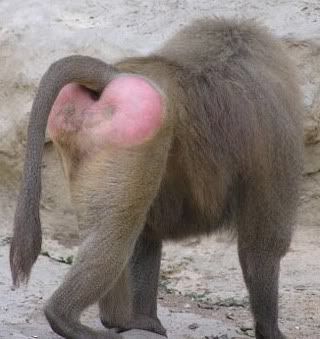
I haven't honestly decided how I feel about this yet. I guess there is something fittingly feral about running around with your (literal) tail hanging out. I will reserve judgment until I've had a chance to convert one or two and paint them up. Besides, I think they'd be the only bare bottoms on the average 40K game table. They might even make for a decent distraction technique? Maybe it won't be that bad? I've already found some reference material to work off of!


Thanks for stopping by. I'll keep you all posted on how these conversions turn out, until then, keep your pants on!

Sunday, January 16, 2011

New IG Go For A Dip

Quite some time ago I bought a can of the Army Painter Quickshade product, Strong Tone. My original intent was to paint a lot of skeletons for an Undead WHFB army. I dipped a few test skellies and they turned out really good. However, that army fell to the wayside and was eventually traded away on the Barter Bucket over at Santa Cruz Warhammer. Since I've been wanting to work on some Imperial Guard I was cruising the interwebs and found someone mentioning that they used Quickshade on their IG. So I figured since I already have the stuff, why not give it a shot? What follows here are my steps on some test minis and the results. One other note. I've been trying to get better at taking pictures as I work, so this post is pic heavy. And, as always, you can click any picture for a larger view.

As seen in my previous post, I have been trying out some new paint from Krylon in their camouflage line. So these guys were painted first in that product for a base coat of khaki.


Then I put some Catachan green on the armor and guns. Two light coats is quick work over the khaki color...


Chainmail for the gun parts, blades, and other metal bits. Shining Gold for the Aquilas, belt buckles, and a couple of details on the beastman.


High Elf Flesh for the Guardsmen flesh and Vomit Brown for the beastman flesh & fur with Bleached bone for his horns & hooves. I also painted the belts, accessories and any other leathery bits with Snakebite Leather...


While it's hard to see, I did do some very basics highlights. I edged the armor and guns with Camo Green and highlighted the khaki just a bit with actual Kommando Khaki, which is very slightly lighter than the Krylon spray. So much so, that I'm not sure the highlight really did anything. I also hit the beastman's horns and hooves with a little Skull White...


I'm terrible about squad markings and things like that. So I figured I'd use the IG decal sheet to cheat my way out of some freehand painting. I brush on 'Ardcoat first, then apply the decals using some Model Master Decal Solvent. After they are good and dry, I put another layer of 'Ardcoat on, just to make sure they are sealed down and hide any decal edges. I hit them with Testors DullCote to take the shine off before continuing...
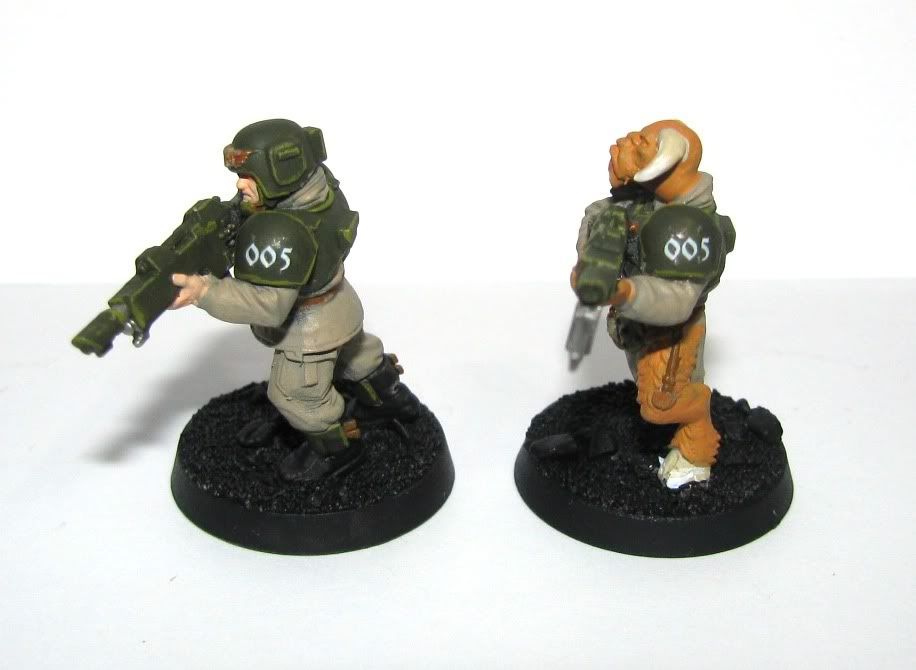
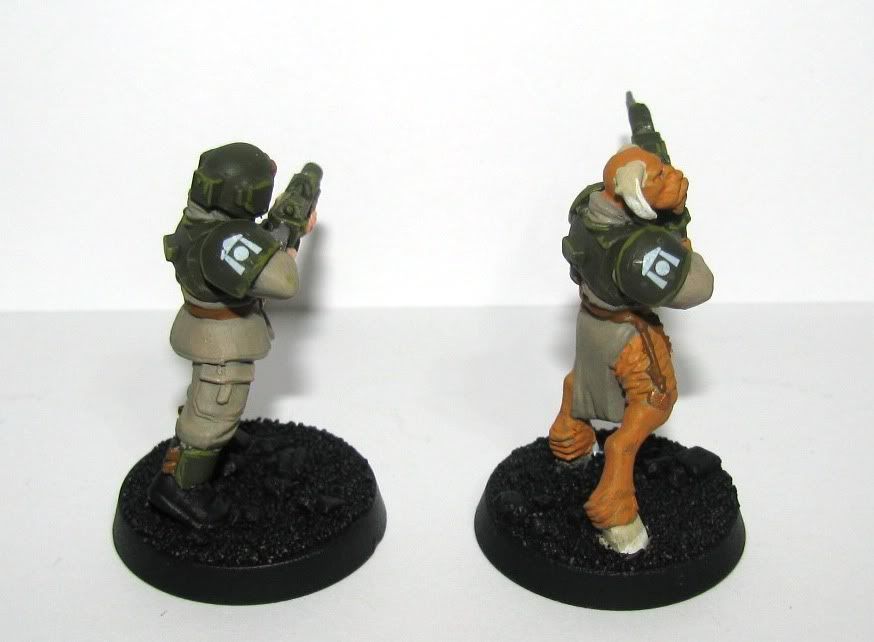


Next up is the dip. After reading lots of reviews and how-to's online, I decided that actually dipping the minis was not my best bet. So I used an old brush and slopped it on them manually. One thing I read that does seem to help is to hold the mini upside down while doing this. It really does help. As you can see below, they come out very shiny.
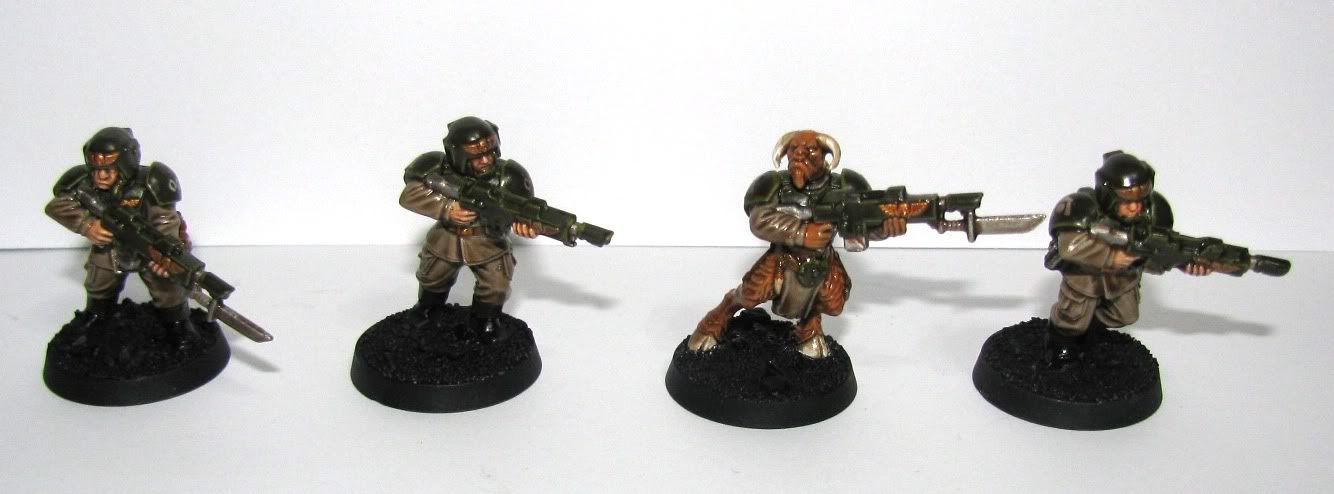
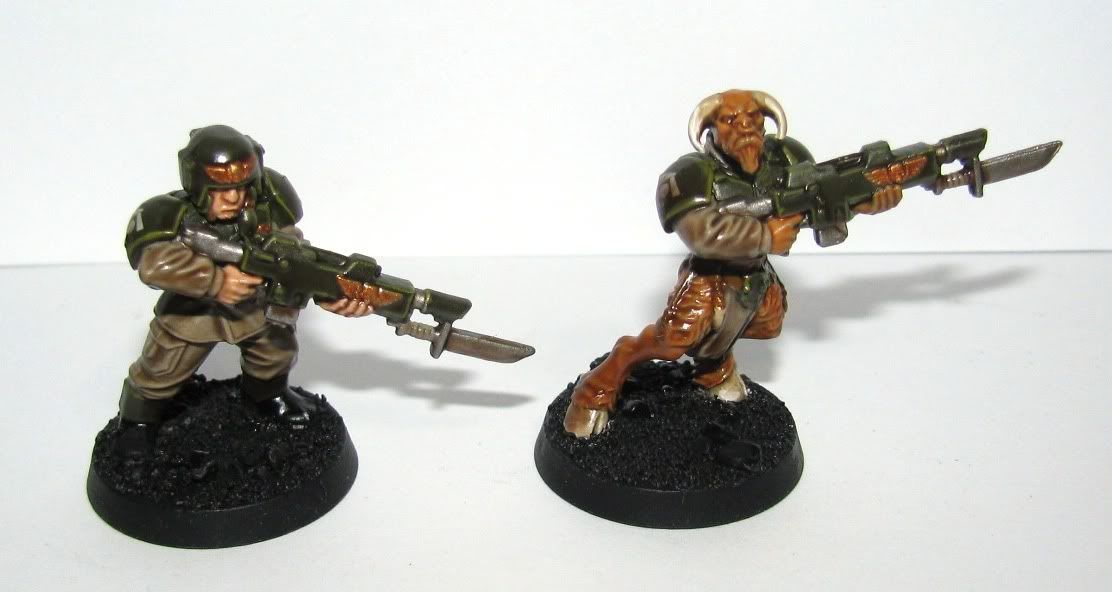


After a 24 hour dry time, the DullCote really makes them look better!


Some work on the bases and these guys are done.


I'm not sure what happened with the bases. They don't look like my bases usually do? They might get a redo eventually. And oh crap! That beastmen has a nose ring. As you can see the Quickshade will not hide my glaring base coat faux pas, but it does shade a mini nicely.

I know some folks hate the dip, and say it's not the quality result that you get from hand painting. But I can say it makes these guys look better than the ones I hand paint and in a fraction of the time. So while I won't use it for everything, my Guard is definitely getting the Quickshade treatment.

Comments and critiques are welcome as always, I only ask that you work a wild African animal name into your comment somewhere. Something you've seen on safari perhaps...

Monday, January 10, 2011

Ah that new paint smell... Camouflage Spray Review

I could have wrote a whole blog about how ideas and what you like changes over time. And that would explain some of the direction this posts starts my hobby off in, but instead I'll give you a short synopsis before the actual blog.

I always wanted a gray, urban camo style guard army. Always. Since Rogue Trader. None of that silly army looking paint scheme for me. Then for a long while I wanted a guard army with black armor and red fatigues. Green and khaki was for sell outs with no imagination! Well, I've sold out. I've been painting outside my comfort zone, color-wise, while working my project with Admiral Drax. It turns out that traditional Guard colors are pretty nice when you get right down to it. They just look right.

So I started looking around on the interwebs and found something interesting. Some folks have been using Krylon paints to prime their minis. This is not too much of a shock (compared to GW Primer sticker shock anyway). But I found out that Krylon makes a line of paints for camouflage applications. So after being fooled by their corporate website into believing that Home Depot or Autozone carry their product, I finally found some at Ace Hardware. In all fairness, Wal-Mart does carry Krylon, but the one near me did not have the camo colors.

I picked up a couple of cans, one of khaki and one of a 'jungle green' sort of color. I have to say that I'm impressed. The paint went on smooth and coated well.

Here is a shot of some guard that had been painted, (in some cases twice) already.


If you click and view the larger image you may notice some "grainy-ness". That is my camera and post processing. The actual minis are smooth as butter.

The product claims to be ultra flat. I've put some paint on these since taking that picture and I will say that it goes on fine despite the fact that this is not, technically speaking, primer.

That worked well, so I grabbed a tank that has been in need of some love for a while and went to town on that too. I sprayed it with the khaki then taped off some pattern and hit it with the green color. The green is a little lighter than I would prefer, but it will darken up a bit when I paint the tank...


All in all I'd say, if you aren't using this paint for base coating, you're stupid. Ok, maybe that's a little extreme. But, it does seem to be really good paint so far. You can google around for other reviews by folks much more eloquent than I. You can also have a look at the product webpage. But I think if you have an army that could benefit from one of the available colors, you should consider giving it a shot!

I'll share the progress on the four guard and the tank. I might even sneak in another totally over reviewed product in the project!

Saturday, January 1, 2011

Painting Across The Pond - Geek Edition Pt I

Greetings and Happy New Year! Now that's out of the way...

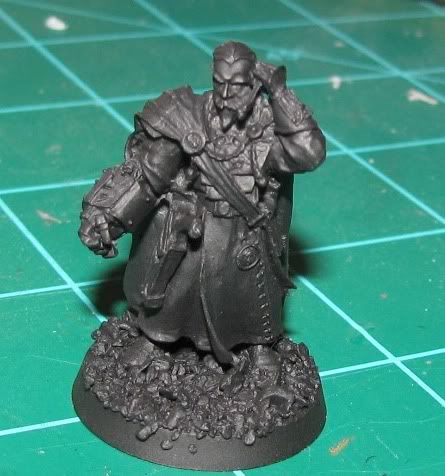
Some time back one of my favorite bloggers, and I dare say friend, Admiral Drax (who lives across the pond) offered up a prize for best suggestions of name for a vehicle he was working on. He would paint a mini of the winners choice for them. I was lucky enough to be one of those suggestions and thought I'd be a pain by taking him up on the offer. Then after thinking about it, I began to feel that he was the one getting to have all the fun! So I suggested we do an exchange of minis and paint one for each other. So, without telling each other what we were sending, the mini's were shipped out. My mini took about one week to reach him, his took exactly one month to reach me... go US Postal service! Remember, it's only a race if I'm winning.

Opening the package was pretty exciting, I do love a good surprise! This is who I found inside...


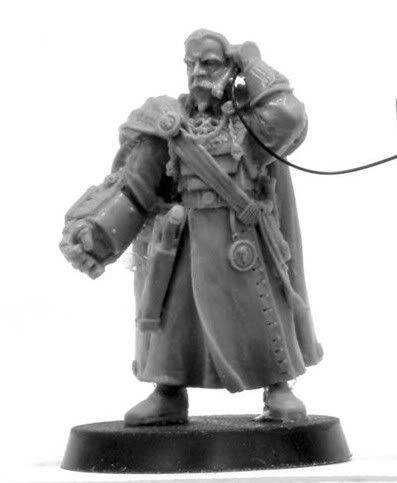
Or for a easier to view picture taken from what I'm sure is a better camera than mine...


Drax is very brave to let me paint such a nice figure. And he's given me free reign to paint him as I see fit. Unfortunately I can't recall any guard units who wear primarily pink, so I'll have to dress him some more traditional hues. Seriously though, this is an awesome mini and it's going to be a blast to paint. Of course, I'm not one to leave well enough alone, so there will be more to this project that just a bit of paint. But Drax doesn't know anything about that, so we'll hold on to that secret till it's ready to be shown.

Thanks for stopping by and I hope you'll go check out the Drax Edition Pt I of this collaborative post. Pt II will be some painting WIP and maybe a sneak peak the as yet unknown facet of this project. Feel free to drop a comment, otherwise I'll wonder ceaselessly as to what you internet people are thinking.

Related Posts with Thumbnails